![Defelsko PosiTector 6000 Coating Thickness Gauge Chinese Version Instructions [2023 New Version] with Figure 1](http://img.nbchao.com/upload/editor/image/20230717/1689589079371094240.jpg)
On-Gage Help
![Defelsko PosiTector 6000 Coating Thickness Gauge Chinese Version Instructions [2023 New Version] with Figure 2](http://img.nbchao.com/upload/editor/image/20230717/1689581967561056310.png)
This instruction manual outlines the basic functions of the Thickness Gauge. Many menu items include gage help functions (indicated by icons) with additional information ![Defelsko PosiTector 6000 Coating Thickness Gauge Chinese Version Instructions [2023 New Version] with Figure 3](http://img.nbchao.com/upload/editor/image/20230717/1689582041444082184.png) . Press
. Press ![Defelsko PosiTector 6000 Coating Thickness Gauge Chinese Version Instructions [2023 New Version] with Figure 4](https://img.nbchao.com/js/plugins/ueditor/themes/default/images/spacer.gif)
![Defelsko PosiTector 6000 Coating Thickness Gauge Chinese Version Instructions [2023 New Version] with Figure 5](http://img.nbchao.com/upload/editor/image/20230717/1689582129275081898.png) or touch
or touch ![Defelsko PosiTector 6000 Coating Thickness Gauge Chinese Version Instructions [2023 New Version] with Figure 6](http://img.nbchao.com/upload/editor/image/20230717/1689582149221054621.png) the icon to display help. A formatted PDF containing all thickness gage help items is available on the website.
the icon to display help. A formatted PDF containing all thickness gage help items is available on the website.
NOTE: Update your gauge to ensure you have the new gauge help information.
preface
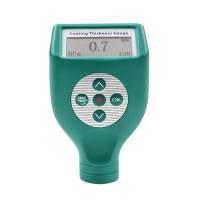
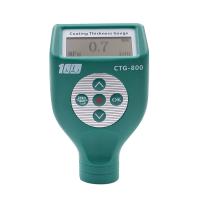
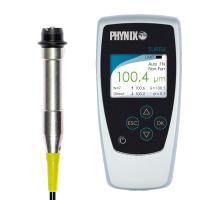
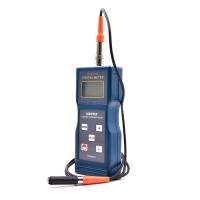
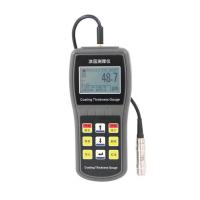
The PosiTector 6000 handheld electronic instrument provides fast and accurate non-destructive measurement of the thickness of metallic coatings. It consists of a body (standard or premium) and a probe.
quick start
Press ![Defelsko PosiTector 6000 Coating Thickness Gauge Chinese Version Instructions [2023 New Version] with Figure 7](http://img.nbchao.com/upload/editor/image/20230717/1689582278429082498.png) the button to power up the gauge. To conserve battery life, the gauge will automatically go to sleep after 5 minutes of inactivity. In sleep mode, the gage powers up significantly faster - handy when moving between parts or positions. After 4 hours of inactivity, the Thickness Gauge will completely power down. Alternatively, select Power Off from the main menu. All settings will be preserved.
the button to power up the gauge. To conserve battery life, the gauge will automatically go to sleep after 5 minutes of inactivity. In sleep mode, the gage powers up significantly faster - handy when moving between parts or positions. After 4 hours of inactivity, the Thickness Gauge will completely power down. Alternatively, select Power Off from the main menu. All settings will be preserved.
Remove the protective rubber cover (if provided) from the probe.
Press the center navigation button to activate the gauge.
Verify accuracy and make adjustments if necessary.
Place the probe flat on the surface to be measured. keep it steady. When a valid measurement is obtained, the meter beeps twice and the measurement is displayed.
Lift the probe at least 2 inches (5 cm) from the surface between measurements - or leave the probe in the same position on the surface for consecutive measurements.
menu operation
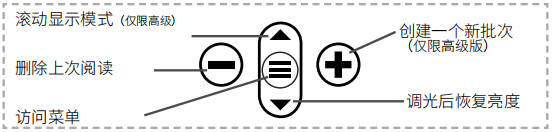
To access the menu, power up the Thickness Gauge and press the center navigation button ![Defelsko PosiTector 6000 Coating Thickness Gauge Chinese Version Instructions [2023 New Version] with Figure 8](https://img.nbchao.com/upload/editor/image/20230717/1689582598315057064.png) . A keypad or touchscreen can be used to navigate the menus. The touch screen function can be disabled in the settings menu if desired.
. A keypad or touchscreen can be used to navigate the menus. The touch screen function can be disabled in the settings menu if desired.
Select a menu option by touching it, or use the ![Defelsko PosiTector 6000 Coating Thickness Gauge Chinese Version Instructions [2023 New Version] with Figure 9](http://img.nbchao.com/upload/editor/image/20230717/1689582546007071016.png) and
and ![Defelsko PosiTector 6000 Coating Thickness Gauge Chinese Version Instructions [2023 New Version] with Figure 10](http://img.nbchao.com/upload/editor/image/20230717/1689582571283070064.png) buttons to highlight the desired option and press
buttons to highlight the desired option and press ![Defelsko PosiTector 6000 Coating Thickness Gauge Chinese Version Instructions [2023 New Version] with Figure 11](http://img.nbchao.com/upload/editor/image/20230717/1689582598315057064.png) to select it.
to select it.
On menus longer than one page, the current page number is displayed below the menu name. Use to navigate between pages when ![Defelsko PosiTector 6000 Coating Thickness Gauge Chinese Version Instructions [2023 New Version] with Figure 12](https://img.nbchao.com/upload/editor/image/20230717/1689582546007071016.png) the first menu item is selected or when the last menu item is selected.
the first menu item is selected or when the last menu item is selected. ![Defelsko PosiTector 6000 Coating Thickness Gauge Chinese Version Instructions [2023 New Version] with Figure 13](https://img.nbchao.com/upload/editor/image/20230717/1689582571283070064.png) If using touch, swipe
If using touch, swipe ![Defelsko PosiTector 6000 Coating Thickness Gauge Chinese Version Instructions [2023 New Version] with Figure 14](http://img.nbchao.com/upload/editor/image/20230717/1689582725986048553.png) up
up ![Defelsko PosiTector 6000 Coating Thickness Gauge Chinese Version Instructions [2023 New Version] with Figure 15](http://img.nbchao.com/upload/editor/image/20230717/1689582740098047138.png) or down to navigate between pages.
or down to navigate between pages.
Press ![Defelsko PosiTector 6000 Coating Thickness Gauge Chinese Version Instructions [2023 New Version] with Figure 16](http://img.nbchao.com/upload/editor/image/20230717/1689582808227025684.png) the button or swipe right to return to the previous screen. Select Exit to close the menu.
the button or swipe right to return to the previous screen. Select Exit to close the menu. ![Defelsko PosiTector 6000 Coating Thickness Gauge Chinese Version Instructions [2023 New Version] with Figure 17](http://img.nbchao.com/upload/editor/image/20230717/1689582850046020886.png) When a menu option is highlighted, an icon
When a menu option is highlighted, an icon ![Defelsko PosiTector 6000 Coating Thickness Gauge Chinese Version Instructions [2023 New Version] with Figure 18](http://img.nbchao.com/upload/editor/image/20230717/1689582882000060013.png) indicates that on-dash help is available. Press
indicates that on-dash help is available. Press ![Defelsko PosiTector 6000 Coating Thickness Gauge Chinese Version Instructions [2023 New Version] with Figure 19](http://img.nbchao.com/upload/editor/image/20230717/1689582898904071971.png) or touch the icon
or touch the icon ![Defelsko PosiTector 6000 Coating Thickness Gauge Chinese Version Instructions [2023 New Version] with Figure 20](https://img.nbchao.com/upload/editor/image/20230717/1689582882000060013.png) to display help.
to display help.
Indicates that a submenu exists for a menu option. Select an option to display its submenu.
probe
![Defelsko PosiTector 6000 Coating Thickness Gauge Chinese Version Instructions [2023 New Version] with Figure 21](http://img.nbchao.com/upload/editor/image/20230717/1689583084666029511.png)
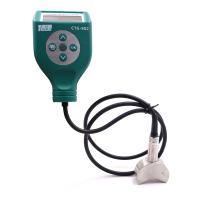
Upon power up, PosiTector will automatically determine which probe is connected and perform a self-test. To disconnect the probe from the main body, slide the plastic probe connector horizontally (in the direction of the arrow) away from the main body. Reverse these steps to connect a different probe. There is no need to power off the gauge when switching probes.
The PosiTector mainframe accepts a variety of probe types including magnetic, eddy current and ultrasonic coating thickness, surface profile, environmental, hardness, salt contamination, gloss and ultrasonic wall thickness probes.
Calibration, Verification and Adjustment
The PosiTector 6000 measures the thickness of metallic coatings non-destructively.
The following three steps ensure high accuracy:
calibration:
Usually performed by the manufacturer. All probes include a calibration certificate.
Verification of accuracy:
Typically performed by the user against a known reference standard, such as the included plastic shim or an optional coating thickness standard.
Adjustment:
Adjustment or Cal adjustment is the act of matching the thickness reading of a gauge to that of a known sample in order to improve the accuracy of the gauge on a particular surface or a particular portion of its measurement range. 1 or 2 point Cal adjustment is achievable.
The probe is factory calibrated and automatically self-checks each time it is measured. For many applications, no further adjustment is required after reset. Simply zero-calibrate on an uncoated substrate and measure. Of course, sometimes the readings can be affected by variations in the substrate, such as shape, composition and surface roughness. That's why it's necessary to do Cal adjustments. ![Defelsko PosiTector 6000 Coating Thickness Gauge Chinese Version Instructions [2023 New Version] with Figure 22](http://img.nbchao.com/upload/editor/image/20230717/1689583753331030280.png) The symbol disappears whenever a Cal adjustment is made to the gauge .
The symbol disappears whenever a Cal adjustment is made to the gauge .
如果未指定Cal调整方法,请先使用1点校准。如果测量表面上包含的垫片发现不准确,请使用2点校准。可以通过执行重置、创建新Cal设置或删除对Cal 1 校准设置所做的调整随时恢复出厂设置。每当使用出厂Cal设置时,显示屏上都会出现![Defelsko PosiTector 6000 Coating Thickness Gauge Chinese Version Instructions [2023 New Version] with Figure 23](https://img.nbchao.com/upload/editor/image/20230717/1689583753331030280.png) 符号。 对于“FN”测厚仪,校准调整独立于“F”或“N”模式进行,并一起存储在一个特定的Cal中。
符号。 对于“FN”测厚仪,校准调整独立于“F”或“N”模式进行,并一起存储在一个特定的Cal中。
校准设置菜单
![Defelsko PosiTector 6000 Coating Thickness Gauge Chinese Version Instructions [2023 New Version] with Figure 24](http://img.nbchao.com/upload/editor/image/20230717/1689583972331010166.png)
1点校准,也称为偏移或校正值,可以通过五种方式执行:
(i)简单调零-测量无涂层部分。提起探头并使用![Defelsko PosiTector 6000 Coating Thickness Gauge Chinese Version Instructions [2023 New Version] with Figure 25](https://img.nbchao.com/upload/editor/image/20230717/1689582898904071971.png) 和
和![Defelsko PosiTector 6000 Coating Thickness Gauge Chinese Version Instructions [2023 New Version] with Figure 26](http://img.nbchao.com/upload/editor/image/20230717/1689584070558057583.png) 按钮调整到“0”。
按钮调整到“0”。
注意:启用校准锁(默认)时无法执行简单的零调整。禁用校准锁以执行此调整。
(ii)平均零点调整![Defelsko PosiTector 6000 Coating Thickness Gauge Chinese Version Instructions [2023 New Version] with Figure 27](http://img.nbchao.com/upload/editor/image/20230717/1689584244080076082.png) 按(i)的首选方法在无涂层部分平均3到10次测量。
按(i)的首选方法在无涂层部分平均3到10次测量。
(iii)对已知厚度的简单调整-测量放置在未涂层部分上的已知厚度的垫片。提起探头并使用和![Defelsko PosiTector 6000 Coating Thickness Gauge Chinese Version Instructions [2023 New Version] with Figure 29](https://img.nbchao.com/upload/editor/image/20230717/1689584070558057583.png) 按钮调整到垫片厚度。
按钮调整到垫片厚度。
注意:启用校准锁(默认)时,无法对已知厚度进行简单调整。禁用校准锁以执行此调整。
(iv)对已知厚度的平均调整![Defelsko PosiTector 6000 Coating Thickness Gauge Chinese Version Instructions [2023 New Version] with Figure 30](http://img.nbchao.com/upload/editor/image/20230717/1689584492984098710.png) (iii)的优选方法是对 放置在无涂层基材上对已知厚度垫片进行3到10次平均测量。
(iii)的优选方法是对 放置在无涂层基材上对已知厚度垫片进行3到10次平均测量。
(v)零偏移量——在测量粗糙或喷砂基材上的涂层厚度时很有用,无需接触未喷砂的代表性基材。可以According to喷砂轮廓高度According to ISO 19840选择预定义的零偏移量值。或者,可以输入自定义零偏移量。零偏移量值从每次读数中减去。
注意:如果有未涂覆的代表性基材,建议对已知厚度(上图)进行平均调整以获得高精度。
![Defelsko PosiTector 6000 Coating Thickness Gauge Chinese Version Instructions [2023 New Version] with Figure 31](http://img.nbchao.com/upload/editor/image/20230717/1689584590947099357.png)
在有限的限定范围内提供更高的精度。测量比预期厚度范围更薄 (通常为零)和更厚的已知涂层厚度。![Defelsko PosiTector 6000 Coating Thickness Gauge Chinese Version Instructions [2023 New Version] with Figure 32](http://img.nbchao.com/upload/editor/image/20230717/1689584662152049072.png)
(限高级型号)
当前的Cal设置(例如Cal 3)显示在显示屏的右上角。返回到特定部分时,可以选择存储的Cal设置。Cal 1可以调整,但永远不会删除,并且在重置后出厂设置始终处于活动状态。如果批次打开并存在读数,则无法创建新的Cal设置。![Defelsko PosiTector 6000 Coating Thickness Gauge Chinese Version Instructions [2023 New Version] with Figure 33](http://img.nbchao.com/upload/editor/image/20230717/1689584782122047395.png)
使用屏幕QWERTY触摸键盘直接在量具上创建有意义的Cal Memory名称-在存储多个Cal Memory调整时很有帮助。 (仅FN组合探头)
在有色金属基材上定期操作时使用。
出现 图标,探头将仅使用涡流原理来缩短测量时间并延长电池寿命。在测量镀层或部分磁性等级的不锈钢涂层时也很有用。
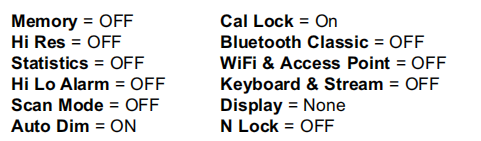
设置菜单
将显示从公制转换为英制,反之亦然。
Reset(菜单重置)恢复出厂设置并将测厚仪返回到已知条件。发生以下情况:
-删除所有批次、存储的测量值、批次名称和屏幕截图。
-校准调整返回出厂设置。
-菜单设置返回到以下位置:
执行更彻底的硬重置,操作如下所示:
关闭量规并等待5秒钟。
同时按住
和按钮,直到出现重置符号 。
这会将量规返回到已知的“out-of-the-box”条件。它通过添加以下内容执行与菜单重置相同的功能:
-蓝牙配对信息已清除。
-菜单设置返回到以下状态:

注意:
-复位期间,保持测厚仪远离金属。
-日期、时间和WiFi设置不受任何重置的影响。

增加显示的分辨率。精度不受影响。

提高测量速度。用于快速检查或测量厚涂层的大面积区域时,正确的探头定位并不重要。需要快速向上/向下移动探头。可能会注意到精度降低。
注意:对于FN探头型号,在快速模式下禁用N模式。
 (限高级版本)
默认情况下,PosiTector 6000大约每秒读取1次。扫描模式允许用 户在不抬起探头的情况下快速连续读取多个读数(每秒3个读数)。从3种扫描模式中进行选择:
Normal - 放置在表面时连续测量。
Statistics - 放置在表面上时显示实时扫描统计信息。显示平均值、最大值、最小值和均方差。
Limited # Avg. - 连续测量,直到达到用户指定的读数,然后显示扫描的平均值。
当记录打开时,会记录扫描测量数据。但是,在统计和有限#平均扫描模式下,只保存统计和/或平均值,不保存单个读数。请注意,执行扫描可能会缩短探头的寿命,建议仅用于光滑表面。有关扫描模式的更多信息,请访问
http://www.defelsko.com/scan
调整内置扬声器的音量(关闭、低、中、高)。
通过将显示器锁定在当前方向来禁用自动旋转功能。

允许禁用触摸屏功能。所有仪表功能也可以使用导航按钮进行控制。
当存储到内存中时,所有测量都带有日期和时间戳(24小时格式)。因此,设置正确的日期和时间非常重要。使用 和
和 按钮选择一个值,并使用
 和按钮进行调整。当前日期和时间设置也可以在主菜单顶部查看。
从“碱性”、“锂”或“镍氢”(可充电的镍氢)中选择仪器中使用的电池类型。电池状态指示器符号已针对所选电池类型进行校准。如果仪器中使用的电池类型与所选电池类型不匹配,不会发生损坏。
统计模式

显示屏上将显示统计摘要。按下按钮 删除上次读数。按下以清除统计信息。


当读数超过用户指定的限制时,允许Gage以可见和听觉的方式提醒用户。
内存管理
PosiTector 6000具有用于记录测量数据的内存存储。可以在屏幕上查看存储的测量值,也可以通过计算机、平板电脑和智能手机访问。所有存储的测量值都带有日期和时间戳。当量规设置为存储测量数据时,会出现符号 。
。
标准型号:在一个批次中存储多达1,000个读数。
高级型号:最多可存储1,000个批次中的250,000个读数。“新批次”关闭任何当前打开的批次并使用最低可用编号创建一个 新批次名称。新批次名称在创建时带有日期戳。
屏幕截图
同时按下两者和按钮以保存当前显示的图像。最后100个屏幕截图存储在内存中,连接到计算机时可以访问(请参阅下面的 PosiSoft USB驱动器)。
帮助确定大面积薄膜厚度是否符合用户指定的最小/最大水平。
帮助确定涂层系统是否符合IMO防护涂层性能标准。
帮助确定保护涂层系统是否符合测量粗糙基材涂层厚度的ISO 19840验收标准。
访问存储的测量数据
DeFelsko为查看、分析和报告数据提供以下免费解决方案:PosiSoft USB驱动器-使用随附的USB-C电缆将量规连接到PC/ Mac。使用通用PC/Mac网络浏览器或文件浏览器查看和打印读数和图表。无需软件或互联网连接。
PosiSoft Desktop:用于下载、查看、打印和存储测量数据的强大桌面软件(PC/Mac)。包括一个可定制的模板化PDF报告生成器。无需互联网连接。
PosiTector APP:(限高级型号)适用于兼容iOS和Android智能设备的应用程序。允许用户创建、保存和共享专业PDF报告。使用智能设备的相机和键盘添加图像和笔记。
PosiSoft.net:与PosiSoft桌面和PosiTector应用程序兼容,PosiSoft.net 是一种使用云存储和共享测量数据的安全方式。
连接菜单
 (限高级型号)
允许连接到本地无线网络或移动热点。 非常适合使用网络的 Internet连接与PosiSoft.net和PosiSoft Desktop(上图)同步存储的测量值。
启用USB驱动器后 ,PosiTector使用USB大容量存储设备类,为用户提供简单的界面,以类似于USB闪存驱动器和数码相机的方式检索存储的数据。USB驱动器也可用于将存储的测量值导入PosiSoft桌面软件(上图)。
注意:连接时,电源通过USB-C线。电池未使用,机身不会自动断电。
 (限高级型号)
通过串行协议将单个读数流式传输到USB连接的计算机。非常适合与串行兼容的SPC数据采集软件一起使用。
 (限高级型号)
当启用并连接到计算机时,PosiTector将被识别为键盘。读数在读取时被发送到计算机,模拟击键,然后回车。
上述WiFi和USB菜单包含Sync. net Now选项。选择后,测量仪会立即通过各自的通信方式同步存储的测量数据(需要互联网连接)。或者,从USB连接菜单中选择Auto Sync.net,以在连接到PC时自动同步。连接时添加到内存中的其他测量值仅在USB电缆断开并重新连接时或选择Sync.netNow选项时同步。WiFi连接的测量仪会在上电时自动尝试同步。
注意:注意如果蓝牙被禁用或断开连接,则同步批次菜单中选择的批次中的数据将保留在队列中,直到重新建立与PosiTector应用程序的通信。
将选定的批次传输到PosiTector应用程序。在设备之间切换时发送批次很有用,因为只有尚未与任何智能设备同步的读数和批次才会自动同步。
当Gage连接到运行PosiTector应用程序的智能设备时,菜单中可以看到发送批次选项。
 (限高级型号)
启用并连接到计算机后,PosiTector将被识别为无线键盘。读数在读取时发送到计算机,模拟击键,然后回车。
注意:键盘位于蓝牙设置菜单中。
 (限高级型号)
允许条形码扫描仪和键盘等蓝牙设备与PosiTector配对,以注释批次和读数。
注意:输入设备位于蓝牙设置菜单中。
 (限高级型号)
Allows individual readings to be sent to a computer, printer, or compatible device when shooting with Bluetooth Classic wireless technology.
Determine if a software update is available for your instrument.
NOTE: The instrument will perform a hard reset after an update.