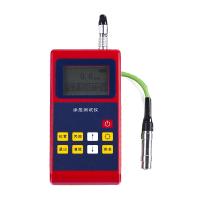
In the field of industrial inspection, eddy current Thickness Gauges are often used to measure coating thickness due to their unique operating principle. The principle is to generate eddy currents in the test specimen by excitation coil current, and then change the coil impedance, and under specific conditions, the coating thickness is obtained through signal processing. However, when tested in practice, a variety of factors can interfere with measurement accuracy. 、

Plating material error
Common coating materials such as copper, aluminum, and chromium have a relative permeability of approximately 1 and generally do not introduce errors. The instrument design can effectively control the influence of conductivity by selecting the excitation frequency reasonably. For example, in the coating inspection of electronic components, measurement deviations due to conductivity differences can be eliminated by precisely matching the frequency.
Roughness effects
The change of the substrate and surface roughness of the test piece will cause a large deviation in the measurement results. When the roughness Ra ≤ 6.3 μm, the influence on the measurement is small; Above 6.3 μm, the effect is significant. For surfaces with wide knife marks, the location of the measuring points has a great influence on the measurement results, and the average of 4-5 measuring points can be taken to reduce the effect. This is because the roughness changes the magnetic circuit gap, and the larger the roughness value, the larger the measured value, and vice versa, the closer the true value. In the coating inspection of automobile parts, the measurement accuracy is improved by the method of multi-point average.
Substrate thickness issues
Calibration instruments are often used with thick substrates, while the actual thickness of the substrate of the test specimen varies greatly. When the thickness of the substrate exceeds 10mm, the thickness change has little effect on the measurement. Less than 10mm, especially less than 3mm, affects more than 5%. When measuring thin workpieces, it is necessary to calibrate with a substrate of comparable thickness, because the low eddy current effect of thin workpieces can lead to large measurements. This problem can be solved by measuring thin parts on a thick substrate, as in the case of aerospace thin-walled parts.
Radius of curvature effect
The calibration sample is mostly flat, while the test specimen may be curved, which can change the air gap between the probe and the surface, which can affect the measurement. The probe can be improved along the axial busbar, and when the radius of curvature is small, it needs to be tested according to the probe, especially in the case of arbitration testing. For example, when the coal department accepts the hydraulic support, the proofreading parts are made in advance to ensure the smooth progress of the acceptance work.
Differences in the parts being measured
The measurement results vary depending on the measurement site. At edges and corners, the measured value is too large due to the small cross-section of the magnetic circuit and the low eddy current effect, so these areas should be avoided when measuring. In the coating inspection of machined parts, edges and corners are avoided, which effectively improves the reliability of the data.
Other factors interfere
The strong magnetic field or large electrical equipment at the detection site will affect the instrument, although the sensor has shielding measures, but it is still necessary to pay attention to ensure accuracy. Different substrate materials are calibrated with the same material to reduce the effect. When measuring, the probe should be pressed tightly to prevent the value from being unstable, and a slight slide can also remove the influence of dust. The coating inspection of power equipment ensures the smooth progress of the measurement work by avoiding the magnetic field and standardizing the operation.
summary
In practical applications, eddy current Thickness Gauges are affected by coating materials, roughness, substrate thickness, radius of curvature, measured parts and other external factors, which can interfere with the accuracy of measurement. When using eddy current Thickness Gauges, operators need to fully understand these influencing factors and take appropriate solutions for different situations, such as reasonable selection of excitation frequency, multi-point measurement average, calibration of the instrument according to the thickness of the substrate, test according to the radius of curvature, avoid specific measurement parts, and pay attention to external interference. Only in this way can we effectively improve the measurement accuracy, provide reliable data support for quality control in industrial production, ensure that product quality meets the standard requirements, and promote the smooth progress of industrial production.


