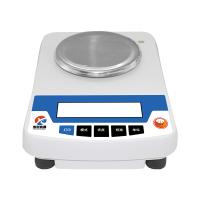
1. Electronic Balance structure
The electronic balance mainly performs weighing according to the principle of electromagnetic balance. The weighing object is directly placed in the balance, and the balance can be balanced and read in a few seconds. It is accurate and fast, and there is no need to try weights in the whole process.
The supporting point of the electronic balance is replaced by an elastic reed for the agate blade of the mechanical balance, the lifting pivot device is replaced by a differential transformer, and the pointer scale is replaced by a digital display. Therefore, the electronic balance has the characteristics of long service life, stable performance, easy operation and high sensitivity. In addition, the electronic balance also has functions such as automatic calibration, automatic tare, overload indication, fault alarm, etc., and has the function of outputting quality electrical signals, and can be used in conjunction with printers and computers to further expand its functions, such as the maximum value of statistical weighing, Min, mean and standard deviation etc. Because the electronic balance has the incomparable advantages of the mechanical balance, although its price is more expensive, it will be more and more widely used in various fields and gradually replace the mechanical balance.

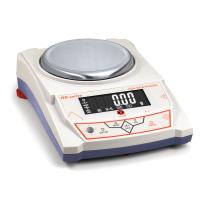
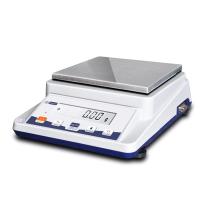
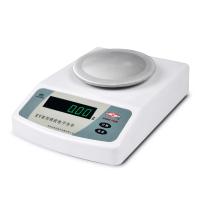
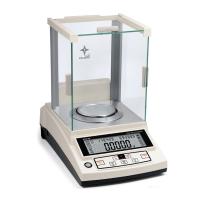
According to the structure, the electronic balance can be divided into two types: the upper dish type and the lower dish type. The weighing pan above the support is called the upper dish type, and the weighing pan is hung under the support as the lower dish type. At present, the top-dish electronic balance is widely used. Although there are many types of electronic balances, their usage methods are similar. For specific operations, please refer to the instruction manual of each instrument.
2. How to use the electronic balance
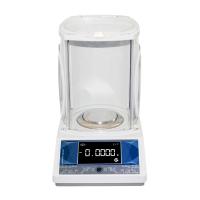
The following takes the FA1604 electronic balance produced by Shanghai Balance Instrument Factory as an example to briefly introduce how to use the electronic balance.
(1) Level adjustment. Observe the level meter, if the water bubble of the level meter deviates, adjust the leveling feet so that the water bubble is located in the center of the level meter.
(2) Preheating. Turn on the power, and after preheating to the specified time, turn on the monitor for operation.
(3) Turn on the monitor. Press the 0N button lightly, the display is fully bright, after about 2s, the model of the balance is displayed, and then the weighing mode is 0.0000g. The balance door should be closed when taking a reading.
(4) Selection of the basic mode of the balance. The balance is usually in the "normal situation" mode, and has a power-off memory function. If you change to other modes during use, press the 0FF key after use, and the balance will return to the normal mode. The setting of the weighing unit can be operated according to the manual.
(5) Calibration. After the balance is installed, the balance should be calibrated before it is used for the first time. Due to long storage time, location movement, environmental changes or inaccurate measurement, the balance should generally be calibrated before use. The balance adopts external calibration (some electronic balances have internal calibration function), which is completed by TAR key reset, CAL minus, and 100g calibration weight.
(6) Weighing. Press the TAR key, after the display shows zero, place the object to be weighed on the weighing pan, and wait for the number to stabilize, that is, after the 0” mark in the lower left corner of the display disappears, the mass value of the object to be weighed can be read out.
(7) Tare and weigh. Press the TAR key to reset to zero, put the container on the weighing pan, the balance will display the weight of the container, press the TAR key again, it will display zero, that is, remove the tare. Place the object to be weighed in the container again, or gradually add the object to be weighed (powder or liquid) into the container until the required mass is reached, and when the "0" in the lower left corner of the display disappears, the net value of the object to be weighed is displayed. quality. After removing all items on the weighing pan, the balance will display a negative value, press the TAR key, and the balance will display 0.0000g. If the total mass on the weighing pan exceeds the maximum load (160g for FA1604 electronic balance) during the weighing process, the balance only displays the upper line segment, and the load should be reduced immediately.
(8) After the weighing is finished, if the balance is still used within a short period of time (or other people still use the balance), it is generally not necessary to press the OFF key to turn off the display. After all the experiments are over, turn off the display and cut off the power supply. If the balance is still used within a short period of time (for example, within 2 hours), it is not necessary to cut off the power supply, and the warm-up time can be saved when using it again. If the balance is not to be used that day, unplug the power plug.
3. Weighing method
The commonly used weighing methods are direct weighing method, fixed mass weighing method and decreasing weighing method, which are introduced respectively as follows.
(1) Direct weighing method. This method is to place the weighing object directly on the balance pan to directly weigh the mass of the object. For example, weighing the mass of a small beaker, weighing a volumetric flask in volumetric vessel calibration, and weighing a crucible in a gravimetric analysis experiment all use this weighing method.
(2) Fixed mass weighing method. This method, also known as the incremental method, is used to weigh a reagent (such as a reference substance) or sample with a fixed mass. The speed of this weighing operation is very slow, and it is suitable for weighing samples of powder or small particles (the smallest particle should be less than 0.1mg, so that its quality can be easily adjusted) that are not easy to absorb moisture and can exist stably in the air.
Note: If you accidentally add more than the specified amount of reagent, you should first turn off the lifting knob, and then use a horn to spoon out the excess reagent.
Repeat the above operations until the reagent quality meets the specified requirements. When strictly required, the excess reagent taken out should be discarded and not put back into the original reagent bottle. During operation, reagents should not be scattered in places other than containers such as balance pans, and the weighed reagents need to be quantitatively transferred directly from containers such as watch glasses to receiving containers, which is the so-called quantitative transfer”.
(3) Decrement weighing method. The sending and subtracting weighing method is also called the subtracting method (see Figure 3-3), which is used to weigh samples or reagents within a certain mass range. This method can be selected when the sample is easy to absorb water, oxidize or react with C02 during the weighing process. Since the mass of the weighed sample is obtained by the difference between two weighings, it is also called the subtraction method.

The weighing steps are as follows
Clamp the weighing bottle with a paper tape (or piece of paper) from the desiccator and take out the weighing bottle (note: do not let your fingers touch the weighing bottle and bottle cap directly), clamp the handle of the weighing bottle cap with a piece of paper, and open the bottle Cover, add an appropriate amount of sample (generally an integral multiple of the amount of a sample) with a horn spoon, and cover the bottle. Weigh out the exact mass after adding the sample to the weighing bottle. Take the weighing bottle out of the balance, tilt the bottle above the receiving container, tap the upper part of the bottle mouth with the weighing bottle cap to make the sample slowly fall into the container, and the bottle cap should never leave the top of the receiver. When the sample poured out is close to the required amount (can be estimated from the volume or test weight), while continuing to tap the bottle mouth with the bottle cap, gradually turn the bottle body upright to make the sample adhered to the bottle mouth Fall back into the weighing bottle, then cap the bottle and weigh it accurately. The difference between the two masses is the mass of the sample. Continuously decrease according to the above method, and multiple samples can be weighed. Sometimes it is difficult to obtain a sample that meets the quality range requirements at one time, and the above weighing operation can be repeated 1 or 2 times.
The above is the author's summary of the application of electronic balances, hoping to provide some references for relevant trial personnel in the industry.