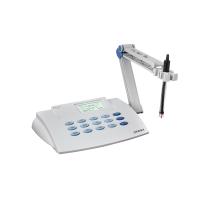
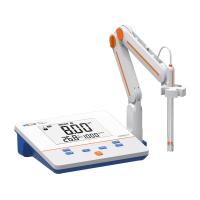
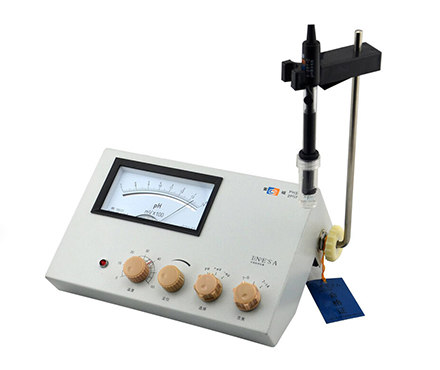
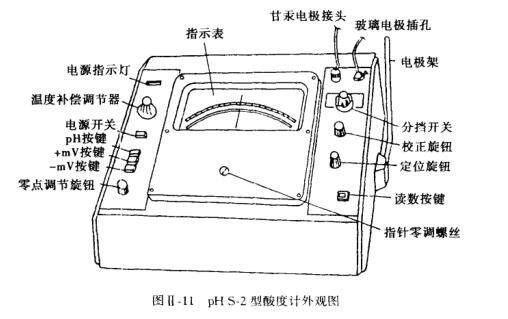
An acidity meter is also called a PH meter, which uses the principle of measuring the electromotive force of a battery to measure the pH value of an aqueous solution, so it can also measure the electrode potential. The following takes the PHS-2 acidity meter (see Figure II-11) as an example for an introduction.
principle
Use a pH meter to measure the pH value. Insert a pair of working electrodes into the solution to be tested. One is a reference electrode with a known and constant electrode potential (usually a mercury electrode), and the other is an electrode whose potential varies with the solution. The indicator electrode (usually a glass electrode) that changes with the ion concentration is used to form a primary battery and connected to a precision potentiometer to measure the electromotive force of the battery. Since the pH value of the solution to be tested is different, the electromotive force generated is also different. Therefore, the pH value of the solution can be measured by measuring the electromotive force of the solution.
In order to save the procedure of converting the electromotive force into pH value, the acidity meter directly displays the measured electromotive force of the battery on the electric dial with a pH scale. On the same day, the iL instrument also installed a positioning regulator. When measuring, first use the pH standard buffer solution, and make the pointer just point at its pH value through the positioning regulator. When measuring the solution to be tested, the pointer directly indicates the pH value of the solution to be tested.
Usually the previous step is called positioning, and the latter step is called measurement.
2. How to use
(1) Measuring the pH value
1. Instrument calibration
(1) Check whether the indicator pointer is at 1.0, otherwise use the pointer zero adjustment screw to adjust.
(2) Turn on the power, press the power switch, and then press the pH button to preheat the instrument for 30 minutes.
(3) Adjust the temperature compensation regulator to the temperature of the solution to be tested, and connect the electrodes.
(4) Turn the gear switch to the "6" position (at this time, the measuring range of the indicator is pH6~8), and adjust the zero point adjustment knob so that the pointer points at 1.0 (ie pH=7.0).
(5) Turn the gear switch to the "calibration" position, adjust the correction knob so that the pointer points to 2.0 on the full scale.
(6) Repeat steps (4) and (5) to check the reproducibility of the pointer at 1.0 and 2.0. When the instrument is stable, the calibration is over. After that, the zero adjustment knob and the calibration knob cannot be moved again.
2. Positioning
Insert the connected electrode into the pH standard buffer solution, press the reading button, adjust the positioning knob so that the pointer points to the pH scale of the standard buffer solution (the sum of the value indexed by the step switch and the index pointer of the indicator), and stir Solution, adjust the positioning knob repeatedly until the pointer is stable. Then release the reading button, the positioning is completed, and the positioning knob cannot be moved after that.
3. Measure
Take out the electrode, rinse it with distilled water and gently blot the moisture on the electrode surface with filter paper, then insert it into the solution to be tested, turn the step switch to the measured range, press the reading button, the index value of the step switch and the indicator table The sum of the values indicated by the pointer is the pH value of the solution to be tested.
4. Precautions
(1) The glass electrode is easy to break the stele, so be careful when using it, and do not collide with the stone.
(2) The glass electrode should be soaked in distilled water for more than 24 hours before use.
(3) The calomel electrode should be replenished with saturated KCl solution in time to maintain a sufficient hydraulic pressure difference.
(4) Do not soak the calomel electrode for a long time.
(2) Measuring the electromotive force of the battery
(l) Connect the two poles of the battery to be tested to the corresponding electrode connectors of the instrument, and heat for 30 minutes.
(2) Adjust the temperature compensation regulator to the temperature of the solution to be tested.
(3) Turn the split switch to the "0" position, adjust the zero adjustment knob so that the pointer points to 1.0, then turn the split start to the "correction" position, adjust the correction knob to make the pointer full scale (see the 0 on the indicator table) ----~2.0 scale).
(4) Turn the gear switch to the "0" position, loosen the screw of the negative pole jack, pull out the negative pole plug, then press the reading button, and adjust the positioning knob so that the pointer points to 0. After adjusting, release the reading button, and the pointer returns to l.0. Then insert the negative plug and tighten the small screw on the jack.
(5) Insert the electrode into the solution to be tested, adjust the gear switch to the appropriate position, press the reading button, the sum of the index value and the index value of the indicator pointer is the battery electromotive force + mv value.
If measuring 1 mV, first press the 1 mV button and use a 2.0~0 scale. The rest is the same as above.