1 Overview
1.1 Scope of application
Metals, plastics, ceramics, glass and any other good conductors of ultrasonic waves can use this instrument to measure the thickness as long as there are two parallel surfaces above and below.
This instrument can be used in the field of industrial production for accurate measurement of various materials or parts. Another important aspect is that it can monitor various pipelines and pressure vessels in production equipment, and monitor their thinning after being corroded during use. degree.
1.2 Basic Principles
The principle of ultrasonic measurement of thickness is similar to that of light wave measurement. The ultrasonic pulse emitted by the probe reaches the measured object and propagates in the object, and is reflected back to the probe when it reaches the material interface, and the thickness of the measured material can be determined by accurately measuring the propagation time of the ultrasonic wave in the material.
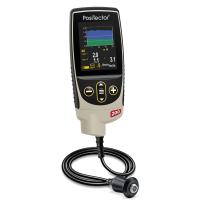
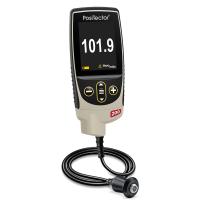
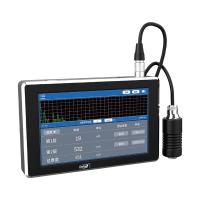
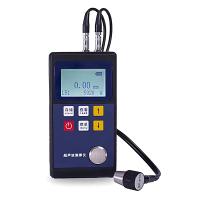
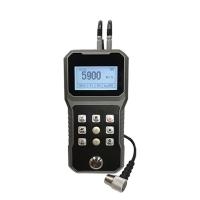
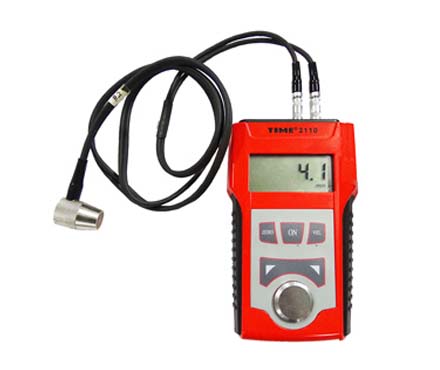
1.3 Basic configuration and names of various parts of the instrument


2 Performance indicators
Display mode: four-digit LCD display
Display minimum unit: 0. 1mm
Working frequency: 5MHz
Measuring range: 1. 2~225. 0mm (steel)
Lower limit of pipe measurement: Φ20×3mm (steel)
Measurement error: ±(1%H+0. 1)mm, H is the actual thickness of the measured object
Sound velocity adjustment range: 1000~9999m/s
Reverse measurement of sound velocity with known thickness: the measurement range is 1000~9999m/s, when the thickness of the test piece is ≤20mm, the sound velocity measurement is accurate*
Accuracy does not exceed ±1mm/H×100%; when the thickness of the test block is greater than 20mm, the measurement accuracy of sound velocity does not exceed ±5%
Operating temperature range: 0~40℃
Power supply: two AAA batteries
Power consumption: Working current <20mA(3V)
Dimensions: 126×68×23 (mm[/3] )
Weight: 170g
3 main functions
●Automatic calibration of zero point can correct the system error
●Linear automatic compensation, using computer software to correct the nonlinear error of the probe in the whole range to improve the accuracy. ●Use the up and down adjustment keys to quickly adjust the sound velocity and thickness, and quickly query the thickness storage unit.
●Coupling status prompt: provide a coupling sign, and you can know whether the coupling is normal by observing its stable state
●It can store ten thickness values, and the data will not be lost after shutdown, which brings convenience to high-altitude and field work.
●Measuring the sound velocity function, directly measure the sound velocity according to the thickness of the sample, avoiding the trouble of looking up the table or converting.
●Sound velocity of five different materials can be stored.
●Low voltage reminder
●Automatic shutdown: the timing automatic shutdown will help you cut off the power
●Full key-membrane closed operation--anti-oil, improve service life
●TT100A has backlight display function
4Measurement steps
4.1 Measurement preparation
将探头插头插入主机探头插座中, 按ON键开机, 全屏幕显示数秒后显示上次关机前使用的声速,如下图所示。此时可开始测量。

4.2声速的调整
如果当前屏幕显示为厚度值,按 VEL键进入声速状态,屏幕将显示当前声速存储单元的内容。每按一次,声速存储单元变化一次,可循环显示五个声速值。如果希望改变当前显示声速单元的内容,用▲或▼键调整到期望值即可,同时将此值存入该单元。

4. 3校准
在每次更换探头、更换电池之后应进行校准。此步骤对保证测量准确度十分关键。如有必要,可重复多次。
将声速调整到5900m/s后按 ZERO键, 进入校准状态, 屏幕显示:

在随机试块上涂耦合剂,将探头与随机试块耦合,屏幕显示的横线将逐条消失,直到屏幕显示4. 0mm即校准完毕。
4.4测量厚度
将耦合剂涂于被测处,将探头与被测材料耦合即可测量,屏幕将显示被测材料厚度,如图:

说明:当探头与被测材料耦合时,显示耦合标志。如果耦合标志闪烁或不出现* 说明耦合不好。拿开探头后,厚度值保持,耦合标志消失。如图:

5 测量声速
如果希望测量某种材料的声速, 可利用己知厚度试块测量声速。 与测量厚度步骤相似,用游标卡尺或千分尺测量试块,准确读取厚度值,将探头与己知厚度试块耦合,直到显示出一厚度值,拿开探头后,用▲或▼键将显示值调整到实际厚度值,然后按VEL键即可显示出被测声速, 同时该声速被存入当前声速存储单元。

6厚度值存储
6. 1存储
按住VEL键,再按ZERO键,进入厚度存储状态,显示某一厚度存储单元号,此时* 可用上、 下调节键找到所需单元(用▲键或▼键可循环显示(0~9单元)。 测量厚*度的同时,将测值存入单元。每测一次新值即将旧值刷新,该单元记录的是最*后一次测量的值。 按 VEL键可退出厚度存储状态。

6. 2查看存储内容
按住VEL键,再按ZERO键,显示当前厚度存储单元号,用▲或▼键找到要查看* 的单元(用▲或▼键可循环显示0~9号单元), 再操作一次即显示该单元的*内容。 此时测量也可将新测的值存入该单元。 按 VEL键可退出厚度存储状态。

7 low voltage indication
If the screen displays the BATT logo, it means that the battery voltage has dropped, and the battery should be replaced in time before continuing to use:

8 automatic shutdown
If there is no operation within two minutes, it will automatically shut down.
9 backlight display function (TT100A)
In the power-on state, press the ▲ and ▼ keys at the same time to turn on the backlight.
10 Notes
9.1 The surface of the probe is made of acrylic resin, which is very sensitive to redrawing on the rough surface, so it should be pressed lightly during use.
9.2 The surface of the measured object should not exceed 60°C, otherwise the probe can no longer be used.
9.3 The intrusion of dust (iron filings, carbon particles, etc.) will cause trouble and should be cleaned frequently.
11 Maintenance and maintenance
10.1 Replace the battery in time
After the low voltage indicator appears, the battery should be replaced in time, as follows:
a. Wait for the machine to automatically shut down
b. Open the battery compartment cover (press down the compartment cover with your thumb, and then exit)
c. Take out the battery, put in a new battery, pay attention to the polarity
10.2 The adhesion of oil and dust will gradually age the probe cable and cause it to break, and the dirt on the cable should be removed after use. 10.3 When the instrument is not in use for a long time, the battery should be taken out to avoid battery leakage and corrosion of the battery box and pole pieces.
10.4 Strictly avoid collisions, tides, etc.