1 Overview
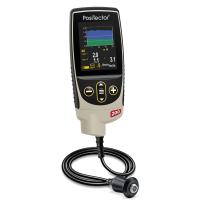
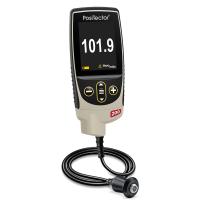
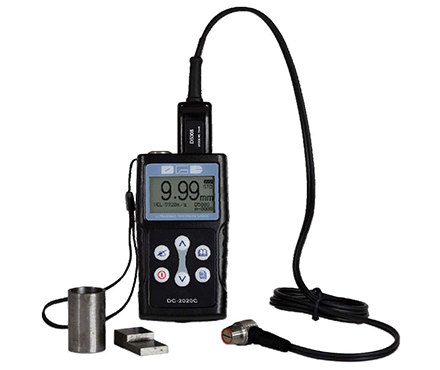
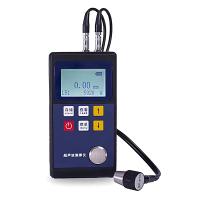
Huayang HCC-16 Ultrasonic Thickness Gauge is developed by introducing the professional technology of similar products from abroad. It adopts the current professional sound velocity increasing and decreasing method and dual chip probe technology to make the circuit highly integrated and digital. The instrument has the characteristics of strong detection ability, good linearity, high precision, good stability, large measurement range, and extremely convenient operation. The displayed form reads out the sound velocity of the DUT.
The instrument adopts the ultrasonic pulse reflection method. When the ultrasonic wave propagates from one homogeneous medium to another, the acoustic reflection will occur on the interface, and the ultrasonic wave emitted from the probe will enter the tested object through the delay block. When the ultrasonic wave reaches the interface (the bottom surface of the DUT), it is reflected back and received by the receiving probe through the delay block. Measure the time between the transmitted pulse and the received pulse, deducting the delay
Block time, according to the relationship between sound velocity, time and distance, calculate the thickness of the tested piece, and automatically display the thickness value of the tested piece.
This instrument can be used to measure the thickness of materials that can transmit ultrasonic waves, such as: metal, ceramics, plastics, nylon, glass, etc. This instrument is suitable for petrochemical industry (oil field, refinery, chemical plant), shipbuilding industry, automobile manufacturing industry, power station, construction industry, machine manufacturing industry and profiles, pressure vessels, boilers, oil storage tanks, pipes, pipes, slabs , Forgings, shafts, wheels, flanges, hulls, decks, tracks, thickness measurement and corrosion measurement of machined parts.
This instrument has a strong detection ability for the test piece with rough surface corrosion, even in the thicker measuring range.
2 technical parameters
2.1 display
1) Red light-emitting digital tube, three and a half digits display;
2) Display resolution 0.1mm;
3) The thickness value shows that the retention time is about 2s;
4) When it is larger than 99.9mm, the hundreds mark will flash.
2.2 Measurement
1) Thickness measuring range: 2mm~200mm (45# steel);
2) Indication error: ±(1%H+0.1) mm,
(H: Thickness of the material to be tested).
3) Probe frequency: 5MHz;
4) Allowable ambient temperature: 0°C ~ 40°C;
5) Sound velocity measurement range: 100m/s~9990m/s;
6) Zero calibration test block: 5.0mm;
7) Power consumption: about 0.3W;
8) Automatic shutdown: without any operation after booting, it will automatically shut down in about 1 minute
shutdown;
9) Power supply: five AAA ordinary batteries or nickel-cadmium batteries;
10) Power loss alarm: the lowest decimal place when the battery voltage is lower than 6.2V
Dot blinks.
2.3 Dimensions: 160mm×68mm×39mm. 2.4 Mass: about 450g.
3 Appearance of the instrument

4Basic operation method
4.1由于双晶探头夹角影响,测量分远、近二个区域,被测件小于10mm为近区,大于8mm为远区,近区和远区的声速设定是不同的,下表为不同材料的声速设定值与校正显示值。校正均在5.0mm试块上进行(已装的机身上)。

4.2测量前的准备
1)首先确保电池容量,检查电池极性是否正确。用一字螺丝刀拧紧电池盒锁紧螺钉。
2)将电缆线分别插入仪器探头插座(3)(注意:插头座为插拔式结构)。
3)According to不同材料和厚度,用一字螺丝刀调节声速设定开关(5)按上表设定声速值(声速设定开关在仪器背部)。
4)按动电源开关(1)电源指示即点亮。即表示可以进行测量。
4.3对钢的测量举例
1)小于10mm厚度的钢材,其测量范围在近区,将声
速设定开关置于612,将探头良好耦合至试块(7)上,调节旋钮(2),使显示屏显示“5.0”与校正显示值相符(见表)。近区校正完毕,可对小于10mm钢材进行测量。
2)被测件厚度大于8mm时(远区),校正时将声速设定开关置于595,探头良好耦合至试块(7)上,调节旋钮(2),使显示屏显示“5.2”与远区校正显示值相符(查表),校正完毕,可对大于8mm钢材进行测量。
4.4声速测量
测量声速前须用被测件相同材料加工成二块不同厚度
的标准试样(W1、W2),厚度须大于10mm。其厚度差为一倍或二倍,厚度值由游标卡尺校正。将探头耦合到较厚的试样W1上,调节声速设定开关(5),使示值与W1厚度相符。然后将探头耦合到较薄的试样W2上,调节旋钮(2),使示值在W2值附近。依次反复几次,直至仪器显示的值与W1、W2试样值相符。此时声速拨盘上的数值,即是材料的声速
值。例:声速指示553,其声速即为5530米/秒。在仪器探测范围内,试样W1、W2的厚度差值选取越大,其测量精度越高(W1、W2需用户自制)。
5仪器使用注意事项
1) When the measured value is greater than 100mm or 200mm, the LED (11) flashes intermittently. For example: "85.6" is displayed on the screen, and the light-emitting diode (11) flashes . At this time, the measured part should be 185mm or 285.6mm. The operator should consult the original material thickness data or estimate the thickness range to determine.
2) When measuring a material with a thickness less than 100mm, once the thickness value is displayed on the display screen, the LED (11) will be blanked.
3) When the power supply voltage is lower than 6.2V, the lowest decimal point (13) flashes, and the instrument can still work for about one hour. Insufficient battery capacity will affect the measurement accuracy.
4) After pressing the power button, the power indicator light is off, check whether the polarity of the battery is correct, and whether the plug of the battery box is in good contact with the instrument.
5) The battery should not be placed in the battery box for a long time to avoid battery leakage and corrosion of the battery box.
6) It is strictly forbidden to knock or collide with the probe, so as not to affect the performance of the probe.
7) The instrument should prevent severe vibration and impact. After operation and use, wipe off the oil on the surface of the instrument and put it in the instrument storage box for proper storage.

