1. Characteristics
* This instrument is a battery-powered portable measuring instrument that uses the principle of magnetic induction for measurement (the corresponding standard is ISO2178). It adopts computer technology, non-destructive testing technology and many other professional technologies to accurately measure the coating thickness without damaging the measured object. characteristic
* It can directly measure the thickness of non-magnetic coating layer (such as: paint, plastic, enamel, copper, aluminum, zinc, chromium, etc. ) on the surface of magnetic conductive material (such as iron, nickel). It can be applied to the thickness measurement of electroplating layer, paint layer, enamel layer, aluminum tile, copper tile, babbitt tile, phosphating layer, paper, and the thickness measurement of the attachment of hull paint and underwater structural parts .
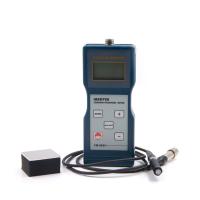
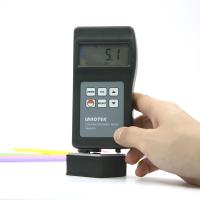
* The spring guide sleeve probe with wear-resistant hard metal probe can not only measure on hard or rough surfaces, but also ensure that the probe has constant pressing force and stable sampling value.
* Digital display, no parallax.
* Lantai CM-8820 Thickness Gauge has a wide measurement range and high resolution.
* Automatic memory calibration value, easy to use.
* Sturdy and delicate structure, easy to carry.
2. Specifications
Display: 4 digits 10mm LCD
Test range: 0~2000um
Resolution: 0.1um/1um
Measurement accuracy: ±5%n or ±5 um
Measurement mode: single measurement and continuous measurement
Operating conditions: temperature 0~40°C, humidity <80%
Power consumption: about 25 mA
Power supply: 4 AAA batteries
Dimensions: 161x69x32mm
Weight: 260g (including battery)
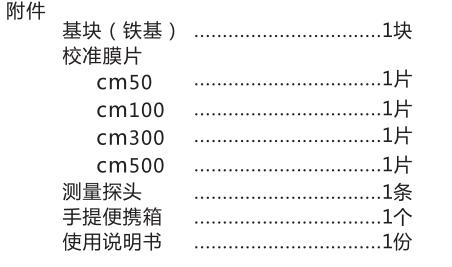
appendix
4. Measurement procedure
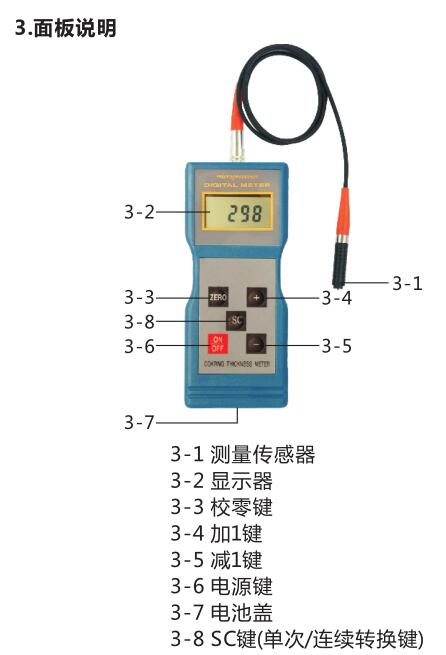
4.1 Press the power button 3-6 lightly, after the whole machine is powered on, the instrument will automatically enter the measurement state.
注意:本仪器在打开电源时,自动进行自检。为确保测量的准确性,打开电源时的前后2秒钟,一定不要将测量探头放在铁基上,也不要将探头靠近铁基或其他磁性材料。
4.2 在确认校准正确的前提下, 就可开始测量。若对以前的校准有所怀疑的话,应再进行一次校准。校准的具体方法详见仪器校准部分。仪器一旦校准,校准结果将自动存贮在仪器中,下次开机测量时,可不必再次进行校准,除非对测量的准确性有怀疑。
4.3 捏住探头前部约15mm处,将测量传感器压紧到被测涂层上, 显示器上的值即为待测涂层的测量值。
4.4 要进行下次测量, 需要将测量传感器提起到10厘米以上, 然后再重复4.3。
4.5 如有必要,测量值可通过加1键或减1键来修正。南北潮提示您:按加1键或减1键时,测量探头一定要远离铁基或其他被测体。
5. 仪器校准
5.1 校零
5.1.1 将测量探头压在铁基上(或不带涂层的测量体上),再轻按一下校零键ZERO进行校零。南北潮提示您:在按ZERO键时,测量 探头一定要压紧在铁基上,而且不要晃动。若按校零键ZERO时,探头未压紧在零板(基块)上,则是显示器清零,而不是校零。
5.1.2 将测量探头提起1厘米以上,然后再将探头压放铁基上(或不带涂层的测量体上),观察铁基上的测量值,若测量值在0附近,说明校零成功,否则,应重新校零。
5.2 校满度
5.2.1 According to要测量的涂层厚度,选择适当的标 准膜片,进行满度校准。
5.2.2 先将标准膜片放在铁基上(或不带涂层的测量体上)。
5.2.3 再将测量探头压在标准膜片上,测量值就显示在显示器上,若测量值与标准膜片不同,测量值可通过加1键或减1键来修正。修正时, 测量探头应远离铁基或测量体至少2厘米。
5.2.4 为保证校满度的准确性,可通过多次测量同一标准膜片上同一点来验证。
6. 测量注意事项
6.1 为了减少测量体材质对测量精度的影响, 建议采用不带涂层的测量体或与测量体材质相同的标准试块作为校准用基准块。
6.2 测量完毕,轻按一下电源键,关断整机电 源。并在测量头的触头及基准块上涂少许油脂以防生锈。
6.3 本仪器有自动关机功能如不进行任何操作大约一分钟后就自动关机。
6.4 仪器应防止剧烈振动、撞击。使用后应擦净仪器表面油污放入仪器箱内妥善保存。
6.5 严禁敲击或碰撞探头以免影响探头性能;严禁捏住探头尾部测量。
7.更换电池
7.1当电池电压约5V时,显示器上将出现电池 符号,需要更换电池。
7.2 打开电池盖,取出电池。
7.3 Install the battery correctly according to the label on the battery box.
7.4 If the meter will not be used for a long time, please take out the battery to prevent the battery from rot and damage the meter. Install the batteries correctly as indicated on the label on the battery compartment .