measurement procedure
4.1 Sample
For the minimum thickness of the specimen, Shore A type requires 5 mm, and Shore D type requires 3 mm. If the sample is thin, it is allowed to use two layers, but no more than three layers can be stacked to obtain the required thickness, and good contact between layers should be ensured. The distance between the test point and the edge should be at least 12mm, and the distance between each measurement point should not be less than 6mm. Moreover, the surface of the sample should be smooth, and the thickness should be uniform, smooth, free of air bubbles, mechanical damage and impurities.
4.2 Press the multi-function button lightly. Turn on the power of the whole machine.
4.3 Maximum value function
Press the "MAX" key to hold the maximum value lightly, and "MAX" will appear on the display. At this time, the measurement result is displayed as the maximum value in the current measurement process. If you want to cancel this function, just press the "MAX" key again, and then " MAX" disappears.
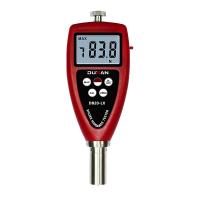
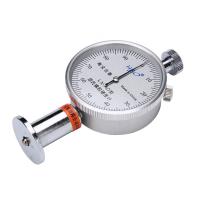
①Hold the Shore Hardness Tester in your hand, let the indenter be perpendicular to the sample to be tested, then press the indenter to the sample as quickly as possible, and use sufficient force to make the end face of the indenter tightly contact with the sample for 1 to 2 seconds , so that the maximum value will be automatically displayed on the LCD.
②To carry out the next measurement, just press the "ZERO" button lightly, and then repeat 4.4. On the other hand, it is also possible to press the 'MAX' key to clear before each next measurement ("MAX" will also disappear), and then press the "MAX" key again to measure (repeat 4.4).
4.4 If it is not for measuring the maximum value, it is not necessary to press the "MAX" key to make the maximum value indicator "MAX" appear on the display. In this case, the number on the display is the instantaneous value. When measuring, keep the Hardness Tester still and read at the required time interval to obtain the required value. Typically, the reading interval should be less than 1 second.
4.5 Average value function and measurement times setting Press the "N/AVE" key, the screen will display the set times
indicator and number of measurements. Continue to press the "N/AVE key" to set the number of measurements, the maximum number of measurements is
9. After the number of times is set, press the "ZERO" key or "MAX" key to return to the measurement state. After each test of the Hardness Tester, the hardness value and the number of tests of this test will be displayed at the same time. When the set number of tests is reached, the hardness value of this time will be displayed first, then the average value will be displayed, and the average value symbol "AVE" will be displayed at the same time. There are two beeps. Users can also record several times of measurement data as needed, and then manually calculate the arithmetic mean. After setting the number of measurements, you can press the "MAX" key and "ZERO" key to return to the measurement state, or the machine will automatically enter the test state after a few seconds. There are two types of average value calculation: maximum value and random value. When calculating the maximum value and average value, the screen should display "MAX" and "N" at the same time. To perform the next measurement, just press the "ZERO" button, and then Repeat ①~②.
Instrument zeroing
5.1 Zero Calibration
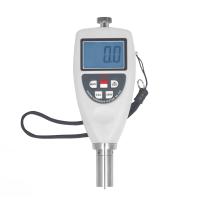
Hold the Hardness Tester vertically and let the indenter hang in the air. At this time, the reading on the display should be zero, otherwise, zero calibration should be carried out. That is, press the "ZERO" button lightly, so that the reading on the display is 0.
5.2 Full scale calibration
Make the pressure foot of the Hardness Tester fully contact with the glass plate. At this time, the extension length of the indenter is zero, and the hardness value on the display should be between 99.7 and 101, indicating that the full scale value is correct, otherwise press the "CAL" key That's it.
battery replacement
6.1 When the battery symbol will appear on the display, the battery needs to be replaced. Open the battery cover and take out the battery.
6.2 Install the battery correctly according to the label on the battery box.
6.3 If the meter will not be used for a long time, please take out the battery to prevent the battery from rot and damage the meter.
Precautions
When measuring, when the reading of the D-type Hardness Tester is less than 10HD, the Shore A-type Hardness Tester should be used for measurement. Similarly, when the reading of the A-type Hardness Tester is greater than 90HA, the Shore D-type Hardness Tester should be used for measurement.
computer connection
8.1 According to the label on the battery box, the optional "USB data line output", "RS232C data line output" and "Bluetooth™ data output" can be used to communicate with the PC computer to realize data collection, processing, analysis and Printing and other functions. Please refer to the online instructions for specific operations. Install the battery correctly.