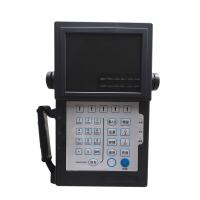
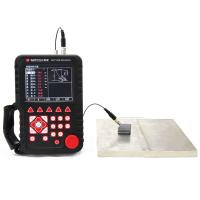
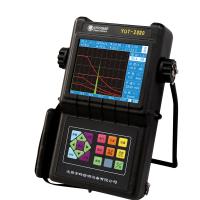
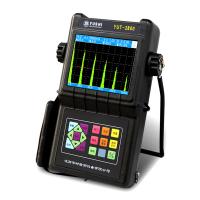
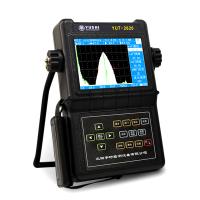
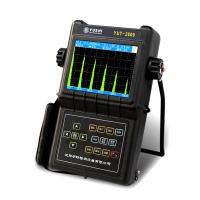
The sound velocity and probe zero point calibration in ultrasonic testing is because the calculation of the parameters displayed in the status line is related to the sound velocity and probe zero point, so please be sure to calibrate before flaw detection; the sound path calibration is to make the waveform within the appropriate sound path range displayed on the screen , in order to better judge and evaluate defects.
1. Straight probe calibration (single crystal probe)
Based on the known conditions of sound velocity and probe zero point, determine the calibration procedure. If the sound velocity is unknown, the sound velocity calibration should be performed professionally; if the sound velocity is known, the sound velocity calibration should be skipped, and the zero point calibration of the probe should be performed after adjusting the sound velocity to the known sound velocity.
1. Known material sound velocity calibration
step:
(1) The material sound velocity is set to a known material sound velocity,
(2) Couple the probe to the calibration test block,
(3) Set the gate logic to single gate mode, that is, set it as the incoming wave alarm or wave loss alarm logic, and set the gate to cover the primary echo. At this time, the sound path measurement is the sound path at the primary echo.
(4) Adjust the probe zero point so that the sound path measurement value (S) in the status line is the same as the known thickness of the test block, and the probe zero point obtained at this time is the exact probe zero point of the probe.
2. Calibration of unknown material sound velocity
step:
(1) Initially set an approximate sound velocity value;
(2) Adjust gate logic to double gate mode;
(3) Coupling the probe to a test block of the same thickness as the material to be tested;
(4) Move the starting point of gate A to the primary echo and intersect with it, adjust the height of gate A to be lower than the maximum amplitude of the primary echo to an appropriate position, and gate A cannot intersect with the secondary echo;
(5) Move the starting point of gate B to the secondary echo and intersect with it, adjust the height of gate B to be lower than the highest amplitude of the secondary echo to an appropriate position, gate B cannot intersect with the primary echo;
(6) Adjust the sound velocity so that the sound path measurement value (S) displayed on the status line is the same as the actual thickness of the test block. At this time, the obtained sound velocity is the accurate sound velocity value under this flaw detection condition.
(7) Set the gate logic to the single gate mode, that is, set it to the incoming wave alarm or wave loss alarm logic, and the sound path measurement at this time is the sound path at the primary echo;
(8) Adjust the probe zero point so that the sound path measurement value (S) in the status line is the same as the known thickness of the test block, and the probe zero point obtained at this time is the exact probe zero point of the probe.
The sound velocity of the material is unknown, set the sound velocity of the approaching material to 5920m/s, set the gate logic to double gate mode, and set the zero point of the probe to 0; couple the probe to the 50mm calibration test block, and adjust the gate A to the same as the primary return At the position where the wave intersects, adjust the B gate to the position where it intersects with the secondary echo;
2. Dual-element probe calibration
Increase the sound velocity value until the sound path between the primary and secondary echoes shows a value of 50mm, and now the accurate sound velocity of the material is 6024m/s; then set the gate to single gate mode, and measure the sound path at the primary echo. Continuously adjust the zero point of the probe until the sound path value measured at the first echo is 50mm, and now the zero point of the probe is measured as 0.125us.
Calibration steps:
(1) Set the dual-probe state in the transceiver group;
(2) According to the current test task and the selected probe, set the sound path and function items of the transceiver group;
(3) Couple the probe to the calibration test block, adjust the zero point of the probe in the basic group until the calibration echo is close to the required position, and the secondary echo is also within the display range;
(4) Adjust the gain until the echo with the largest amplitude is close to the height of the full screen;
(5) Open the double gates in the gate group;
(6) Select the frontier measurement method in the setting function group;
(7) Move the starting point of gate A to the primary echo and intersect with it, gate A cannot intersect with the secondary echo;
(8) Move the starting point of gate B to the secondary echo and intersect with it, gate B cannot intersect with the primary echo;
(9) Adjust the gate height so that it is at the same position of the two calibration echo fronts;
(10) Then change the sound velocity until the thickness value of the calibration test block is displayed;
(11) Set the gate logic to the single gate mode, that is, set it to the incoming wave alarm or the wave loss alarm logic. At this time, the sound path measurement is the sound path at the primary echo;
(12) Adjust the zero point of the probe so that the measured value of the sound path in the status line is the same as the known thickness of the test block.
3. Angle probe calibration
1. Calibrate the incident point (front of the probe): use IIW test block (also known as Dutch test block) or CSK-IA test block to measure the zero point of the inclinometer probe, preferably adjust the sound velocity of the instrument to 3230m/s, and the display range to 150mm, and then start For the test, the user puts the probe on the test block and moves it as shown in the figure, so that the echo of the reflector on the R100mm arc surface reaches the highest. Use a ruler to measure the distance between the front end of the probe and the center of the R100mm arc of the test block. This value is the value The leading edge value of the probe, the R100mm arc center corresponding to the position on the probe is the probe incident point. Angle probe calibration usually requires the following steps: 1. Calibrate the incident point (front edge of the probe); 2. Calibrate the probe angle (K value); 3. Calibrate the sound velocity of the material; 4. Calibrate the zero point of the probe.
2. Calibrate the probe angle (K value): The probe calibrated with the angle value can be calibrated with the IIW test block. If the probe is calibrated with the K value, it can be calibrated with the CSK-IA test block. There are scales for angle or K value on these two test blocks, choose the appropriate scale according to the nominal value of the probe (as shown in the figure on the right, the 60-76 degree probe can be calibrated on the upper side of the IIW test block, and the 74-degree probe can be calibrated on the lower side. 80-degree probe, the upper side of the CSK-IA test block can calibrate K2.0, K2.5, K3.0 probes, and the lower side can calibrate K1.0, K1.5 probes. Please press the calibration value on the test block Select the appropriate calibration test block and calibration method). Place the probe as shown in the figure, and move it left and right to make the echo of the reflector reach the highest. At this time, the scale corresponding to the incident point is the angle or K value of the probe.
3. To calibrate the sound velocity of the material, find the highest reflected wave of R100mm as described in 1. Adjust the display range so that the secondary echo of the arc surface can be displayed on the screen. Gate B intersects with the secondary echo, adjust the sound velocity value so that the sound path measurement value (S) in the status line is 100, and the sound velocity value obtained at this time is the actual sound velocity value of the material.
4. Calibrate the zero point of the probe to keep the above measurement status, change the gate mode to positive or negative, adjust the zero point of the probe so that the sound path measurement value (S) in the status line is 100 again, and the zero point value of the probe obtained at this time is the probe’s zero point value.
There are many calibration methods for angle probes, and they are not limited to calibration with standard test blocks. They can also be calibrated with small holes of known depth. Theoretically, the smaller the reference reflector, the higher the calibration accuracy, but the difficulty of calibration Also increase accordingly. When calibrating with a small hole, the angle can be calibrated by measuring the depth and horizontal position of the small hole, calculating the slope, and using the measured depth or horizontal position value to calibrate the sound velocity and the zero point of the probe.

