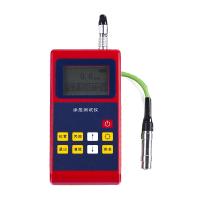
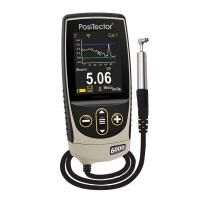
Gain a working knowledge of test methods relevant to coating thickness measurement and instrumentation for common and complex applications.

If the car's doors are likely to be steel, and the hood is likely to be aluminum, then a dual purpose magnetic induction and eddy current meter and probe would be beneficial. Source: Fischer Technologies
Improving quality while reducing costs is a never-ending goal shared by small one-man companies as well as large organizations. Since virtually everything we surround ourselves with is coated, enforcing tolerances using coating thickness measurement technology will help the bottom line. This is true for in-house plating and painting applications, companies conducting incoming inspection of goods from suppliers, and third-party inspection companies and consultants. Costs can also be reduced by simplifying the time and effort required to evaluate measurement and adjustment processes. Less time managing means more time fine-tuning.
To improve quality and reduce costs, it is important to understand the test methods involved in coating thickness measurement and the instruments available for common and complex applications. IMPORTANT: Operators should be aware that just because a test method measures coatings, it may not necessarily be a good test method.
We will discuss the testing methods available and point out some key factors operators should consider before selecting the appropriate instrument. Recognizable applications such as household fixtures, automotive parts, and fasteners will be used as examples. We'll also discuss ways to simplify measurement results and help ensure data integrity.

Various testing methods are available for the same task. One such example is measuring galvanization on steel. Source: Fischer Technologies
Test Methods
Common and complex plating and other coating thickness applications are typically measured using one of the following test methods: X-ray fluorescence, Coulomb charge, beta backscatter, magnetic induction, amplitude eddy current, and phase sensitive eddy current.
Energy-dispersive X-ray fluorescence analysis (ED-XRFA) is a method for measuring coating thickness and analyzing materials. It can be used to qualitatively and quantitatively determine the elemental composition of material samples, as well as to measure coatings and coating systems. It works losslessly and without contact. Measurements can be performed quickly, often without extensive sample preparation.
Using ED-XRFA, the thickness and chemical composition of homogeneous materials and coatings can be measured. Traces of hazardous substances can be detected even in extensive samples. Furthermore, X-ray fluorescence analysis is a very clean method because no chemicals are used.

Many times it is necessary to review the hard copy files of the reports. Importing, copying and pasting measurements into inspection forms creates an administrative burden and can lead to errors. Direct import of measurement results into any report template will help reduce the possibility of errors. Source: Fischer Technologies
Chrome/nickel/copper coating over plastic
One of the thousands of examples where X-ray fluorescence will be the test method of choice is the task of measuring chrome, nickel and copper coatings applied to shower heads. In most cases, the substrate is plastic, thus eliminating the ability of most other test methods to perform the measurement. In addition, X-ray fluorescence is capable of measuring each individual layer of decorative chrome to a range of 0-5 microns or less, nickel plating 5-10 microns, and copper layers can be 30 microns or greater.
As mentioned earlier, X-ray fluorescence is non-destructive, offering major advantages. Care should be taken to align the part with the Detector and to properly focus the video on the measurement point. The estimated or target thickness of copper should also be considered when determining whether X-ray fluorescence is the more appropriate test method. All things considered, X-ray fluorescence is well suited for this application, but it is not a test method capable of measuring chromium/nickel/copper coatings on plastics.
The coulometric method measures almost all metallic coatings, including multiple coatings on any substrate material such as plastic. However, this is a destructive method because the coating is continuously removed over the measurement area and is determined by the time required for removal.
X-ray fluorescence may still be the preferred option because it is fast and nondestructive. However, operators should consider the size of the part and its suitability for placement inside the X-ray system's chamber—the X-ray chamber for large parts can be modified—and if other alignment or focusing issues may arise.
The thickness of the copper may also determine which method is better. For example, if copper is as thick as 50 microns, coulometric methods can be a great complement to XRF methods.
The beta backscatter method allows the thickness of organic and metallic coatings to be measured on a variety of substrates. Even soft coatings, such as oil and lubricating films, can be determined with an appropriate probe configuration. Those companies with thickness measurement applications that include organic and metallic coatings may choose beta backscatter over other methods because of the wide range of coating/substrate combinations that this method can measure. Additionally, beta backscattering is non-destructive.
Magnetic induction and eddy current testing methods represent some of the most recognizable coating thickness instruments available. Magnetic induction instruments are used to measure the thickness of non-ferromagnetic metallic coatings such as chromium, copper, zinc, paint and powder coatings. Amplitude eddy current measurement of paint, powder coating and anodized coatings on aluminium, stainless steel, copper and brass.
Depending on the capabilities of the particular instrument, there are dual purpose magnetic induction and eddy current meters and probes. When these capabilities are advantageous, for example the doors of a car might be steel and the hood of a car might be aluminum. The importance of the equipment's ability to automatically detect the substrate material and apply the appropriate test method cannot be overemphasized. It reduces time and reduces the possibility of erroneous measurements, thereby reducing time and cost.

Common and complex plating and other coating thickness applications are typically measured using one of the following test methods: X-ray fluorescence, Coulomb charge, beta backscatter, magnetic induction, amplitude eddy current, and phase sensitive eddy current.
standard
ASTM D7091 Standard Practice for Nondestructive Measurement of Dry Film Thickness of Nonmagnetic Coatings Applied to Ferrous Metals and Nonmagnetic, Nonconductive Coatings Applied to Ferrous Metals are resources for those with many of the above applications. Other test methods have their own ASTM and ISO standards.
It is important for the user to understand that not all gages and probes are suitable for all applications. Operators should check specifications such as correctness as determined using calibration standards of known thickness. Accuracy can be expressed as an absolute value or a percentage. Another criterion for a particular system is the precision or repeatability standard deviation of X number of individual readings.
Other factors include the performance of the gage or probe when measuring the diameter of a concave or convex surface, the minimum measurement area required, the performance of the gage or probe relative to the distance from the probe tip to the edge of the part being measured, and, as it relates to the substrate thickness, the thickness gage and probe performance.
Other criteria to consider during the selection process are the shape of the part that needs to be measured, the type or types of substrates used for the coating, and whether the user only needs a point Detector or an instrument that provides memory and download capabilities.
Galvanized steel
Another example of multiple test methods that can be used for the same task is the measurement of galvanization on steel.
Magnetic induction will measure zinc on steel; however, the spot size and measurement area may be too small to obtain truly meaningful results. Again, X-ray fluorescence will measure these parts, but cost and portability of handheld instruments may be a factor in the decision. In this case, the phase-sensitive eddy current measurement test method (ISO 21968) should be used.
The phase-sensitive eddy current method can measure metallic coatings on any substrate. The method is also advantageous for this example because it is capable of measuring small objects such as nuts, bolts and screws.
In other words, the shape of the part has little effect on the reading results. Likewise, zinc or copper measurements on steel on rough surfaces can be measured. So, for this example, using this technique yields more realistic and reproducible results than other traditional testing methods.
Inspection Plan and Report Templates
Simplifying the measurement and documentation process is often cumbersome. It is very important to ensure the correct number of reads and the correct order. When done correctly, selectivity analysis of different parts or areas on each part can be evaluated. For example, the injection patterns on each car door, hood and trunk can be viewed individually. The spray pattern can then be adjusted. Making quick and meaningful assessments and adjustments to your process has a direct impact on the bottom line.
Many times it is necessary to review the hard copy files of the reports. Importing, copying and pasting measurements into inspection forms creates an administrative burden and can lead to errors. A value of 5.3 million could be incorrectly typed as 3.5 million, causing the statistical results of the data to be inadvertently skewed. Direct import of measurement results into any report template will help reduce the possibility of errors.
There are various test methods available for coating thickness measurement requirements. It is necessary to use the appropriate test method for the specific application. Therefore, performance capabilities such as gage and probe authenticity should be considered, especially considering factors that affect readings.
In addition to the capabilities of gages and test methods, operators are encouraged to take advantage of technological developments that greatly improve efficiency through hardware and software capabilities. These developments reduce the possibility of error. It also provides a selective analysis of the parts or areas on each part to be evaluated.
Align processes with faster and more meaningful data through paperless inspections and report templates. These adjustments will result in improved quality and reduced costs.


