Instructions
1 Key definition: There are three keys on this machine, ⊙ key, ↑ key, ↓ key (order from left to right)
The ⊙ key is the power switch and the confirmation function, the ↑ key is the shift key, and the ↓ key is used for page turning and digital addition and subtraction.
2 boot method
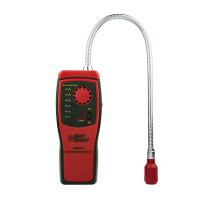
Press and hold the ⊙ key for 5 seconds, and it will automatically turn on after 5 seconds. After turning on, the screens displayed in sequence are: gas name, maximum range, unit and power. After 2 seconds, the preheating countdown will start to display for 120 seconds. If you don’t want to Wait, press the ⊙ key to directly enter the normal measurement interface, the gas type is displayed in the lower left corner, and the vibration motor, buzzer, and indicator light all alarm once to indicate normal startup. If the battery is insufficient or the sensor cannot be detected, the alarm will continue. , at this time, if you press the ⊙ key to silence the sound, the sound, vibration motor, and indicator light will stop working, but the word "Alarm" is still flashing on the screen. If the battery is insufficient, the battery icon will flash. If the sensor cannot be detected , and the word "FAULT" is displayed , press the ⊙ key again at this time, the sound, vibration motor and indicator light will continue to work. If the instrument is a pump suction type, the pump icon will be , and it is always rotating, if there is no pump, the icon will not be displayed. The picture on the right is the screen displayed after normal startup (take CO as an example)


Menu Settings
Password setting: press ⊙ key, ↑ key, ↓ key in sequence, and it will be valid only if it is completed within 2 seconds. Menu definition: Z, S, FS, AL, AH, CER, DEFA, OUT
1. Zero calibration Z
If the zero point drift of the sensor is too large, zero point calibration is required, as shown in Figure 1

The zero point setting menu defaults to "N", as shown in Figure 2, and it needs to be confirmed whether to operate.

If it is confirmed to calibrate the zero point, in the zero point setting menu, press the ↓ key to modify it to "Y", as shown in Figure 3

Press the ⊙ key to confirm the zero point calibration, if the calibration is successful, the word "YES" will appear in the lower left corner, as shown in Figure 4

If the calibration is unsuccessful, the word "NO" will appear in the lower left corner, as shown in Figure 5

6.2. Target point calibration S
If the sensor has been used for a long time, sensitivity correction is required , use the ↓ key to select the " S " option, and press the ⊙ key to modify it, as shown in Figure 6

The target point concentration setting menu defaults to "N", as shown in Figure 7, and it needs to be confirmed whether to operate.

If it is confirmed that the target point needs to be calibrated, in the target point setting menu, press the ↓ key to modify it to "Y", as shown in Figure 8

Press the ⊙ key to confirm the calibration of the target point. If the calibration is successful, the word "YES" will appear in the lower left corner, and the value will change to the value set in the menu "CER", as shown in Figure 9

If the calibration is unsuccessful, the word "NO" will appear in the lower left corner, as shown in Figure 10

Full scale setting FS
As shown in Figure 11, use the ↓ key to select the "FS" option, press the ⊙ key to modify, and the ↑ key to shift, and then press the ⊙ key to save after modification.

Level 1 alarm point setting AL
As shown in Figure 12, use the ↓ key to select the "AL" option, press the ⊙ key to modify, and the ↑ key to shift, and then press the ⊙ key to save.

Secondary alarm point setting AH
As shown in Figure 13, use the ↓ key to select the "AH" option, press the ⊙ key to modify, and the ↑ key to shift, and then press the ⊙ key to save after modification.

Target point concentration setting CER
As shown in Figure 14, use the ↓ key to select the "CER" option, press the ⊙ key to modify, the ↑ key to shift, and then press the ⊙ key to save.

Restore factory default DEFA
As shown in Figure 15, use the ↓ key to select the "DEFA" option, press the ⊙ key to modify, and you need to confirm whether to operate.

Exit menu settings OUT
As shown in Figure 17, use the ↓ key to select the "OUT" option, press the ⊙ key to set and exit

equipment maintenance
In normal use of the Detector, the effective service life of the sensor is 24-36 months. During the effective service life, the sensor should be regularly calibrated and checked every 6 months or 1 year to ensure accurate and effective gas monitoring. Outdated and faulty sensors need to be replaced.
sensor replacement
After the sensor fails, please return the instrument to the factory for replacement.
Sensor Calibration
See 6.2 description for details. Do not operate when the standard gas is not ready. In case of misoperation, you can refer to the description in 6.7 to restore the factory default settings. Refer to the description in 6.2 before calibration, set the concentration value to be calibrated in advance, and then pass the standard gas, the flow rate of the standard gas is controlled at 300 ml/min
Precautions
l It is strictly forbidden to charge or disassemble the instrument on site
l It is strictly forbidden to replace the sensor with power on
l The calibration check of the Detector should be carried out regularly
l Sensors that have exceeded the effective service life and have faults should be replaced in time
l Avoid impacting the sensor with a gas higher than the measurement range, which may damage the sensor, and man-made damage is not covered by the warranty.