When the button is pressed , the PosiTest AT-M starts up and displays a dash . To preserve battery life, the instrument powers down after 5 minutes of inactivity.
quick guide
Fully open pressure relief valve (turn counterclockwise)
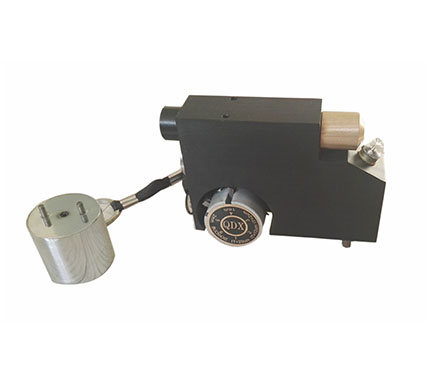
Attach the actuator to the cart
Close the pressure reducing valve completely (turn clockwise)
zero - push button

Pump pressure into the system until the cart pulls
1. Make sure the pressure relief valve is fully open (turn counterclockwise).

2. Push the actuator handle all the way down into the actuator assembly. Place the actuator on the cart head and attach the quick coupler to the cart by passing through the hole in the actuator and lifting the coupling. Release the quick coupler when the cart head is fully engaged.
3. Fully close the relief valve on the pump (turn clockwise).

 Press the button to confirm and adjust the cart size as required . Press
  the button to select pressure units . The instrument maintains these settings even when the button is pressed.
4. Zero the instrument before pressing the button . This prepares the instrument for testing by clearing the display and zeroing the instrument.
5. Slowly prime the pump until the displayed reading is close to the priming pressure. Activation pressure is the point at which the instrument begins to calculate and display the pull rate. This is also the pressure to enable the reading storage capability.
The starting pressure for various trolley diameters is: For best results, before exceeding the starting pressure, return the pump handle to the fully upright position and complete one continuous stroke with the desired pull until the actuator pulls the trolley from the layer separated.

6. Open the pressure relief valve and remove the trolley from the actuator assembly.
7. Press Push button to store readings into memory (memory can store up to 200 times). Press again to view stored readings. Stored measurements can be accessed using our PosiSoft 3.0 desktop software (see Accessing Stored Measurement Data ).
To delete all stored test results from memory, press and hold the button, then press the button. The icon will disappear from the display.