Prepare the instrument
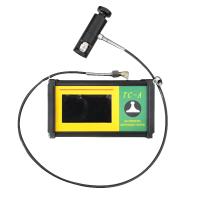
1. Push the actuator handle all the way down into the actuator assembly. Place the actuator on the cart head and attach the quick coupler to the cart by passing through the hole in the actuator and lifting the coupling. Release the quick coupler when the cart head is fully engaged.
2.  If necessary, press the button to start the instrument.
3. Verify that pull parameters are set to prioritize cart size, pull rate, pull limit and hold time. Change as necessary.
Note: If you need to record test results, you need to open the memory batch before testing. Select New Batch from the Memory menu .
Execute the test
4. Press the button to start the test.
The instrument starts to apply pressure (start-up phase) and a green animated arrow (up) appears on the display. When the starting pressure is reached, the LCD starts showing the pressure on the pull graph. See Step 5 for perfusion pressure .
Pressure build-up stops when the cart is pulled from the surface, the pull limit is reached, or
 a button is pressed. The maximum pressure value will flash on the display with a red animated arrow (down) as the pump backs off the actuator.
 a button is pressed. The maximum pressure value will flash on the display with a red animated arrow (down) as the pump backs off the actuator.
CAUTION: To avoid injury, keep fingers away from the quick coupler and actuator assembly until the pull test is complete and the actuator is fully retracted. The pull test can be aborted at any time by pressing the stop button.
NOTE: When coating strength exceeds specified requirements, it is useful to set a tensile limit or to stop the test before fracture occurs.
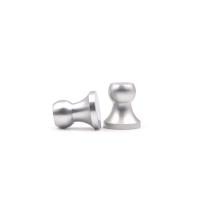
5. Remove the dolly from the actuator assembly.
6. Check the cart and surface to analyze the results .
record results
If memory batching is turned on, the maximum pressure results are automatically stored in memory . Pass/fail, pull parameters, date and time are also logged.
The nature of the break (tack, adhesive, glue), batch and reading can also be recorded. Swipe the touchscreen horizontally or use the Left/Right buttons to navigate to the appropriate view and select Edit. See memory view .
All stored measurement data can be accessed using PosiSoft solutions (see Accessing stored measurement data ).
memory view (carousel)
When memory batching is turned on , a carousel appears at the top of the display. Views are represented by dots, and a solid dot represents the current view.
Swipe horizontally to navigate between views or vertically to move between batch readings. Alternatively, the directional buttons can be used for navigation.
There are six views:

Record Fracture Analysis
Viscous and cohesive fracture visual analysis can be recorded using the PosiTest AT-A's keypad or touchscreen display. Alternatively, the PosiTector App can be used to report information after the test.
Fractures were estimated visually and recorded as a percentage of each fracture. The two layer examples below illustrate cohesive fractures in Coatings 1 and 2 (50% each estimated visually). The recorded results are included in the report.

The PosiTest AT-A can record fracture information for up to five layers. Viscous and viscous fractures are identified as follows:

Select Edit to set the number of layers and bonding/adhesive break details. Use |  |

 the buttons to make adjustments.
example:

100% cohesive rupture at D/E coating interface (layer 3/layer 4)

70% cohesive failure in layer 1; 30% stickiness in layer 2