Operation overview
The PosiTector SPG starts the phase when the center navigation key is pressed. To preserve battery life, it powers down after about 5 minutes of inactivity. All settings are preserved.
Remove the protective plastic cover from the probe.
Press the center navigation button to launch Gage.

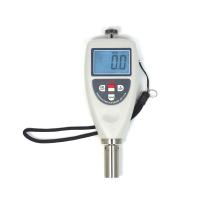
Place the included glass zero plate on a stable flat surface. Measuring on the plate with PosiTector SPG. If the average of several readings is greater than ±5 µm (0.2 mil), the instrument is zeroed.
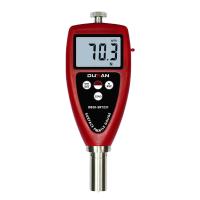
Place the probe FLAT on the surface to be measured so that the probe tip reaches the bottom of the contour valley. Steady. The Gage will be worn twice and display the measurements.
Lift the probe from the surface between measurements.
NOTE: To preserve battery life, the PosiTector body and PC probe power down after approximately 5 minutes of inactivity. All settings are preserved.
prove
All probes include a calibration certificate. For organizations with recertification requirements, instruments may be returned for calibration on a regular basis. DeFelsko recommends customers establish calibration intervals based on their own experience and work environment. Based on our product knowledge, data and customer feedback, a one-year calibration interval from date of calibration, date of purchase or date of receipt is a typical starting point. DeFelsko Corporation provides written calibration procedures free of charge.
Why is measurement important?
Steel is often blast cleaned or roughened before painting. The peak-to-valley height of the resulting surface profile is an important factor in the performance of the applied protective coating.
Thin profiles may reduce coating bond strength (adhesion). Too high and the peaks may not get enough coverage and may rust prematurely. If the profile is too tall, more coats may be required, which are expensive.
For these reasons, the surface profile should be measured prior to coating application to ensure that it complies with contract specifications.
probe

The PosiTector SPG consists of a body and probe. See information to find your body and probe type. For more probe information, visit www.defelsko.com/SPG. To disconnect the probe from the body, power off the instrument and pull the plastic probe connector horizontally (in the direction of the arrow) away from the body. Reverse these steps to attach new probes.
When powered on, PosiTector will automatically determine the type of probe connected and perform a self-test.
Probe tip angles are supplied at 60° to meet most testing standards including ASTM D 4417 B. Optional 30° angled tips with replacement tooling are available for special applications or to comply with Australian Standard AS 3894.5.
Purchases of 60° or 30° angled tips include replacement tools. Insert both legs of the replacement tool into the probe tip and turn counterclockwise to remove the tip. Insert new tip and tighten clockwise. Don't over tighten. Since the factory zero setting may not always be accurate after changing the probe tip, the gage should be checked on the included glass plate and zeroed if necessary.
The PosiTector body accepts all 200, 6000, SPG, RTR, DPM and UTG probes.

menu operation
Instrument functions are controlled by menus. To access the menu, turn on the instrument and press the center navigation button.
Below is a sample menu for the PosiTector SPG premium model:

navigation buttons

Calibration and Accuracy Verification
calibration
Instrument calibration is usually done by the manufacturer or a qualified laboratory. All probes include a certificate of calibration showing traceability to national standards. For organizations with recertification requirements, periodic returns to PosiTector SPG are available for calibration.
DeFelsko recommends that our customers establish Gage calibration intervals based on their own experience and work environment. Based on our product knowledge, data and customer feedback, a one-year calibration interval from date of calibration, date of purchase or date of receipt is a typical starting point.
Written calibration procedures are freely available online.
Verify accuracy
Verify instrument accuracy using the included metal spacer and glass zero plate.
Place the board on a stable, flat surface. Take several measurements. If the average value is greater than ±5 μm (0.2 mil), the instrument is zeroed.
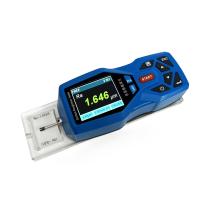
Next, place the metal spacer on the glass plate and measure to make sure the probe touches the glass plate in the area between the "legs" of the spacer. The average of several measurements should be within the combined tolerance of the gasket and gage (±10%). For example, measuring a 75µm (3 mil) gasket should yield a value between 67.5µm (2.7 mil) and 82.5µm (3.3 mil).
To prevent measurements with incorrectly adjusted gages, verify the gages at the beginning and end of each work shift. During a work shift, if the Gage is dropped or suspected to be giving false readings, it should be re-verified for accuracy.
In the event of physical damage, wear, high use, or after established calibration intervals, the strain gage should be returned to the manufacturer for repair or calibration.
Zeroing the instrument
zero
The PosiTector SPG has only one zero adjustment point. The zero point can be set using one of two methods. Both methods can be found under the Zero menu option.
glass plate zero
Setting the instrument to zero on the glass plate is the preferred zero adjustment method:
Select Zero from the menu.
按(+)按钮选择用于获得平均值的读数数量,通常为3。
反复测量玻璃板。在最后一次测量之后,量具将计算出一个零,表示所有零读数的平均值。
零工厂
如果没有玻璃板或合适的光滑硬表面,可以恢复出厂零点设置:
从菜单中选择Zero。
按向下按钮选择“重置”,然后按中心导航按钮。工厂校准图标将出现在LCD上。


注意:
- 在RESET期间恢复出厂零点设置。
- 出厂零点设置可能并不总是精确,特别是在更换探头尖端后。为获得很好的精度,应在附带的玻璃板上将量具归零。
设置菜单
重启
复位(软复位)恢复出厂设置并使仪器返回已知状态。发生以下情况:
- 删除所有批次,存储的测量值,图像和批次名称。
- 零点调整返回到出厂设置。由于这可能并不总是准确的零,因此应在玻璃板上检查应变计。
-Menu设置返回到以下内容:
Memory = OFF
Hi Lo Alarm = OFF
统计模式 = OFF
蓝牙 = OFF
通过关闭仪器,等待几秒钟,然后同时按住中央和(+)按钮直到出现重置符号,执行更有效的硬重置。这使仪器返回已知的“开箱即用”状态。它执行与菜单重置相同的功能,并添加:

- 蓝牙配对信息被清除。
- 菜单设置返回到以下内容:
单位 =微米
语言 =英语
翻转显示 =正常
电池类型 =碱性
自动同步 =关闭
背光 =正常
白色黑色 =关闭
蓝牙流媒体 =关闭
USB驱动器 =开启
注意:
- 在重置期间,使量具远离金属。
- 日期和时间不受任何重置的影响。
信息
显示型号和序列号,探头类型和序列号,PosiSoft.net注册密钥,用于存储读数的剩余存储量,日期和时间以及软件包。
出于安全考虑,需要注册密钥才能将仪器添加到您的免费PosiSoft.net帐户。
翻转显示
此选项会使显示屏上下颠倒。称心的使用开销,使得显示器方便地指向操作员。
白底黑
(限高级型号)
在黑色背景上将LCD显示屏反转为白色,以便在某些环境中提供更好的可读性。
逆光
(限高级型号)
选择显示亮度(太阳,正常或夜晚)。在没有活动一段时间后,所有设置都会略微调暗以延长电池寿命。按向下按钮可使显示屏变亮。
设置时钟
所有批次在创建时都带有日期戳,并且所有读数在存储到内存时都带有时间戳(24小时格式)。因此,使用此菜单选项保持日期和时间是新的的非常重要。使用向上和向下按钮进行滚动,使用( - )和(+)按钮调整值。仪器的数据和时间也可以在Info中查看。
电池类型
从“碱性”,“锂”或“镍氢”(镍氢可充电)中选择仪器中使用的电池类型。如果选择了NiMH,仪器将在通过USB连接到PC或可选的AC充电器时对电池进行涓流充电。电池状态指示器图标针对所选电池类型进行校准。如果选择了错误的电池类型,则不会发生损坏。
注意: DeFelsko建议使用eneloop(NiMH)可充电电池。
单位
将显示从英寸转换为公制,反之亦然。存储器中的存储测量值不会被转换。
注意:切换单元将关闭统计,HiLo警报并关闭内存。
语言
将显示和打印的单词转换为所选语言。
统计
统计
 选择后,
选择后, 显示屏上将显示图标和统计摘要。

按( - )按钮删除最后一次测量。按(+)清除统计信息。
HiLo警报
当希洛报警被选择时,当前的螺被显示的设定。向下调整( - )或向上调整(+)。或者,测量厚度接近所需值的涂层,并使用按钮进行最终调整。选择“ 下一步”接受此值。现在显示当前的Hi设置。按照相同的步骤调整Hi设置。
该 图标将出现在显示屏上。
测量结果将与您定义的HiLo限值进行比较。如果结果在这些限制范围内,Gage会发出蜂鸣声。如果读数低于Lo限制,则会发出一个低音,如果高于Hi限制,则会发出高音。按(+)清除HiLo读数。
明确
清除所有屏幕上的统计信息和HiLo表格。
内存管理
所述PosiTector SPG可以记录在存储器中的读数用于打印到可选的蓝牙无线打印机,传输到计算机或具有同步PosiSoft.net。读数在存储时带有时间戳。

标准型号一次最多可存储250个读数。Memory菜单中出现以下内容:
开:打开内存并开始录制
关闭:停止录制(存储的读数保留在内存中)
清除:从内存中删除所有读数
查看:在显示屏上列出组统计信息和所有存储的读数。它将首先According to内存中的所有读数显示统计信息。使用向上和向下按钮滚动浏览所有读数。按退出。
高级型号可存储100,000个读数,最多1,000个批次(组)。
新批次
关闭当前打开的所有批次,并使用最低可用编号创建新的批次名称。例如,如果仅存在批处理1和批处理3,则将创建批处理2并使其成为当前批处理。该 图标会出现,并显示基本统计。每个测量都将显示并存储到这个新批次中。屏幕统计信息会在每次测量时立即更新。新批次名称在创建时标有日期。
快捷方式:批次打开时,按(+)创建新批次
新的子批次
(仅在批次当前打开时出现)
在当前打开的批次中创建新的子批次。
快捷方式:打开子批次时,按(+)创建新的子批次
在以下示例中,B2s2是批次2的子批次。Subbatching允许用户对相关批次进行分组,以便为其累积统计数据。批次2包含B2s1和B2s2的统计信息。

SmartBatch
 PosiTector SPG使用尖头锥形探头测量单个山谷相对于周围山峰高度的深度。
单次深度测量通常不能充分表征喷砂清理表面的表面轮廓。即使在靠近的点处,重复的量具读数通常也会因表面不规则而不同。因此,大多数组织和合同规范要求进行多次测量并进行分析,以产生更好地表征表面的最终结果。
Smart Batch菜单选项设置PosiTector SPG,以符合ASTM,SSPC,ISO,IMO,US Navy,SANS和AS等组织发布的各种标准和测试方法中定义的统计方法。
有关如何使用Smart Batch™功能的说明,请访问www.defelsko.com/smartbatch
打开
选择以前创建的批次或子批次名称以打开并生成当前名称。如果它包含测量值,屏幕上的统计信息将立即反映从此批次计算的值。此批次关联的校准设置(即校准2)也会打开。
注意: 当存在子批次时,批次名称右侧会显示一个实心三角形。按查看子批次。这也适用于“ 删除”,“ 查看”和“ 打印”选项。
关
停止录制过程,关闭当前批次,并从显示中删除批次信息。
删除
从内存中完全删除批处理或子批处理。删除名称并删除所有测量值。子批次可以单独删除。要删除所有相关的子批次,只需删除良好批次。
视图
使用向上或向下按钮滚动信息,统计摘要以及当前打开的批次中每个读数的列表。按退出。
注释
(限高级型号)
创建有意义的批次名称,并使用熟悉的屏幕QWERTY键盘直接在仪器上输入注释。使用量具导航和( - )(+)按钮输入注释。注释可与PosiSoft.net同步,并包含在USB Mass Storage报告中。
打印
将统计摘要和单个测量值发送到可选的蓝牙无线打印机。
注:要取消打印,请同时按住( - )和(+)按钮
显示
(仅在批次当前打开时出现)
提供以下用户可选显示选项:
图表:批次或子批次读数的实时xy图表。
图像:从 PosiSoft.net上传(同步)的图像。
注释:从 PosiSoft.net上传的说明或注释。
无:默认屏幕显示批次打开时的统计信息。
快捷方式:当批次打开时,按向上滚动以显示选项。
注意:按( - )删除当前打开批次中的最后一个读数。
如果使用该设置进行任何测量并存储到批次中,则无法进行校准调整。
如果在进行连续测量时存储器为ON,则只有显示屏上的最后一个值(当探头被抬起时)存储在存储器中。扫描模式将所有测量值存储到内存中
每批最多可包含10,000个读数。
连接到计算机
该PosiTector可以使用附带的USB连接线或蓝牙无线技术连接到电脑...
USB连接具有以下功能:
通过USB Mass Storage下载读数
通过PosiSoft.net下载读数并同步批量照片和备注
更新仪器固件
为仪器供电以供长时间使用,或为可选的可充电电池充电
USB端口位于仪器顶部,位于橡胶盖后面。

PosiSoft.net
为了增强其Gage的操作,所有PosiTector用户都可以访问PosiSoft.net提供的功能。它是一个免费的基于Web的应用程序,提供厚度读数的安全集中管理。
在(1)创建用户帐户之后,(2)已经注册了量具,并且(3)将PosiTector Desktop Manager下载并安装到Windows PC上,可以手动或自动执行测量数据的同步。PosiTector通过USB电缆或蓝牙无线技术连接到支持Web的PC。存储在存储器中的量具测量值被上传; 下载图像和批处理笔记。
可以使用标准互联网Web浏览器从世界上任何位置(作业现场或总部)操纵上载的数据。可以生成带注释和公司徽标的报告和图表。数据可以导出为XML或CSV逗号分隔的文本文件。
可以通过任何计算机和大多数支持Web的设备(包括智能手机)的安全登录与授权用户共享测量数据。
PosiTector桌面管理器(PDM)是一个基于Windows的小应用程序,它允许Gage和PosiSoft.net之间的自动双向通信(同步)(需要互联网连接)。安装后,PDM作为启动应用程序运行,并驻留在PC的Windows通知区域(系统托盘)中。PDM可在PosiSoft.net帐户中免费下载。
在PosiSoft.net上注册您的Gage,以充分利用您的量具功能。见www.PosiSoft.net
输出存储读数
可以使用以下方法之一访问存储的读数:
USB大容量存储 - 使用提供的USB电缆将PosiTector连接到PC / Mac,以访问和打印存储的读数和图形。无需软件或互联网连接。
PosiSoft.net - 一个免费的基于Web的应用程序,提供厚度读数的安全集中存储。从任何联网设备访问您的读数。
蓝牙打印机(另售) - 在读取时读取读数或打印批次读数和统计数据。
传统的PosiSoft支持 - 现有的PosiSoft用户可以继续使用熟悉的传统PosiSoft软件下载读数。升级您的PosiSoft版本:
连接菜单
同步(同步)是PosiTector将测量数据上传到PosiSoft.net(来自标准和高级型号)同时将图像和批次备注下载到仪器(限高级型号)的过程。当仪器通过USB或蓝牙无线技术连接到运行PosiTector Desktop Manager的启用Web的PC时,会发生此传输。它可以手动(USB或蓝牙)或自动触发(限USB)。
立即同步
当连接(USB或蓝牙)到运行PosiTector Desktop Manager的连接互联网的PC时,立即启动与PosiSoft.net的同步。
当使用多个连接进行连接时,可以同时同步多个量具(例如,通过USB连接的两个量具和通过WiFi或蓝牙连接的一个量具)。
自动同步
 当最初通过USB连接到运行PosiTector Desktop Manager的互联网连接的PC时,允许Gage自动将存储的测量值与PosiSoft.net同步。
连接时添加到内存的其他测量仅在USB电缆断开连接,然后重新连接或选择了连接>立即同步时才会同步。
USB驱动器
通用串行总线(USB)是用于在设备和主机控制器(通常是个人计算机)之间建立通信的.USB已经有效地取代了各种接口,如串行和并行端口。
所述PosiTector使用USB大容量存储设备,其提供了简单的接口以类似于USB闪存驱动器,相机或数字音频播放器的方式来检索数据。
选中后,任何计算机都可以通过使用附带的USB电缆导航标有“PosiTector”的虚拟驱动器来查看和同步存储在内存中的读数。
通过选择根目录中的“index.html”文件来查看格式化的HTML报告。可选地,位于每个批处理文件夹中的文本“.txt”文件提供对测量值的访问。可以使用通用PC / Mac Web浏览器或文件浏览器查看或复制存储的读数和图形。
当PosiTector第一次通过USB电缆连接到Windows PC时,会启动枚举过程,安装设备驱动程序而无需重新启动计算机。您可能会在屏幕右下角的任务栏中看到几个弹出窗口。等待整个过程完成后再继续。
注意:通过USB电缆连接电源时。不使用电池,机身不会自动断电。如果安装了可充电(NiMH)电池,仪器将对电池进行涓流充电。
蓝牙
PosiTector Advanced型号具有蓝牙功能:
沟通代替USB电缆与PosiSoft桌面管理(PDM)。
将个人读数流式传输到计算机或蓝牙无线打印机。
打印到可选的电池供电蓝牙无线打印机。
开:打开蓝牙功能上。选择后,图标将出现在显示屏上。要取消激活蓝牙,请选择关闭。
配对:在存储或流传输读数之前,需要配对Gage和接收设备。有关配对说明,请访问www.defelsko.com/bluetooth/
信息:列出有关当前蓝牙连接的信息,包括当前配对的设备和MAC地址。
流:选中后,Gage会在读取时将读数传输到配对的蓝牙设备。读数可以在传输到可选的蓝牙无线打印机或第三方计算机软件时进行流式传输。
蓝牙无线打印机

PosiTector Advanced型号可以输出到可选的电池供电的蓝牙无线打印机中的两种方式之一:
在获取时读取个人读数。
打印存储的批次读数和摘要。
首专业入Connect> Bluetooth菜单。打开蓝牙ON和“配对”的PosiTector到打印机。请参阅:www.defelsko.com/bluetooth/
流媒体:在“ 连接”>“蓝牙”菜单中,选择“流”复选框。所有读数现在将同时显示在LCD上并发送到打印机。
打印:在“记忆”菜单中,选择“ 打印”。
无线上网

允许与连接到本地无线网络或便携式移动热点的平板电脑,智能手机和计算机等设备进行无线通信。请访问www.defelsko.com/WiFi
开启/关闭 :开启无线网络功能上。选择后, 图标将出现在显示屏上。要停用WiFi,请选择 关闭。
接入点 :无线连接智能设备/计算机到PosiTector Advanced主体,无需单独的网络。无线将读数导入PosiSoft 3.0桌面软件或在现场或无论何时WiFi网络不可用或超出范围时访问PosiSoft Mobile。
要启用,请从Connect> WiFi菜单中选择Access Point。Access Point图标将显示在PosiTector显示屏的左上角。 保护您的接入点
要确保只有授权设备才能访问PosiTector,请务必为接入点输入密码(密码)。默认密码短语是密码。
在Connect> WiFi> Setup菜单中,选择AP Passphrase。
按 按钮显示屏幕键盘。输入接入点的密码短语。连接到PosiTectors接入点的所有设备都需要密码短语。
所有支持WiFi的设备现在都可以看到PosiTector 。只需将设备WiFi连接到新的PosiTector接入点即可。所有PosiTectors均由其各自的量具体序列号单独标识。
AP频道 - 默认频道:6
对于大多数用户,不必更改默认频道。如果您遇到连接不良或无法连接,请尝试其他频道。
在Connect> WiFi> Setup菜单中,选择AP Channel。
按向上中心导航按钮突出显示该频道。使用( - )或(+)按钮更改频道。按向下导航按钮,然后选择确定。按按钮。
将读数导入PosiSoft 3.0桌面软件
从PosiSoft 3.0菜单中,选择Import> From Gage。所有连接的量具将显示其独一的序列号。导入完成后将显示测量数据。
导入所需的时间取决于量具中存在的批次数和测量值。进口通常不会超过几秒钟。
导入期间批量不会从量具存储器中删除。它们保留在量具上,直到被用户删除。
访问PosiTector PosiSoft Mobile
适用于Apple iOS和Android设备:
适用于Apple iOS和Android用户的PosiSoft Mobile Manager应用程序。只需从Apple App Store或Google Play下载该应用程序即可。
将智能设备/计算机连接到PosiTector接入点后,打开PosiSoft Mobile Manager应用程序。从列表中选择PosiTector以打开PosiSoft Mobile。
适用于所有支持WiFi的设备:连接到PosiTector接入点的
任何 WiFi启用设备都可以查看仪器内置的 PosiSoft Mobile Web界面。使用设备的Web浏览器,输入PosiTector的IP地址以访问 PosiSoft Mobile的功能。
在Connect> WiFi菜单中,选择Information以查看与PosiTector关联的IP地址。
在显示的设备Web浏览器中输入显示的IP地址。
示例:192.168.0.1:8080
有关PosiSoft Mobile的更多信息,请访问:www.defelsko.com/posisoft/positector-app
网络: Gage将允许用户添加新网络,并将自动检查可用的本地网络。屏幕上列出了Gage检测到的可用网络以及Gage先前已连接到的当前未在连接范围内的任何网络。
信息: Gage显示有关本地WiFi网络连接的信息,包括......
SSID:网络名称
状态:显示Gage是否已连接到网络
IP地址:网络的IP地址。用户可以将此号码输入到连接到同一网络的任何启用WiFi的设备的Web浏览器中,以便通过PosiSoft Mobile查看Gage的同步批次。
设置:允许用户设置WiFi连接
IP设置:输入IP信息,如下所示:IP类型(DHCP或静态),IP地址,网关,网络掩码,DNS1,DNS2。
服务器启用:启用网络和Gage之间的连接。
量具名称:输入量具的名称(最多14个字符)。
WiFi重置:删除所有WiFi设置。
更新
确定您的仪器是否有可用的软件更新(需要使用PosiTector Desktop Manager连接到连接到互联网的PC 。如果有更新,将出现一个提示,允许用户选择是否在此时执行更新。
注意:确保将存储的测量值备份到PC或PosiSoft.net。完成更新后,仪器可执行硬复位,并且擦除存储器中的所有读数。

 在更新操作期间,请勿拔下Gage。
更换探针提示
提供两个替换探头尖端。第一种是取代符合ASTM D 4417 B等大多数测试标准的60°角尖。第二种是特殊应用的30°角尖或符合澳大利亚标准AS 3894.5。两者都包含替换工具。
温度
工作范围:+ 32°至+ 120°F(0至+ 50°C)
该PosiTector SPG用于温度自动补偿。在测量之前,让探头在几分钟内达到环境温度。
丢弃在明显不同的温度条件下进行的第一次测量。测量比周围环境温度更高或更冷的表面时,将探头抬起至少6英寸(15厘米),并在测量之间离开表面1秒钟。
电源/电池指示灯
电源: 3节AAA碱性,锂电池或可选的镍氢(NiMH)可充电电池。要获得很好的电池指示结果,请确保在设置>电池类型菜单中选择了适当的电池类型。
电池指示灯 显示一个完整的条,安装了新的碱性电池或充满电的电池。随着电池的减弱,电压会降低。当电池符号较低时
 ,仍然可以使用Gage,但应尽早更换电池或为电池充电。当电池电量非常低时,Gage将自动关闭,之后显示屏上显示电池电量不足警告。要保留所有用户设置和存储的存储器读数,请仅在仪器断电后更换电池。电池性能在低温下会降低。
可充电电池
(可选)
DeFelsko recommends using eneloop (NiMH) rechargeable batteries. They combine the advantages of rechargeable and disposable (alkaline) batteries. They discharge very slowly and can be stored for long periods of time without self-discharge problems.
return service
PosiTector does not contain any user-serviceable components. Before returning the instrument for repair:
Install new batteries or new rechargeable batteries in the correct alignment as shown inside the battery compartment.
Check the probe screen for dirt or damage. The probe tip should move up and down freely. The metal plate around the probe tip should be smooth and free of burrs and foreign objects.
Perform a hard reset.
Put a metal spacer on the glass plate and try to measure.
troubleshooting
Most conditions can be cleared with a hard reset (see page 9). If not, visit our Service & Support page to learn about sending us your instrument for a free evaluation.
Inconsistent thickness readings:
Probe tip may be damaged, scratched or frayed
Gage won't print to bluetooth wireless printers:
Make sure the gage is paired for use with the printer and select the Gage menu option Connect>Bluetooth>Stream box.
Check the printer battery. Turn it off and on again.