In general, the structure of the electric constant temperature Forced Air Drying Oven is as follows:
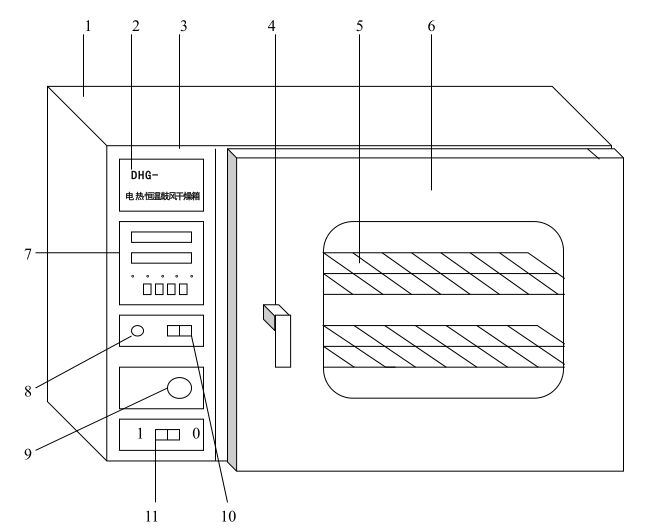
1. Box body 2, nameplate 3, control panel 4, door handle 5, shelf 6, box door 7 , temperature controller 8, power indicator light 9, damper adjustment knob 10, power switch 11 fan switch
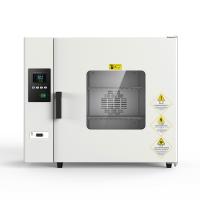
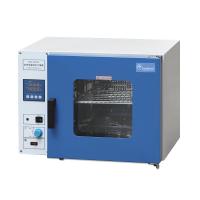
DHG series desktop Forced Air Drying Oven is a series of products with five specifications of 30, 50, 70, 140 and 240 liters in volume. The outer shell of the drying box is made of high-quality steel plate surface baking paint, the working room is made of general galvanized steel plate or mirror stainless steel plate, and the working room is equipped with a shelf made of two layers of stainless steel wire, and the middle layer is filled with ultra-fine glass wool for heat insulation. The double-layer tempered glass is used as the observation window on the door of the box, so that the items in the box can be clearly observed. A heat-resistant silicone rubber sealing ring is installed at the joint between the working room and the box door to ensure the seal between the working room and the box door. The power switch, power indicator light, air door adjustment knob, temperature controller and other operating parts of the drying box are all concentrated on the control panel in front of the box, located on the left front side of the box. The heating and constant temperature system in the box is mainly composed of a motor with a centrifugal impeller, an electric heater, a reasonable air duct structure and a temperature controller. When the power supply of the drying box is turned on and the fan switch is turned on, the motor will run, and the heat generated by the electric heater at the rear of the box will be discharged upward through the air duct, and then the dry items in the working room will be sucked into the fan to continue the cycle. , so that the temperature in the working room is uniform. The intelligent temperature controller has the function of automatic wind speed adjustment. During the heating process, the motor runs at high speed, and when the temperature is close to constant, it automatically adjusts to low speed operation, thereby reducing the use problems caused by excessive wind speed. Users can also cancel this function through simple operations. The damper regulator can adjust the air volume in and out of the box by opening the damper adjustment knob.
Steps
1. Put the items to be dried into the drying box and close the door.
2. Adjust the damper adjustment knob to "MIN" or "MAX" according to the degree of humidity of the item to be dried.
3. Turn on the power switch, the power indicator light is on, and the temperature controller has a display.
4. Turn on the fan switch, and the fan will run automatically as required.
5. Set the temperature controller, and the equipment will automatically run according to the set requirements.
6. After drying, turn off the power switch and take out the items.

Instructions for use
1. Temperature setting
a. In the normal working state, press the SET button to enter the temperature setting state. At this time, the PV display shows SP, and the first digit of the SV display flashes;
b. Press the shift key to shift the blinking to the desired setting position;
c. Press the minus key or the plus key to adjust the number to the desired value;
d. Press the SET button twice, the meter returns to the normal working state, the temperature setting is completed, and the meter runs according to the new set value.
2. Timing function
a. In the normal working state, press the SET button twice to enter the timing setting state. At this time, the PV display shows ST, and the SV display shows 0 and flashes;
b. Press the shift key to shift the blinking to the desired setting position;
c. Press the minus key or the plus key to adjust the number to the desired value;
d. Press the SET button once, the meter enters the timing running state, and the running indicator light flashes at this time;
e. The timing function is countdown operation. In the timing operation state, press the shift key, and the SV display will display the remaining time of timing;
f. The remaining time of the timer returns to zero, and the meter enters the end of the timer state. At this time, the SV display shows End and flashes, and at the same time, all the indicators except the wind speed indicator are off;
g. At the end of the timing, press the SET key once, and the meter will return to the normal working state.
h. At the end of the timing, because the temperature control part of the instrument stops working, the measured value displayed on the PV display will drop to the ambient temperature, which is a normal phenomenon.
i. If you do not need to use the timing function, please be sure to set the timing time to zero.
j. During the operation of the timing function, if an unexpected power failure occurs, the remaining time of the timing will automatically return to zero after the power is turned on again.
k. Timing range of this equipment: 1~9999 minutes or 1~9999 hours. (Please specify when ordering!)
3. Automatic wind speed adjustment function
a. When the equipment is heating up, the circulating fan runs at high speed to accelerate the air convection in the working room, shorten the heating time and improve work efficiency;
b. When the temperature in the working room is close to the control temperature, the instrument will automatically adjust the circulating fan from high-speed operation to low-speed operation, so that the air in the working room can be convected smoothly and effectively prolong the life of the circulating fan;
c. If you do not need to use the automatic wind speed adjustment function, you can adjust the high-low speed control parameters to 999.9 according to the control parameter adjustment method, and the circulating fan will always run at high speed.
4. Self-tuning function
If there is a large temperature overshoot or large temperature fluctuation during the temperature control process, please perform the following operations to start the self-tuning function
a. Turn off the power switch, open the box door, and let the equipment cool down to the ambient temperature naturally;
b. Close the door, turn on the power switch, and set the temperature to the usual temperature value;
c. Adjust the self-tuning parameter to 1 according to the control parameter adjustment method;
d. In the normal working state, press and hold the minus key for 5 seconds to enter the self-tuning state. At this time, the PV display shows ATU and flashes;
e. After the self-tuning is finished, the instrument will automatically return to the normal working state.
f. In the self-tuning state, pressing any key is invalid.
5. Control parameter adjustment method
a. Press the plus key and the SET key at the same time, and the PV display will display LCK;
b. Press the plus key to display 7 on the SV display;
c. Press the SET key again to make the PV display screen display the prompt of the control parameter that needs to be adjusted;
d. Press the plus or minus key to make the SV display screen display the value required by the control parameter, and all control parameters can be adjusted at one time;
e. Press the SET button for more than 5 seconds to return to the normal working state; at this time, the temperature controller executes the newly modified parameters.
Note: During the adjustment of the control parameters, if no key is pressed for 30 seconds, the instrument will automatically return to the normal working state, but the changed data will be deemed invalid.
Since the product has been strictly tested before leaving the factory, it is generally not necessary to modify it. However, when the product is turned on for the first time; the product has been used for a period of time; the use environment is harsh; the ambient temperature used is inconsistent with the ambient temperature during manufacturing; standard.
6. The error correction method between the measured temperature and the actual temperature in the box
a. Put the mercury thermometer (mercury thermometer with 0.1°C accuracy) into the working room, and the mercury end should be placed at the geometric center of the room; the reading of the mercury thermometer is the actual temperature.
b. Turn on the machine, when the device runs to a constant temperature state (about 1 to 2 hours), compare the difference between the actual temperature and the temperature displayed on the PV display, and the difference (actual temperature-PV display value) is the measured value correction parameter SC that needs to be modified value, that is:
SC = original SC value + (actual temperature - PV display value)
c. Calculate the SC value according to the above formula and input it.