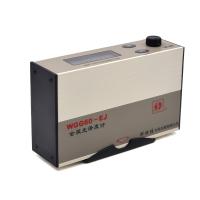
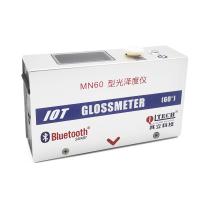
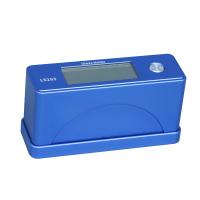
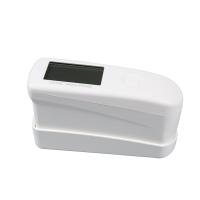
How to Measure Gloss
There are many different geometries that can be used for gloss measurement, each depending on the type of surface being measured. For non-metals such as coatings and plastics, the amount of reflected light increases with the angle of illumination because some light penetrates the surface material and is absorbed into it or diffusely scattered from it depending on its color. Metals have higher reflectivity and therefore have less angular dependence.
A number of international technical standards are available to define the use and specifications of different types of gloss meters used on various types of materials including paints, ceramics, paper, metals and plastics. Many industries use gloss meters in their quality control to measure the gloss of products, thus ensuring the consistency of their manufacturing process. The automotive industry is a major user of gloss meters, with applications extending from the factory floor to the repair shop.
Gloss Meter Construction
A typical gloss meter consists of a fixed mechanical assembly consisting of a standard light source that projects a parallel beam of light onto the test surface to be tested, and a filter Detector to receive the light reflected from the surface, Figure 1 . The ASTM method states that the illumination should be defined such that the source-Detector combination is spectrally corrected to give the CIE luminous efficacy V(l) with a CIE illuminant SC[i].

Figure 1. Parallel beam specular reflection instrument.
Many commercially available instruments meet the above criteria in their measurement geometry. The instrument is calibrated using a reference standard, usually made of highly polished flat black glass, with a refractive index of 1.567 for the sodium D line and a gloss value of 100 for each geometry[ii].
Choosing the Correct Gloss Measurement Angle
The measurement angle is the angle between the incident light and the reflected light. Three measurement angles (20°, 60° and 85°) are specified to cover most industrial coating applications. Choose the angle based on the expected gloss range as shown in the table below.
| Gloss range | 60° value | notes |
| high gloss | > 70 GU | If the measurement exceeds 70 GU, change the test setup to 20° |
| medium gloss | 10 - 70GU | |
| low gloss | <10GU | If the measurement is less than 10 GU, change the test setup to 85° |

For example, if a measurement made at 60° is greater than 70 GU, the measurement angle should be changed to 20° to optimize measurement accuracy. There are three types of instruments on the market: 60° single-angle instruments, a combination of 20° and 60°, and a type that combines 20°, 60°, and 85°.
The other two angles are for other materials. Ceramics, films, textiles and anodized aluminum are measured at 45° and paper at 75°.
gloss unit
The measurement scale of the gloss meter, Gloss Units (GU), is based on the Graduation of a highly polished reference black glass standard with a defined index of refraction having a specular reflectance of 100 GU at a specified angle. This standard is used to establish an upper point calibration of 100 with a lower endpoint established as 0 on a good matte surface. This fouling is suitable for most non-metallic coatings and materials (paints and plastics) as they are usually in this range. For other materials, where the appearance is highly reflective (specular, plated/raw components), higher values can be reached, up to 2000 gloss units. For transparent materials, these values can also increase due to multiple reflections within the material.
Gloss Meter Standard
| Comparison of Gloss Measurement Standards | |||||
| standard | 20° | 60° | 85° | 45° | 75° |
| high gloss | medium gloss | low gloss | medium gloss | low gloss | |
| Coatings, Plastics and Related Materials | ceramics | Paper | |||
| ASTM C346 | x | ||||
| ASTM D523 | x | x | x | ||
| ASTM C584 | x | ||||
| ASTM D2457 | x | x | x | ||
| BS3900 D5 | x | x | x | ||
| DIN 67530 | x | x | x | ||
| DIN EN ISO 2813 | x | x | x | ||
| EN ISO 7668 | x | x | x | x | |
| JI Z 8741 | x | x | x | x | x |
| TAPPI T480 | x | ||||
Glossmeter Calibration
Each gloss meter is set by the manufacturer to be linear over the entire measurement range by calibrating it to a set of master calibration bricks traceable to NIST (National Institute of Standards and Technology).
In order to maintain the performance and linearity of the gloss meter, it is recommended to use inspection standard tiles. This standard tile assigns gloss unit values to each measurement angle, and these values are also traceable to national standards such as NIST. The instrument is calibrated to this check standard, which is often referred to as a "calibration tile" or "calibration standard". The interval at which this calibration is checked depends on the frequency of use and the operating conditions of the Glossmeter.
It has been seen that standard calibration tiles kept in very good condition can become contaminated within a few years and be changed by a few gloss units. Standard tiles used in working conditions need to be calibrated or checked periodically by the instrument manufacturer or a gloss meter calibration professional.
The one-year period between standard tile recalibrations should be considered the minimum period. If at any time the calibration standard becomes permanently scratched or damaged, it needs to be recalibrated or replaced immediately, as the gloss meter may give false readings.
International standards state that tiles are calibrated and traceable workpieces, not gloss meters, but manufacturers often recommend checking the instrument to verify its operating frequency against operating conditions.
Advances in Gloss Measurement
Gloss meters are useful tools for measuring the glossiness of surfaces. However, it is insensitive to other common effects, such as haze and orange peel, that reduce the quality of appearance.
Haze: Caused by microscopic surface structures that slightly change the direction of reflected light, causing blooming adjacent to the specular (shine) angle. The surface has a low reflective contrast and a light opalescent effect
Orange peel: Inhomogeneous surface formation caused by distorted reflected light from large surface structures.


