This article is a translation, for more details, please check the English version
Gloss meters became popular in the 1970s. German equipment manufacturers are starting mass production of gloss meters and standards suitable for production lines at reasonable prices. These instruments were based on laboratory instruments used in the paper industry at the time. Due to technological developments and stricter aesthetic requirements, tolerances for gloss unit (GU) specifications have decreased significantly. Some instrument manufacturers claim that their Glossmeters are accurate to within 0.1 GU, and application specifications often state a bandwidth of only 1 GU as an acceptance criterion. Are these standards realistic? To answer this question, we will have to consider the definition of gloss stated in international (ISO and ASTM) standards as well as those measured by reference laboratories.
define gloss
To define a unit like gloss we need to define some reference points. The gloss reference points defined in the standard are the 0 GU and 100 GU references. A 0 GU reference is a full, dull matte surface with zero reflections. For 100 GU the reference is based on black or quartz glass. The refractive index is the derivation of the change in angle of light as it passes from one medium to another at a specific wavelength and is used to calculate the reflectivity of a surface. This is done using the Fresnel equations. This seems very powerful, but the definition of using wavelength is flawed. ASTM and ISO disagree on the wavelength of the spectral line used to reference 100 GU. ISO uses the d line (helium), ASTM refers to the D1 line (sodium). In fact it's only a 1.7 nanometer difference,
Usually, using only two reference points is standard for very thin foundations. Also, the linearity between these two points is just an assumption. There is no way to verify the linearity of this assumption, as no further reference points are defined and thus unavailable.
Surface roughness
A second unspecified parameter has been observed. The surface roughness of the calibration standard tiles is not part of the Fresnel equation, nor is roughness considered in the relevant standards. Some standards specify flatness, but roughness is better specified as "highly polished" (how high?). However, surface roughness does affect how reflective a surface is. The gloss calibration tiles used by instrument manufacturers to verify the linearity of their products are made of the same material throughout the gloss range, but with different surface finishes such as roughness and texture.
Strictly speaking, these tiles should all have the same gloss value due to the Fresnel equation and the definition of the standard. However, they all yield different values when measured by a reference laboratory (NIST or BAM). So the question arises, "Does surface roughness affect the gloss value?" The answer is clear: yes, it does.
Table 1 shows the main parameters used in several global standards. The change in gloss value due to this difference can increase by multiple gloss units.
Figure 1 shows the relationship between gloss and roughness. The rougher the surface, the lower the gloss. The graph is gloss correlation with Ra value (arithmetic mean surface roughness). All data were obtained on black glass bricks of the same material with the same refractive index.
lack of coordination
Both of these issues, surface roughness and wavelength of spectral lines, are systemic issues in the harmonization of gloss standards, making it impossible to comply with multiple standards simultaneously. Gloss meter designs and geometries are often suitable to operate within multiple standards. However, as shown in Table 1, calibration of gloss meters on currently defined standards creates problems. Even the two major reference laboratories, NIST and BAM, are inconsistent. NIST refers to ASTM standards and BAM to ISO standards.
The reasons for the lack of coordination among standards are difficult to explain. Literature research doesn't show any significant research on gloss/reflection vs surface roughness. Work has been done on coatings, but generally when looking at haze, image clarity and orange peel - all important parameters, but none with defined reference standard values. In some ways, glossy standards seem questionable to say the least.
There have been some scientific studies of the behavior of light on rough surfaces, such as the Beckman-Kirchhoff scattering theory. However, there is no unified theory linking this theory to the Fresnel equations. A scientific study to see if the two theories could be combined could create a final and definitive definition on gloss calibration tiles to determine the absolute values of ISO and ASTM.
In addition to the uncertainties in the definition of glossiness standards, there are other issues. Everyone wants the traceability of their methods to be in serious danger. All accredited laboratories are required to send their standards for calibration on a regular basis and require strict traceability to reference standards. Reference standards should be at least of higher certainty than calibration standards. This means that the reference standards used are regularly verified every year.
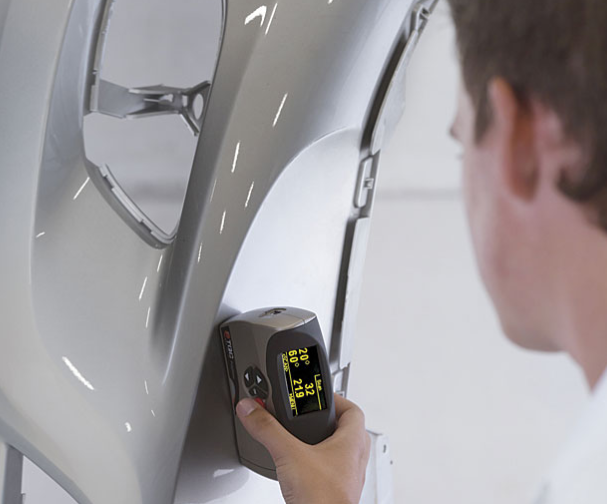
Many ISO 17025-accredited calibration laboratories calibrate user tiles supplied with each commercial gloss meter by verification with another commercial gloss meter. The gloss meter itself is calibrated on BAM certified tiles. Within the relevant 100 GU range, the BAM indicates uncertainties up to ±1 GU. Combine this with the reproducibility and accuracy of commercial gloss meters used for validation, and it's easy to add multiple gloss units of error.
The main reference standards of BAM and NIST should be checked according to their refractive index. In the past 15 years, there has never been a cross-check between these two major laboratories. Many aspects about gloss references are unclear and require classification, such as the correlation between roughness and gloss, the wavelength of spectral lines and the assumed linearity of calibration lines.
The current situation was one of ISO's motivations for reworking the ISO 2813 gloss standard. In order to advance the standard to an official next-level working document, ISO requires a round-robin or inter-laboratory study (ILS). A series of commercial gloss meters of professional brands were used in this study. This study demonstrates that the repeatability and reproducibility values stated in the instrument data sheets used in ILS are far from reality. Furthermore, the data on which these repeatability and reproducibility values were found to be based was lost over time. Based on the results of round robin testing, ISO has decided to declare new reproducibility (R) and repeatability (r) levels in the forthcoming version of ISO 2813.
in conclusion
ISO has already taken the first step by updating ISO 2813, but this only solves part of the problem. The main problem is the main standard. All data are currently derived from only one reference, a quartz glass wedge, with no proof of assumed linearity. Where desirable, a range of reliable reference materials will be developed and defined to justify and ensure a glossy reference for a range of values, not just one or two points. A list of references will also prove or disprove the assumed linearity of the calibration line. There seems to be a need for valid scientific research to determine the effect of roughness and wavelength in order to develop a major standard that would bring ISO and ASTM online and leave no questions unanswered.
A scientific study on the definition of Global Gloss will be of great use to the industry. All gloss specifications should be checked for feasibility and correctness. Although gloss is a generally accepted appearance standard for quality control in many industries, recent revelations about gloss standards require us to rethink the way we think about the accuracy of our results.

