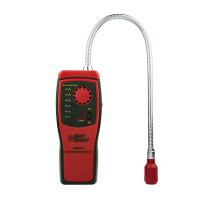
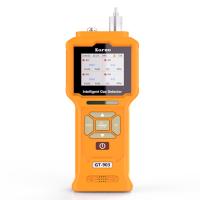
introduce
ATEX, IEC, UK HSE and US OSHA standards all require shock testing and calibration of any portable instrument used for worker health and safety protection in potentially hazardous environments. To ensure safety, not only must the gas meter read accurately, but it also needs to have a functioning alarm that warns workers of a dangerous situation. Initial calibration upon receipt of the instrument is necessary as the response of most sensors degrades over time and thus requires recalibration.
This article helps the user define the appropriate time interval between instrument calibrations. Although the regulatory standard is primarily for 4-gas confined space entry instrumentation with electrochemical sensors and catalytic-type flammable gas (LEL) sensors, this article intends to include any ion scientific instrumentation used in industrial hygiene, including PIDs, infrared sensors, and stationary instruments.
Reduced sensor sensitivity
Many environmental conditions can degrade sensor response, including the following factors. LEL sensors are inhibited or poisoned by silicon compounds (some lubricants), sulfur compounds (such as H2S), lead (Pb) compounds, acids, and compounds that generate acids on combustion (such as chlorinated hydrocarbons). Electrochemical sensors are affected by high levels of organic vapors and corrosive gases. Ammonia, chlorine and chlorine dioxide sensors become unresponsive when over-exposed to NH3. PID lamps can lose output from a) simple aging, b) coating when exposed to excess dust, high boiling point compounds, phosphine, organic amines or silazanes, or c) contact with liquid water. If the sample gas does not reach adequately due to leaks in the sample train or clogging of the inlet dust filter, any sensor will become unresponsive. thereby,
Calibration frequency
ISEA (International Safety Equipment Association) and ATEX recommend the following general procedure:
1a) Daily "bump test" of the instrument before it is put into service. The gas is applied long enough for the sensor to alarm to ensure that gas is entering the sensor and that both the sensor and the alarm are working. The gas doesn't need to have a definite concentration, it can be as simple as a magic marker.
either
1b) Daily calibration checks before the instrument is put into service. A calibration gas is applied to the sensor to see if it responds within a predefined error range, usually within 10-20% of the expected value, as set by the manufacturer's recommendations or the user's company policy.
In critical cases of gas testing for work permits, ATEX recommends a bump test or calibration check at the end of the day's use to ensure that the instrument is functioning properly throughout the monitoring period.
2) If the crash test or calibration check fails, do a full calibration. Full calibration should also be performed periodically as recommended by the manufacturer, the user's company policy, or a regulatory agency.
Calibration should be checked frequently during initial use in the target environment. This time period should cover all expected environments to which the instrument will be exposed. The check interval can be extended if the instrument remains calibrated during this time. In this way, a more appropriate calibration frequency can be defined for a specific site or application.
In addition, the above test procedures should be performed in case of any special circumstances that may affect the function of the sensor, including but not limited to:
Frequent exposure to high or low temperatures, high pressure and humidity, high particle levels or immersion in liquids.
Exposure to high (out-of-range) concentrations of the target or similar chemicals.
As mentioned above, exposure to sensor inhibitors and poisons is common.
Exposure to severe physical vibration or shock.
transfer custody of the instrument to another person.


