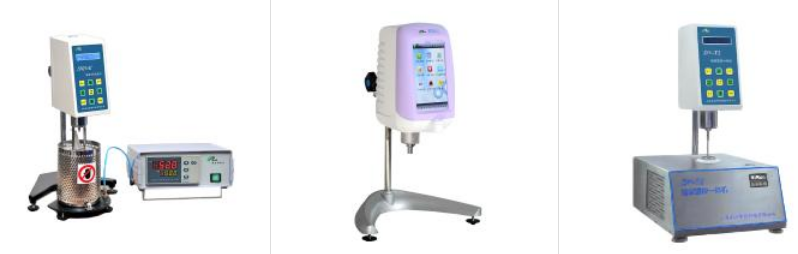
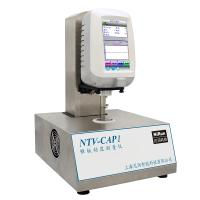
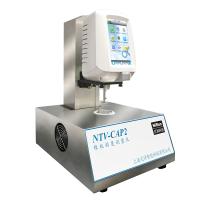
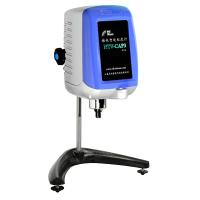
Introduction of STM-2T Stormer Viscometer
STM-2T Digital Stormer Digital Viscometer is a digital display viscometer with ARM chip processor, faster data processing speed, high subdivision drive stepper motor, and touch screen function. The speed is stable and accurate, and the operation is easy. The screen directly displays the viscosity, KU value, load value and temperature, and can lock the viscosity value, KU value, load value and temperature value. The main control board and the subdivision driver board all adopt patch technology, and the circuit design adopts the current professional microcomputer processor, and the structure layout is reasonable and compact. The instrument's full scale and linearity of each gear are all measured and corrected through the PC interface, and its measurement performance and functions have reached the professional level of the same type abroad.
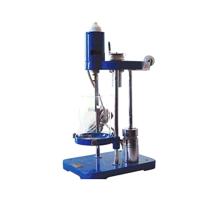
STM-2 Stormer digital viscometer is a testing instrument specially used to measure the viscosity of paints, coatings, adhesives, inks, pastes and others expressed by KU value. When measuring, a paddle rotor rotates at a constant speed of 200r/min, and the resistance to the rotation of the stirring blade is automatically converted into KU value, cP value and grams value. This instrument complies with ASTM-D562 standard and GB9269 standard.
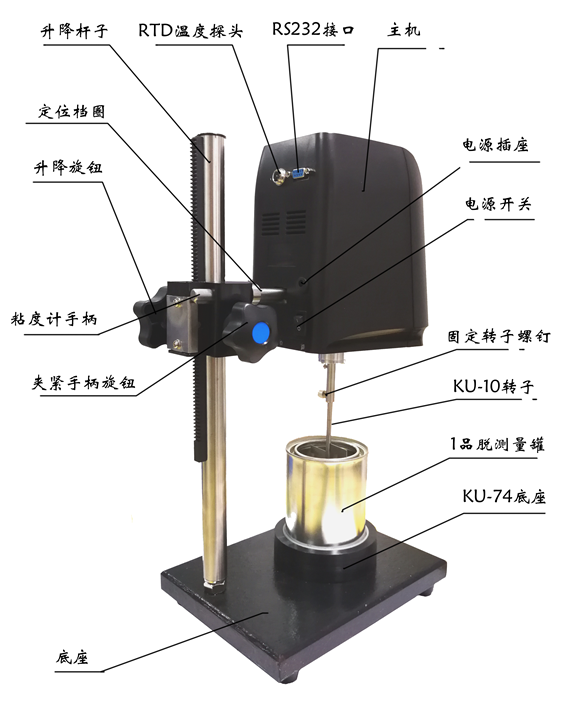
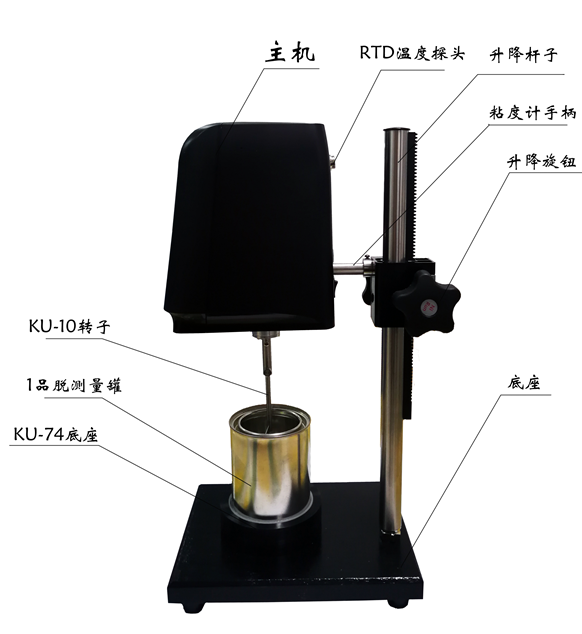
Instrument installation (refer to the general assembly diagram and follow the steps below)
(1) Take out the base (lifting frame), Stormer viscometer host, power adapter, rotor, etc. from the packing box.
(2) Turn the lifting knob to check the flexibility and self-locking of the lifting chuck. If you find that it is too loose or too tight, you can use a screwdriver to adjust the two M4 adjusting screws at the rear of the lifting frame so that it can be lifted up and down, and a little tighter. It is advisable to prevent automatic falling after installing the viscometer. Note: It has been adjusted before leaving the factory.
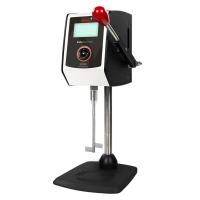
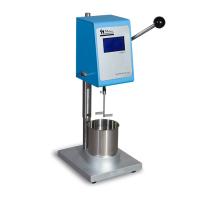
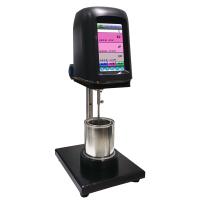
(3) Insert the metal handle behind the main body of the STM-2 Stormer viscometer into the small hole on the lifting slider, and adjust the left and right positions of the Stormer viscometer at the same time, so that the main shaft of the Stormer viscometer is at the center of the measuring tank. Tighten the clamping handle knob at the same time.
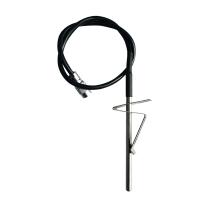
(4) Install the RTD temperature probe to the temperature port. If equipped with a micro-printer, please install it to the RS232 interface.
(5) Make sure that the power switch of the Stormer Viscometer is in the OFF state, and turn on the power.
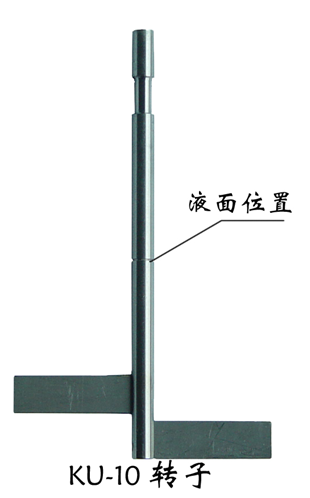
(6) Take out the KU-10 paddle rotor from the packaging plastic bag, install it into the sleeve of the central shaft according to the installation diagram, and tighten the fixing screws.
(7) 拉出定位拉手,把KU-74底座放在斯托默粘度计正下方,如KU-10桨式转子不在测量罐中心,可以用内六角工具去调整二个KU-74底座中心调整螺钉。转动升降旋钮,仔细观察KU-10桨式转子是否在测量罐中心。
(8) 在KU-74底座上放测量罐并倒入测量液体,转动升降旋钮,找到K-10转子上液面位置,就可以开始测量了。
操作与使用
1. 按照[仪器安装]步骤将斯托默粘度计安装到位。
2. 将测量液体倒入1品脱测量罐,并放在KU-74底座上。
3. 保证KU-10桨式转子在1品脱测量罐正中心
4. 将RTD温度探头插入测量罐中,观察屏幕上温度值,如果液体温度值满足测量要求,在温度显示带(白色任何位置点一下)
就会显示
表示锁住温度值(再点一下 [HOLD]键,可以解锁温度值)。从测量罐中移开RTD温度探头(清洗干净),进行下一步骤,否则,重新调换满足温度要求的液体,倒入测量罐中。
5. 确定斯托默粘度计的电源开关置于OFF 状态,转动升降旋钮,使得KU-10桨式转子逐渐浸入被测液体当中,直至转子上的标记与液面相平为止,并保证桨叶转子在测量罐正中间。
6. 按下斯托粘度计后面电源开关,接通电源。按下[测量]键,步进电机开始旋转,适当时间(10秒钟)后屏幕显示粘度值、KU值、负荷值、温度。
7. 在测量过程中,如需停止测量,可直接按[停止]键,此时电机停止转动,而粘度计主机不断电。
8. 测量完成后,向上转动升降旋钮,使得KU-10转子完全离开测量罐样品液面。取下KU-10桨式转子,进行清理KU-10桨式转子和测量罐工作。
注意事项
(1)装卸转子时应小心操作不要用力过大,不要使转子横向受力,以免转子弯曲。
(2)每次使用后对换下来的转子、RTD温度探头应及时清洁(擦干净)并放好。请不要把转子留在仪器上进行清洁。
(3)当调换被测液体时,请及时清洁(擦干净)转子、测量容器,避免由于被测液体相混淆而引起的测量误差。
(4) The instrument and the rotor are one-to-one matching, please do not confuse several instruments and rotors.
(5) Please do not disassemble and adjust the instrument parts at will.
(6) After installing the rotor, please do not rotate it for a long time without liquid, so as not to damage the bearing.
(7) Doing the following points will help to measure more accurate values:
• Accurately control the temperature of the measured liquid.
• Immerse the rotor in the liquid to be measured for a long enough time to make the temperature of both the same.
• Maintain liquid homogeneity.
• Place the rotor in the center of the vessel for the measurement.
• Keep the rotor clean and free from vibration.
(8) When the KU-10 paddle rotor has not been put into the measuring tank, please do not press the [Measurement] key. Keep the motor at a standstill. When the KU-10 paddle rotor is fully penetrated into the measuring tank, make the mark on the rotor level with the liquid level, and ensure that the paddle rotor is in the middle of the measuring tank. Then press the [Measurement] key. After the measurement is completed, first press the [Stop] key and turn the lifting knob upward to make the KU-10 paddle rotor completely leave the liquid level of the measuring tank before cleaning.