Most new businesses should rent a building with the understanding that everything will be built and installed for them. However, this is not always the case. If you are considering starting a new business, make sure to ask if a CO2 Gas Detector will be installed and where it will be located. If the building company or property manager is unwilling to install it for you, make sure you know how to do it safely and effectively.
What Tools Do You Need
Gathering the right tools to install a CO2 Gas Detector can help you make the process quick and easy. If you don't have tools handy, consider borrowing them to save money. The installation process involves only two tools: a tape measure and a screwdriver or drill. You will need a tape measure to determine the distance of the mounting holes, and a screwdriver or drill to install the screws that will hold the Detector.
Where
exactly CO2 Gas Detectors should be placed is debated, but the general consensus is to place the Detector where it can be easily heard. This includes any high traffic areas in the office with at least one Detector per floor. If you have a lot of square footage, figure out ahead of time how many Detectors you might need. Better to install more than one. Always keep the Detector in the open position and away from anything that could prevent CO2 from reaching the Detector.
Another thing to consider when determining a good location for a CO2 Gas Detector is altitude. You don't want to place it so high that you can't reach it while changing the battery, but you also don't want to place it so close to the ground that it can get dirty and possibly damage the system. Think of the system like you would install a smoke Detector, and place it accordingly.
Places to Avoid
Since CO2 Detectors are designed with certain temperature and humidity tolerances, it is better to avoid placing them anywhere near gas stoves or heating appliances. In general, try to avoid anywhere that can generate a lot of heat or steam, such as kitchen areas, bathrooms, or even in direct sunlight.
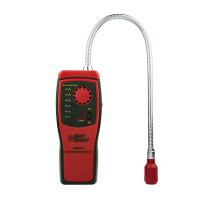
installation unit
Installing the Detector is very simple. The installation method is the same for most models, but it is better to read the instruction manual of the selected model. Turn the Detector over and measure the distance between the two mounting holes. Mark two points on the wall at equal distances from the mounting holes. These markings indicate the location of the mounting screws. Be sure to add new batteries before installing the unit. Take the time to mark a date on your calendar for battery replacement at least once a year.