WGG60-E metal gloss meter is a gloss measuring instrument designed and manufactured according to the international standard SO2813 and the national standard GB/T9754, and is defined by the S02813 standard to expand its gloss measurement range. All performance indicators meet the requirements of the working machine of the national JG696-2002 "Specular Gloss Meter Verification Regulations".
Main application range
Because of its full-range design, this type of instrument is well suited for gloss measurement of various metal and non-metal surfaces.
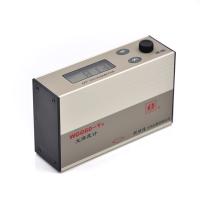
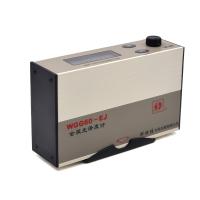
Structural diagram of main unit of Keshijia WGG60-EJ Metal Gloss Meter
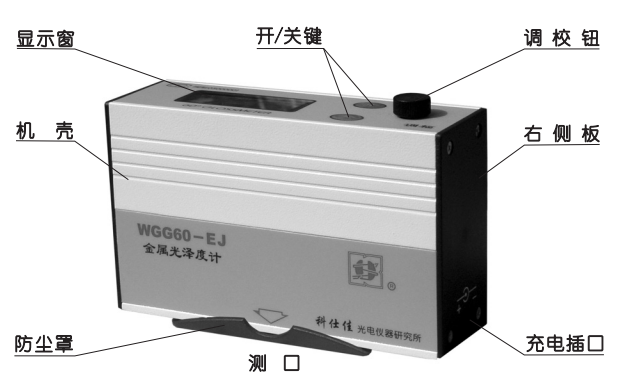
Turn on and off
Press the corresponding switch key to turn on or turn off the power of the instrument.
tuning
Turn on the power, remove the dust cover, and place the measuring port on the mirror glass working plate. After about half a minute , adjust the "Adjustment (Amplitude Modulation)" to make the displayed value equal to the verification value of the working board. If you want to measure the surface whose gloss value is lower than 150 gloss units, you can also use the black glass working board to "adjust" the instrument. school".
☆Instrument measurement needs to be buckled into the positioning frame of the work board box, and the adjusted indication value is valid. Measurement
☆ Place the measuring port on the part to be tested, and the value displayed by the instrument is the gloss value of the part.
If the startup time is long or the temperature of the measurement environment changes greatly, the instrument should be adjusted again to ensure the accuracy of the measurement.
Special advice: every time it is turned on, it must be adjusted before measurement. Therefore, there is no need to switch the power supply frequently during the measurement process , causing inconvenience.
check
Use the mirror glass working board to adjust the instrument according to the adjustment steps (see page 7), and place the measuring port on black glass working board. The difference between the indicated value of the instrument and the marked value of the board should not be greater than 2 gloss units.
If the calibration result is out of tolerance, it means that the glossiness of the working board has changed, and the calibration must be done again; you can send the whole set of instruments to our company, and our company promises to provide free re-calibration and mass transmission.
☆Don't remind:
・The measuring port of the instrument needs to be buckled into the positioning frame of the work plate box, so that the displayed value is valid. It is recommended that the instrument be used for a period of time, or when there is doubt about the measured value, the calibration work . Calibration is not required for every measurement.
Operation precautions
During the operation, the measuring rounds of the instrument, the surface of the working plate, and the measured surface of the object should be kept clean . Otherwise it will cause measurement error and inaccurate calibration. If there is dust or smudges , please wipe it off with lens paper or absolute alcohol.
Adjustment and measurement or calibration operations should be performed at the same ambient temperature. Otherwise, too large ambient temperature difference will lead to numerical offset.
During use, direct exposure to strong light should be avoided to prevent external light interference from affecting the accuracy of the measured value.
The measuring port plane of the instrument is the reference plane for measurement, and any foreign matter shall not be adhered or pasted, so as not to affect the measurement accuracy of the instrument.
After the battery power exhaustion warning sign appears, if you continue to use it, the instrument will only display "1" or "-1". At this time, the battery should be charged in time.
Internal battery power supply method
Just turn on the instrument switch directly. (Refer to "Switching on and off" in "Operating Steps") Emergency power supply method
Once the internal battery is exhausted and the instrument is urgently needed, you can use the instrument while charging . After use, continue to charge the battery.
Undervoltage warning sign
The internal battery power is about to run out, and the instrument will automatically display a warning sign.
Undervoltage warning sign:
The warning symbol is displayed on the left side of the instrument display window as shown in the right figure.
How to charge the internal battery
Turn off the switch of the instrument, and connect the instrument and the charger. Plug the charger into the 220V AC socket, the indicator light of the charger is on, and the charging starts.
This charger is a constant current type, and it should be charged for 14-16 hours to a battery that has been exhausted.
Notice
When the instrument does not have an undervoltage warning sign, please recharge the battery, otherwise it will affect the service life of the battery
When charging, please pay attention to the timing to prevent the battery from being overcharged and causing premature damage to the battery! After charging, the charger should be removed from the AC power socket.
It is strictly forbidden to use non-supporting chargers for charging, so as not to damage the instrument or cause danger!
maintainance
The whole set of instruments should be stored in a dry, ventilated place without corrosive gas. Avoid moisture that will affect its performance.
When the instrument is not in use, it should be covered with a dust cover. If there is dust attached to the mirror surface, please use lens tissue or a blower to remove it
A After using the working board, please wipe it clean with lens paper or absolute ethanol, and keep it in a safe place. Do not allow surface damage to affect measurement accuracy.
If the instrument is not used for a long time, the battery in the machine should be replenished with an appropriate amount of power every month.
After using the instrument, remember to turn off the power switch to avoid damage to the battery due to over-discharge.
The instrument cannot be disassembled at will, so as not to affect the accuracy of the instrument and cause maintenance difficulties.
The company has the right to disclaim the warranty if the instrument is damaged due to disassembly or improper use. However, paid repairs can be given.