introduce
The hardness of a coating is a relative property that can be interpreted in a number of ways by the different industries using the coating/lining material. Although hardness tests are often used to assess the degree of cure, they can also be used to measure hardness characteristics in coatings. The absolute hardness of a coating is not always the ultimate goal of the formulation, an increase in hardness may be accompanied by a decrease in brittleness or coating flexibility. The balance between hardness and other final film properties depends on the end use of the product.
When comparing hardness values listed on a paint manufacturer's product data sheet, this information is often considered an indicator of how well it has cured and its inherent properties. Uncured coatings that remain soft can suffer damage in service; for example, backfilling a trench too quickly and damaging a newly applied pipe coating that has not fully cured can adversely affect pipe integrity
This article describes two common testing methods: indenter (durrometer) and pencil hardness, which is more of a pure hardness test. The choice of test method is usually dictated by the thickness of the coating material, although variations in test thickness are permitted if useful information can be obtained. The hardness of thick film coatings (the method indicating that "thick film" is considered to be at least 6 mm or 240 mils) is usually measured using an indenter type Tester which measures resistance to indentation under a specific spring force load, whereas Thin films are often evaluated for hardness of coatings (methods that do not include reference thicknesses) using the pencil hardness test. Note that there is no correlation between the hardness test methods described herein, and no pass/fail criteria are indicated in the corresponding ASTM standard test methods. The project specification should indicate the minimum acceptable hardness value before the coating system is put into service. The minimum acceptable hardness value is usually determined by the coating manufacturer.

Measuring Durometer Hardness
Durometer hardness testing was performed according to the procedure described in ASTM D2240, Standard Test Method for Properties of Rubber—Durometer Hardness. The standard covers twelve types of measuring equipment (types A, B, C, D, DO, O, OO, OOO, OOO-S and R). This article describes the use of the Shore D durometer because many thick film, chemically resistant coatings fall within the hardness range that the Shore D durometer can accurately measure. For softer, thick film coatings, the Shore A durometer may be more useful because it has less spring. According to ASTM standards, durometer hardness values less than 20 and greater than 90 are not considered reliable, and it recommends that readings below 20 and 90 are not recorded for either Shore A or Shore D instruments.
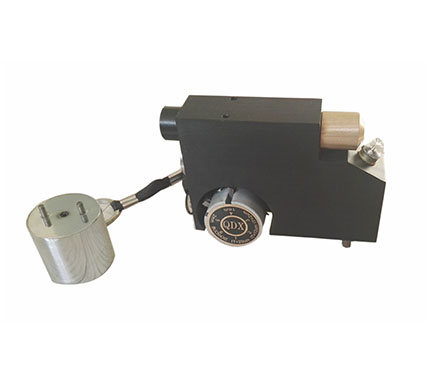
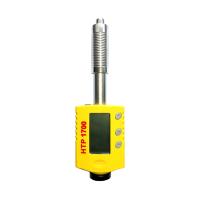
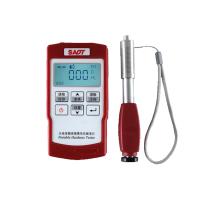
The Shore D durometer is a small handheld device (Figure 1) used to measure the indentation hardness of a variety of materials such as hard rubber, plastics, soft metals, epoxies, and other coated materials. A small, tapered head protrudes from the presser foot (bottom of the Tester). Durometers contain a calibrated spring that applies a vertical force to the indenter. Naturally, the cured hard coating will provide resistance to the indenter under the applied load force. This indentation resistance is shown on the gauge or digital display in the form of a hardness value.
The surface of the coating to be tested shall be clean and smooth. Any inherent surface roughness may produce erroneous hardness values.
Since temperature and humidity can affect hardness values, the surface temperature of the coated surface and the relative humidity of the surrounding air should be measured and recorded prior to testing. Although ASTM standards require reporting of temperature and humidity data, hardness values are not corrected for prevailing environmental conditions.
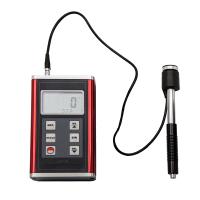
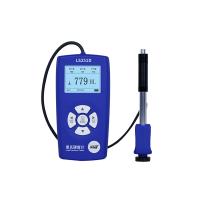
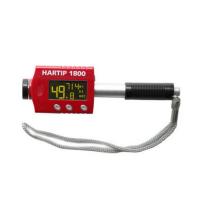
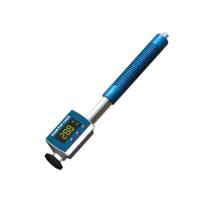
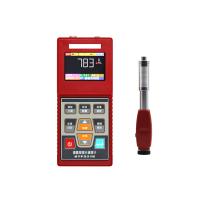
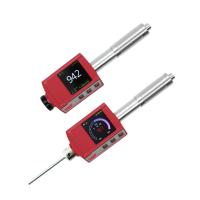
Digital Hardness Testers (Figure 2) with separate (remote) probes are becoming more and more popular. Their use is more suitable for curved surfaces due to the smaller diameter of the test feet compared to the bases of standard durometers. However, the entire measurement surface of the probe needs to sit flush against the surface, without rocking, to obtain reliable readings.
After verifying accuracy with a test block, press the remote probe into the coating until the presser foot makes full, flat contact with the surface and secures it in place. After the Tester emits a single audible signal, it will display a symbol indicating that a reading is being taken. The Hardness Tester will emit a double signal and display the measured value.
Verify Durometer Operation
Durometers should be calibrated annually by the manufacturer or its authorized service center. Some will even provide a 10-point calibration certificate traceable to a national metrology institute such as the National Institute of Standards and Technology (NIST). Operators cannot calibrate the Hardness Tester, but should verify proper operation before each cycle of use.
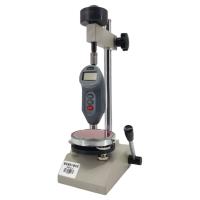
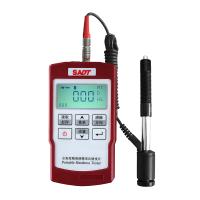
Test blocks are used to verify correct operation. The groups shown (Fig. 3) represent hardness values of 25, 46 and 75 for the D scale. Take a measurement on each test block and compare it to the hardness value displayed on the durometer. If the displayed value of the durometer does not meet the tolerance of the test block value (eg 25 +/- 5, which means that the displayed hardness value obtained on the test block can be between 20-30), the durometer should not be used to measure the coating. Layer hardness should be returned to the manufacturer or service center for repair and calibration.
Measuring Pencil Hardness
Pencil hardness testing was performed according to the procedure described in ASTM D3363, "Standard Test Method for Film Hardness by Pencil Test". Pencils containing lead leads of various hardnesses (as shown in Figure 4) are then prepared to try to scratch or gouge the coating. The inherent scratch or scratch resistance of a coating is an indicator of hardness. This test can be used for thin film coatings that cannot normally be evaluated using an indenter Hardness Tester.

To perform a pencil hardness test, a series of 14 drafting pencils representing lead of different hardness (from 6B to 6H; according to Figure 4) and a piece of emery cloth or extra-fine sandpaper are required.
Remove the wood from the end of the pencil to expose at least 1/8" of
take the lead. Blunt the tip of the wire with sandpaper or emery cloth to create a 90° cylinder (instead of a conical end) as shown in Figure 5. Hold the pencil at a 45° angle to the coated surface and try to push the edge of the blunt "cylinder" into the coated film (Figure 6). One of three outcomes will occur:
The edge of the pencil lead will scratch but not the paint film;
The edge of the pencil lead can scratch the paint film; or
The edge of the lead will be beveled or broken, indicating that the coating is harder than the lead.
Whenever a pencil lead is reused, it first needs to be "refreshed" with emery cloth or sandpaper to regenerate the cylindrical end of the lead.
The pencil hardness test method indicates that the test should be performed under temperature and humidity conditions of 23±2°C (73.5±3.5°F) and 50±5% relative humidity. Shop/field conditions rarely meet these ranges; therefore, hardness measurements obtained outside of these conditions should be reported with actual conditions and recorded as obtained under conditions not listed in this method.
Certified pencils can be purchased, but calibration is usually not done because the cost of calibration often exceeds the cost of buying a new pencil. Similar to durometer hardness, the results of this method may be altered by surface texture or imperfections, and it is recommended that any surface irregularities be noted.