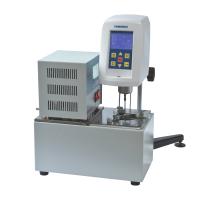
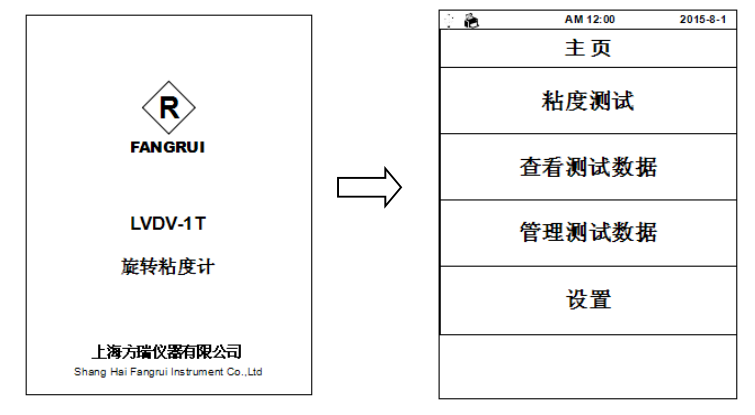
Take the LVDV-1T model as an example: after starting up, the instrument first displays the initial interface, and then automatically enters the main menu page after waiting for 3 seconds . There are 4 options in the main menu:
Viscosity test: measure the viscosity value of the sample;
View viscosity data: read and print the saved test results;
Manage viscosity data: export or batch delete the saved test results;
Setting: Setting of the basic parameters of the instrument, such as: time, date, storage path, factory reset, language selection, screen backlight adjustment, etc.
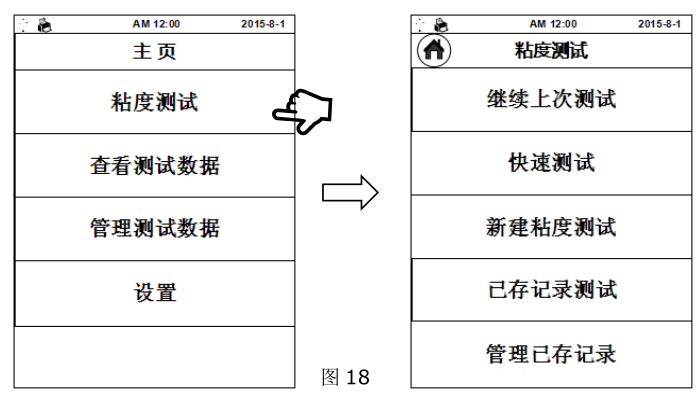
1. Viscosity test
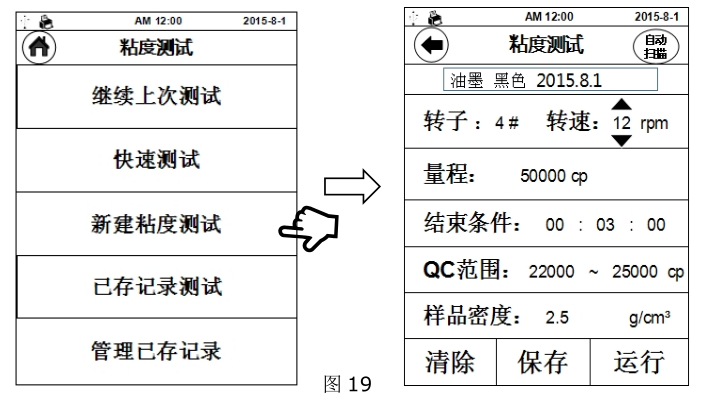
1.1 Click "Viscosity Test" to enter the viscosity test interface (Figure 18), there are 5 options in this interface:
Continue last test: use the test conditions of the last time (before power failure) to continue the test
Quick test: Quickly measure the viscosity, just select the rotor and speed, and the data cannot be saved after the test is completed
New Viscosity Test: Create a new test record test
Saved Recorded Tests: recall stored recorded tests
Manage saved records: Delete saved test conditions
1.2 According to different test requirements, click one of "Continue Last Test", "Quick Test", and "New Viscosity Test". Taking "New Viscosity Test" as an example, click to enter the parameter setting interface (Figure 19).
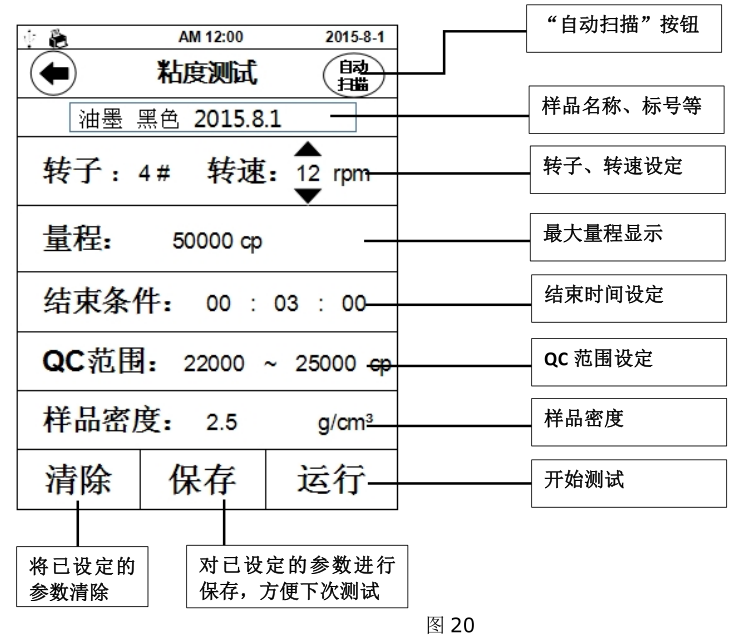
1.3 Parameter setting: Before the viscosity test, the test parameters suitable for the sample to be tested should be set (Figure 20), among which "sample name ", "rotor" and "speed" are mandatory items, "end time", "QC Range" and "Sample Density" are optional items.
The speed setting is selected through the arrows up and down the value, and the rest of the parameters are input using the virtual keyboard after clicking the parameter value.
For example : if the viscosity of the tested sample is known to be about 3000mpa.s, you can choose the following combination: 2# rotor, 6rpm; or 3# rotor, 30rpm
参数设定完成后可以将参数存入内置储存中,在下次的测试中即可通过“ 继续上次测试”直接使用该参数进行粘度测试。也可在日后的使用中从“ 已存记录测试”中调取该组参数进行测试。
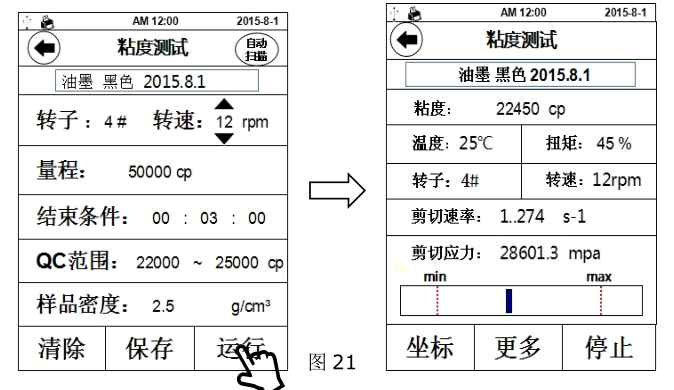
1.4 开始测试:参数设置好后,点击“ 运 行”开始测试,界面切换至测试界面(图 21),
粘度: 被测样品的粘度值(若测试时显示 ERROR,表示超出量程需更换表更大量程)
温度: 温度传感器所测得的温度值(需选配温度传感器才能显示温度值)
扭矩: 测量值与满量程的百分比
转子: 当前所选的转子号
转速: 当前所选的转速(RVDV/HADV/HBDV 系列粘度计转速可以无级调整,即不停止运转情况下改变转速)
剪切速率: 当前测试条件下的剪切速率
剪切应力: 当前的剪切应力
条状趋势栏:扭矩趋势栏,刻度代表当前扭矩百分比,两端红色虚线处分别代表 10%和 90%
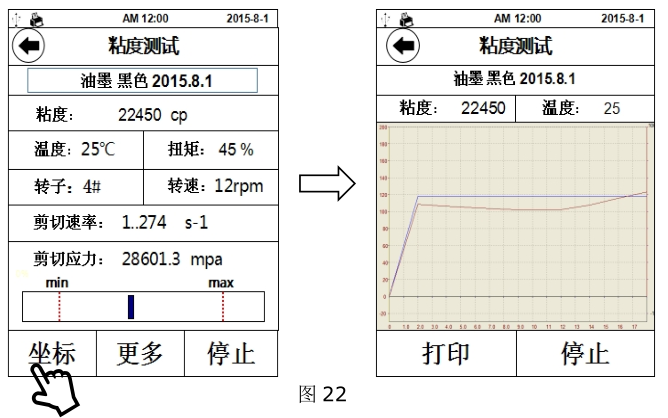
1.5 测试时点击“ 坐标”,显示界面会从列表显示变为坐标系显示状态(图 22),如需返回列表界面请点击左上角 图标,点击“ 打印”可将当前测试数据及坐标曲线通过外置打印机打印出来(需选配专用外置打印机)。
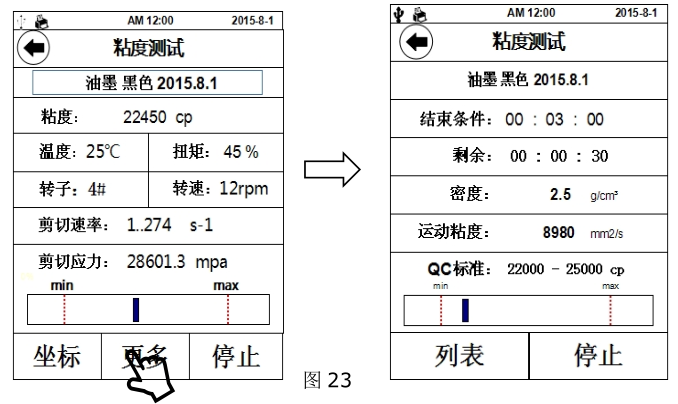
1.6 测试时点击“ 更多”,该界面显示内容为之前的可选参数(图 23),如测试前未设置则无显示。
结束条件:设定一个时间段,从开始测试时,到达时间后测试自动停止,此时数据依然留
在测试界面,此功能在测试如剪切变稀的非牛顿流体时较为实用
剩余: 剩余结束时间
密度: 测试前填入的被测样品的密度 ,用以换算运动粘度
运动粘度: 被测样品的运动粘度值
QC标准: 预设定一个粘度范围,用于判定所测得粘度值是否符合该样品的粘度标准,下方趋势栏则对应该范围,两端红色虚线分别对应最小值与最大值。例:下图中样品粘度标准为 22000cp~25000cp,实测粘度值为 22450cp,趋势栏刻度线处于红色虚线内,则认定该样品符合标准。该功能能便于生产中对多种样品的品控管理。
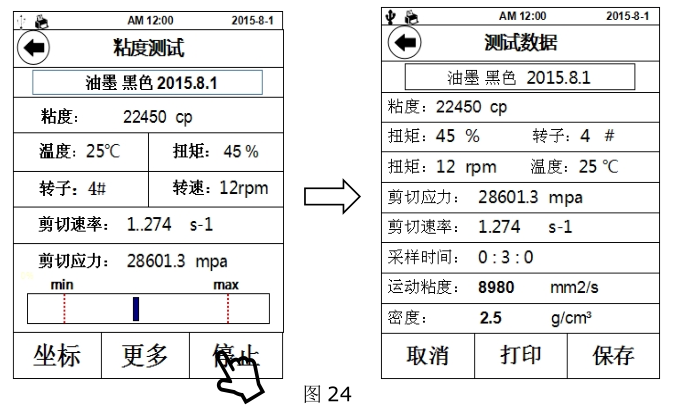
1.7 结束测试:完成测试后点击“停 停止 止”,进入测试数据界面(图 24),点击“ 打印”可将测试数据通过外置打印机打印出来,点击“ 保 存”可将测试记录储存到仪器内存中,可在主菜单“ 查看 粘度 数据”一项中调阅并打印,保存前需要输入样品名称,否则保存无效。
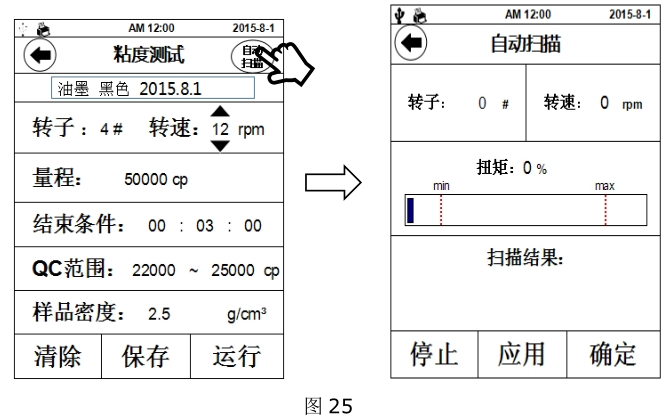
1.8 自动扫描:该功能可为操作者提供很好的的转子、转速组合信息。点击参数设置界面右上角的 “ 自 动 扫描” ”,界面切换至扫描界面(图 25),设定任一转子,同时装上该型号转子,点击“确定”开始扫描,“扫描结果”一栏中开始显示扫描状态,当扫描结果满足测试要求时,“扫描结果”处显示“合适”,点击“应用”直接把扫描结果应用到测试参数中。如扫描结果无法满足测试要求时,“扫描结果”处显示“请更换小号转子”或“请更换大号转子”,此时按照屏幕提示操作即可。
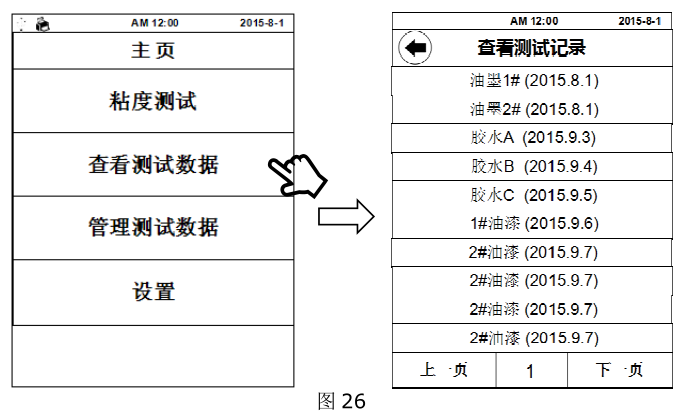
2、查看、打印测试记录:点击“查看测试数据”后,屏幕上会显示已存储的测试记录(图 26),选择所需的记录查阅或打印。
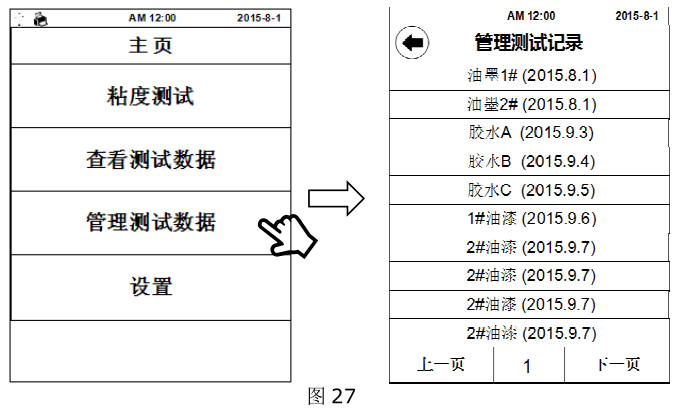
3、管理测试记录:点击“管理测试数据”后,屏幕上会显示已存储的测试记录(图 27),选择所需的记录即可删除该项记录。
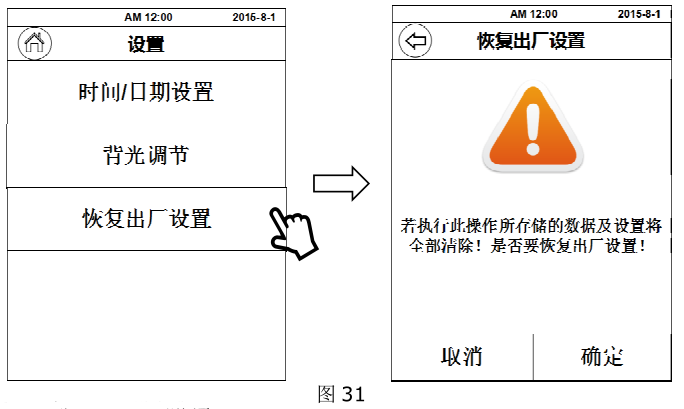
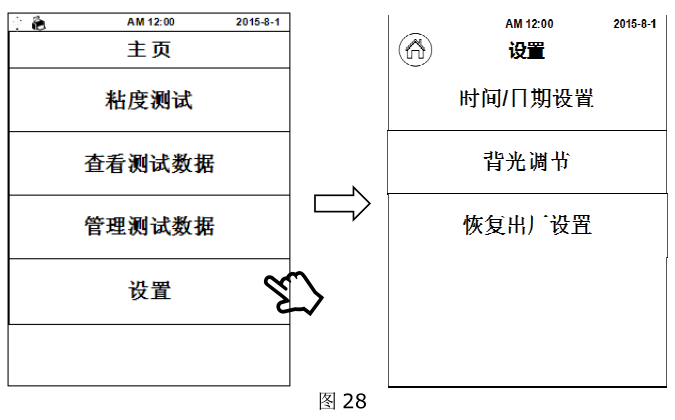
4. Settings: General settings of the instrument, time, date, etc. (Figure 28)
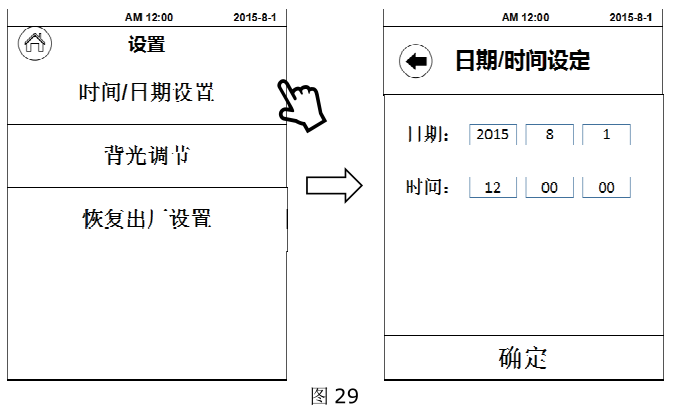
4.1 Time and date setting: Click "Time/Date Setting" to directly adjust the values in the date and time columns. (Figure 29)
4.2 Backlight adjustment: Click "Backlight adjustment", and adjust the screen brightness through the "-" and "+" at both ends of the indicator bar or directly drag the circular adjustment button . (Figure 30)

4.3 Restore factory settings: click “Restore factory settings”” and the interface shown on the right will appear. If you click “OK” at this time, the instrument will return to the state when it left the factory, and the test records and parameter records in the internal memory of the instrument will also be restored. is cleared. (Figure 31)