Operation Guide
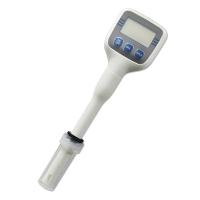
Before use, please pull off the electrode protection cap under the instrument, do not rotate it!

Switch function:
1. The normal switch is to click the "ON/OFF" button.
2. Automatic shutdown function. If there is no key operation for 5 minutes after starting up, the meter will automatically shut down; meter self-test function (this step is executed by default every time the meter is turned on):
1. After pressing the "ON/OFF" button to start the machine, the instrument immediately enters the self-test mode (full display on the LCD screen);
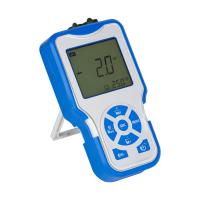
2. Subsequently, the LCD will display the current instrument model: 6821;
3. Finally, the meter enters the normal pH or ORP measurement working mode.
4. The factory setting of the instrument is "pH" mode by default
5. The meter has a memory function, and the meter will work in the last measurement mode when it is turned on again
(For example: the ORP value was detected last time, and the LCD screen still displays the ORP measurement mode when the machine is turned on again)
pH measurement mode: (in power-on state)
1. Press and hold the "ON/OFF" button for about 3 seconds until the pH character is displayed on the LCD screen;
2. Then, press the "CAL" key to confirm, the pH function is set successfully;
3. At this time, the meter has entered the pH measurement mode, and can perform normal pH measurement;
ORP measurement mode: (in power-on state)
1. Press and hold the "ON/OFF" button for about 3 seconds until the pH character is displayed on the LCD screen;
2. Press the "HOLD" button again to select until the ORP character appears;
3. Then, press the "CAL" key to confirm, and the ORP function is set successfully;
4. At this point, the meter has entered the ORP measurement mode and can perform normal ORP value measurement
Backlight function: (in power-on state)
1. Press and hold the "ON/OFF" button for about 3 seconds until the pH character is displayed on the LCD screen;
2. Press the "HOLD" button again to select until the LCD displays LED characters;
3. Then press the "CAL" key to confirm, the backlight on function has been successfully set; if you want to turn off this function, just turn off the machine and then turn it on again.
Lock function:
Press the "HOLD" button to lock the current data on the LCD screen, and the HOLD symbol is displayed on the top of the screen. When the "HOLD" button is pressed again, the lock mode is released, and the HOLD symbol disappears.
reset:
If the meter cannot work normally or cannot be calibrated, please press and hold the "HOLD" button for about 3 seconds until the LCD displays CLR characters; at this time, release the "HOLD" button. The factory reset was successful.
If the pH value is measured, the meter needs to be re-calibrated for pH; if the ORP value is measured, the meter can measure the ORP value Automatic temperature compensation (ATC)
The ATC symbol appears in the lower left corner of the LCD screen, indicating that the meter is in the automatic temperature compensation mode
℃/℉ conversion
The temperature unit of the instrument is ℃ (Celsius) by default when it leaves the factory. If you use ℉ (Fahrenheit) as the temperature unit, you can switch
Instrument Calibration
1. pH Calibration Procedure
First, prepare 4 medium-sized measuring cups;
Then, pour the pH correction solution (pH4.0, pH6.8, pH9.1 three values) and tap water into 4 cups respectively:
Note: The order of calibration is: first calibration pH 6.8; second calibration pH 4.0 third calibration pH 9.1
The following calibration steps take pH 6.8 as an example (calibration 4.0 and 9.1 are the same):
Steps
1 Turn on the machine (you need to soak the electrode in distilled water or pure water for 10-30 minutes to activate the electrode).
2 Clean the electrode in tap water, take it out, and dry it with a paper towel;
3 Put the electrode into the pH6.8 calibration solution; wait for the value to stabilize;
4 Press and hold the "CAL" button for about 3 seconds until the LCD displays CAL characters and release the button;
5. Wait for the meter to display the SA character, indicating that the meter has been calibrated successfully and is automatically saving the calibration data;
6 Afterwards, the LCD will display the END character, exiting the calibration mode
Special Note:
If the indicator does not display the SA character, but directly displays the END character, it means that the calibration of the meter has failed. At this time, it is necessary to check whether the calibration solution is correct, or
Whether the probe fails;
2. ORP does not need to be corrected.
If in doubt about ORP measurements, check with ORP buffer!
Over range display
When the pH value is lower than 0 or higher than 14, the pH&ORP display area will display: "1- - .-".
When the ORP is lower than -500mV or higher than +500mV, the pH & ORP display area will display: "1- - .-".
When the temperature is lower than 0°C or higher than 50°C, the temperature display area will display: symbol 'L' or symbol 'H'.
Low voltage reminder
When the LCD display is dim and the low voltage symbol (battery symbol) is displayed, it means that the battery voltage is low, please replace the new battery as soon as possible, remember that the old and new batteries
Do not mix them.