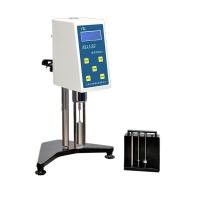
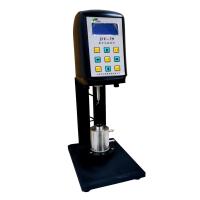
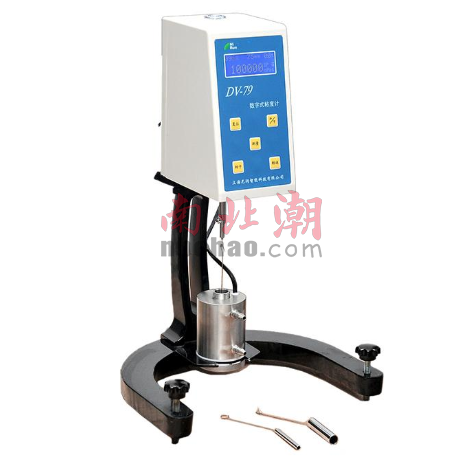
Nirun DV-79 digital display viscometer is a common DV series Rotational Viscometer. It is an upgrade on the NDJ-79 viscometer. This article introduces its specific operation steps in detail.
(1) First install the viscometer in place according to the correct installation method.
(2) Install the connecting rod at the coaxial end of the motor to the connecting end of the motor.
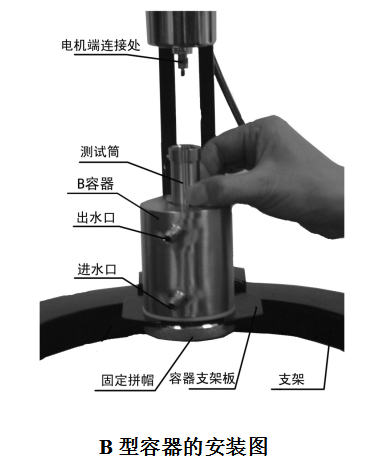
(3) Put the test cylinder into the B-type container (notch alignment). Put the selected rotor into the test cylinder, slowly inject the liquid to be tested into the test cylinder of container B (note: try not to overflow the test cylinder, if it overflows, wipe it off in time) load the sample to the liquid surface and the lower edge of the conical surface of the test cylinder flush. Loosen the fixed cap, place the B-type container on the container support plate as shown in the figure, initially fix the center position of the B-type container, and tighten the fixed cap (but you can move the B container slightly). Hang the rotor on the connecting rod at the coaxial end of the motor. At this time, the rotor should be completely submerged in the liquid.
A container installation steps:
Put the selected rotor into the test cylinder of container A, and slowly inject the liquid to be tested into the test cylinder of container A (note: try not to overflow the test cylinder with the sample, if it overflows, wipe it off in time) load the sample to the liquid surface and the conical surface of the test cylinder at the lower edge. Put the A container test tube on the container support, and connect the hook on the rotor with the hook on the connector. Just adjust the center position of the A container test cylinder.
(4) Turn on the machine, and the stepper motor starts to work (it is recommended to use high speed and fast rotor positioning). At this time, the rotor may shake when it rotates, and the B-type container can be moved back and forth, left and right to make it concentric with the rotor. As time goes on, the rotor will be concentric with the inner cylinder. (If you are making a standard sample, you can confirm the center position of the B container if you want to find the minimum value of viscosity). After determining the position of the B-type container, tighten the fixed cap (the phenomenon that the B-type container cannot be moved). After the sample test is finished, the rotor is separated from the connecting rod at the coaxial end of the motor, and the test cylinder is taken out for cleaning. The B-type container is still fixed on the container support plate.
(5) Input the selected rotor number: each time you press the rotor key, the rotor number displayed on the screen will change accordingly, and cycle among A → B → C → D → E → F → G, when the screen displays the selected rotor number , the input is complete.
(6) Select the speed: press the speed key, the screen will display the current speed such as 060.0RPM, and the character "6" will flash continuously, at this time, you can set the tens digit of the speed by pressing the number increase key or decrease key; then press The shift key can shift to the ones digit and the ten digits after the decimal point one by one. The setting method of the tens digit above can be used to complete the value setting of other digits. After the speed is set, press the speed key to confirm.
(7) Press the measurement key, the stepper motor starts to rotate, and after a certain time, the viscosity value and the percentage meter scale at the current rotor and speed can be measured at the same time.
(8) During the measurement process, if you need to replace the rotor, you can directly press the reset button, and the motor will stop rotating at this time, and the viscometer will not be powered on. After the rotor is replaced, repeat the above items (6) to (8) to continue the measurement.
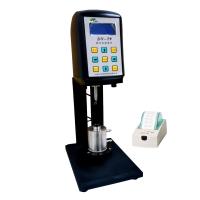
(9) print:
a. The viscosity has not been measured, press the print key to choose to set the printing time interval: Press the print key, and S: 00: 05 will appear on the upper right of the screen, and the printing time setting can be changed by the shift key and the number plus or minus key. After finishing, press the print key to confirm; S : 00 : 05 means to print once every 5 seconds, 00 : 10 means to print once every 10 seconds, ... 05 : 00 means to print once every 5 minutes, and so on;
b. Connect the printer, press the measurement key, and after starting to measure the viscosity, press the print key to start printing or stop printing. Press the print key once, and the printer will print on, indicating that printing is started according to the printing time interval, and press the print key again, and the printer will print off, indicating that the printing is complete.