Measuring physical parameters such as coating thickness, surface profile and dew point is a common task for inspectors and applicators. However, these measurements are only as accurate as the instrument that performs them. Even high-quality electronic instruments can produce erroneous measurements if three key steps are not followed: calibration, verification, and adjustment. This article explains these often misunderstood steps as defined by ASTM D7091 1, ISO 2808 2 and SSPC-PA 2 3 . The importance of a "long form" calibration certificate on which calibration can be performed, and applications that may require field adjustments will also be discussed.
Ensure accurate instrument readings
Part 1: Calibration
What is Calibration?
The term "calibration" has different meanings depending on the industry or context of use. There is a good chance that someone you know is misinterpreting the term "calibration and calibration interval" as it relates to the coating inspection industry. They will be surprised to learn that not only are they unable to calibrate gages themselves, but there is often no set recalibration interval.
To show how daunting it is to define calibration terms, one need only look at the myriad of definitions provided by major organizations. Given the challenges of defining words used in many industries for many types of instruments, it's no surprise that interpretations vary.
An easier approach is to explain calibration terms as they relate to a specific industry sector, in this case the protective coatings industry. Here, ISO, ASTM, SSPC and others generally agree.
Calibration in the Paint Inspection Industry
ASTM D7091 describes the measurement of dry film thickness using a magnetic eddy current meter, which is typical of many standards. It defines calibration as:
"...a high-level, controlled and well-documented process for obtaining measurements of traceable calibration standards over the entire working range of the gage, followed by necessary gauge adjustments (as required) to correct any out-of-tolerance The coating Thickness Gauge is performed by the equipment manufacturer, its authorized agent, or an authorized calibration laboratory using documented procedures in a controlled environment, and the result of the calibration is the restoration/recalibration of the Thickness Gauge so that it meets the /exceeds the manufacturer's stated accuracy."
Within that definition, there are a few terms that deserve further discussion:
"Traceable Calibration Standards": Fundamentally, the purpose of calibration is to ensure that the readings of an instrument are within tolerances of known standards. Quantifying these known values (weight, distance, etc.) is the responsibility of an organization called the International Bureau of Weights and Measures (BIPM).
BIPM collaborates with national metrology societies such as NIST (USA), NPL (UK) and PTB (Germany), which maintain Standard Reference Materials (SRMs) for standard measurements of length, weight and time. These SRMs are highly accurate workpieces used as calibration standards for accurate measuring equipment.
Since everyone can't afford, effectively, or even be able to calibrate, SRMs are used to calibrate the primary calibration standard. Secondary standards are used to calibrate working standards; and working standards are used to calibrate process instruments. Through this "chain of standards" it is eventually possible to trace the instrument directly to the SRM artifact without measuring that artifact.
Since an instrument or standard is always less accurate than the standard used to calibrate it, the uncertainty increases as one learns more about the standard chain.
A Test Uncertainty Ratio (TUR) of 4:1, which is generally accepted in industry, means that the tolerance of the instrument is four times greater than the uncertainty of the standard being measured. For example, a coating Thickness Gauge calibrated to a standard with an uncertainty of ±0.05 mils will have a stated tolerance or accuracy of ±0.2 mils when using a 4:1 TUR.
All participating research institutes recognize the validity of each other's calibration and measurement certificates under a mutual recognition agreement signed between the main national metrology societies.
"Accredited Calibration Laboratory": ASTM D7091 limits the parties who can perform the calibration to "the equipment manufacturer, its authorized agent, or ... an accredited calibration laboratory". While the first two categories are self-evident, the concept of an "accredited calibration laboratory" is less clear. ISO/IEC 17025 specifies the requirements for accreditation, and laboratories can obtain such accreditation through accreditation bodies that sign the International Laboratory Accreditation Cooperation (ILAC) agreement.
However, ISO 17025 accreditation of laboratories is only for specific calibration activities. The scope of a laboratory's accreditation lists the activities that the laboratory is accredited to perform, in addition to the measurement uncertainties to which the laboratory is able to calibrate. If using a third-party calibration laboratory, it cannot be overstated how important it is not only to ensure that it is accredited, but that its accreditation includes the instrument you are calibrating. While a large number of ISO 17025 accredited laboratories exist, there are very few laboratories that calibrate paint inspection equipment.
Calibration certificate
Once the instrument has been calibrated, a document called a "Certificate of Calibration" is issued (Figure 1). This document documents the actual measurement results and all information related to a successful instrument calibration, including traceability to national standards. Work specifications usually require proof of recent calibration.
Many test equipment manufacturers do not provide calibration certificates. Instead, they may provide a "certificate of compliance," "certificate of compliance," "certificate of accuracy," or "attestation." These are only the manufacturer's statements of accuracy, requiring the user to trust that the instrument will measure accurately. Such "certificates" do not meet the definition of calibration under ASTM D7091 and other standards, and are often insufficient to meet internal, contractual, or regulatory requirements.
Although the form and content of calibration certificates vary, a proper certificate needs to contain specific minimum information to ensure compliance with ISO/IEC 17025 requirements. Figure 1 shows an example of a calibration certificate with each important attribute highlighted.

Identification of the calibration laboratory - A calibration certificate needs to identify the location where the calibration was performed.
Title - Make sure the document is "Certificate of Calibration" or "Certificate of Calibration".
Individual Identifier - Each calibration certificate is individual and should have an individual identifier such as a serial number or certificate number.
Identification of Calibrated Instruments - Calibration certificates should clearly identify the instrument, including the serial number and any model information.
Environmental conditions in the laboratory environment - at least the temperature and relative humidity at which the calibration will be performed should be specified.
calibration date
Identify the calibration method used - Any calibration should be performed in accordance with established and approved procedures. Some device manufacturers publish their calibration procedures.
Evidence of Traceability - Traceability is the main purpose of a calibration certificate and evidence of traceability needs to be documented.
Calibration Results - Calibration certificates are required to document the actual instrument readings against a reference value and indicate whether the instrument readings are within tolerance of the reference standard.
Name, title and signature of the person performing the calibration
Statement of Accuracy - The certificate is required to specify the uncertainty to which the instrument has been calibrated. This is usually the same as the manufacturer's specification, but may be limited by the capabilities of the calibration laboratory.
Logo/Information of Accreditation Body (unless the device manufacturer issued the certificate) - For certificates not issued by the device manufacturer, the logo or identification information of the body accrediting the laboratory should be provided.
If a certificate issued by a calibration laboratory or instrument manufacturer does not include these important attributes, it may not be a calibration certificate as defined by most standards and contracts.
when to recalibrate
Since the accuracy of most measurement equipment degrades with use, periodic recalibration (or recertification) is required throughout the life of the instrument. Calibration intervals are defined times between instrument recalibrations. Most manufacturers do not include calibration intervals as part of the calibration certificate, as required by ISO 17025. Why? Because they don't know the frequency of use of the gauge, the environment in which the gauge is used, and the maintenance conditions4.
如果您没有使用仪器的经验,则更好在两次校准之间间隔一年。可以According to经验和定期验证进行调整(请参见下文)。拥有新仪器的客户可以将仪器投入使用的日期(或购买日期)用作其第一个校准间隔的开始。保质期的影响可忽略不计,使实际校准证书日期的重要性降至最低。
第2部分:验证
验证重要性无庸赘述
校准证书不能保证在整个校准间隔内都能保持准确性。许多因素可能会对量具的运行产生不利影响,例如意外损坏或碎屑堆积。为了防止使用不准确的量规进行测量,大多数标准都要求准确性,并且在每次使用前(通常在每个工作班次开始时)都要对操作进行验证。在获得大量测量结果之后,如果掉落了仪表,或者怀疑其提供了错误的结果,则应重新检查。签约方通常会就检验量具准确性的细节和频率间隔达成初步协议。
在这些时间间隔内您会做什么?这取决于您建立的质量体系。一些所有者在他们的量规是新的时仅测量样品零件并记录结果。然后保存该样本,并用于定期检查量具的操作和准确性。
但是,检查准确性的很好的方法也是最为普遍接受的方法,是使用书面程序在受控环境中测量校准标准品。ASTM D7091包含许多标准的典型语言:
“ 7.3准确性的检验—在使用前,用户应按照制造商的说明,使用适当的涂层厚度标准,由用户检验每台仪器的校准准确性,如有必要,还应纠正发现的任何缺陷。应对量具进行检验以确保达到预期的使用范围。”

校准标准有多种形式,具体取决于要验证的仪器。它们需要可追溯至国家计量学会,并且测量值应在量具的范围内-称心情况下,应在预期的测量范围内。测量它们的过程在称为“校准程序”的文档中进行了描述,一些制造商会According to要求发布或提供这些程序。
对于涂层测厚仪,可提供经认证的涂层金属板或塑料垫片作为涂层厚度标准。印版通常更准确,更耐用,但价格也更高。1型(机械)涂层测厚仪无法使用塑料垫片进行验证。
一系列读数的平均值应在量具和参考标准品的总公差之内。为了确定组合公差,不能将量规和标准件的公差简单地相加,而应使用“平方和”公式。例如,如果参考标准的精度为±2%,而仪器的精度为±3%,则组合公差为±3.6%,计算公式如下:

如果读数超出组合公差,则说明量规或参考标准存在问题。应确定有问题的量具或参考标准,并且自上次准确性检查以来进行的所有测量均应视为可疑。
第3部分:调整
对于许多检查仪器而言,“校准和验证”足以确保仪器进行正确的测量。但是,对于涂层测厚仪,通常需要执行第三步:调整。这是因为涂层测厚仪无法直接测量涂层的厚度;相反,它们测量基材的磁性。随着探针从基材移开,这些性能会减弱,因此与涂层厚度有关。
但是,还有其他因素会影响基板的磁性能。这些包括:
涂层测厚仪通常在工厂进行校准,以在平坦,光滑的碳钢上表现良好。但是,如果进行调整,它们可以在具有不同表面粗糙度,几何形状,成分或质量的应用上准确测量:
“ 3.1.2调整-将量规的厚度读数对齐以匹配已知厚度样本的厚度的物理行为(消除偏差),以提高量规在特定表面上的精度。”
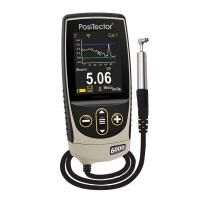
重要的是要注意,任何调整仅考虑执行调整的位置处的基板粗糙度,几何形状,成分和/或质量。如果这些因素中的任何一个在整个零件或工作中发生变化,则通常需要进行进一步的调整。某些电子仪器(例如PosiTector 6000 Advanced型号)能够保存多个校准调整,因此用户可以选择适合当前应用的调整。
还应注意,并非所有的涂层测厚仪都是相同的。有关如何调整特定仪器的很好的指导,请咨询制造商或仪器的用户手册。以下概述是调整一种常见涂层测厚仪的指南。
调整几何形状,成分和质量
要确定仪器是否需要调整,请检查未镀膜基材上一系列读数的平均值是否在零的量规公差范围内。如果测量超出公差,则可能需要调整量规。这通常很简单,就是通过检查测量过程中遇到的误差来抵消所有将来的测量结果。II型电子压力计(例如PosiTector 6000)通常具有内置的“调零”功能,以使过程自动化。如果未涂覆基材的后续测量结果在零公差范围内,则说明调整成功。I型机械式拉力计,例如PosiTest具有非线性标度,因此仪器本身不应进行调整。相反,用户应获取贱金属读数(BMR),并从将来的涂层厚度读数中减去该值。
在几乎所有应用中,仪器都将在成功进行调零后在整个范围内进行公差测量。可以通过将垫片放在未镀膜的基材上并确保量规读数在垫片和量规的组合公差范围内来验证这一点。在极少数情况下,量具的读数在零公差范围内,而垫片的公差范围之外,则可能需要进一步调整。有关更多详细信息,请咨询产品手册的制造商。

调整表面粗糙度
虽然零调整通常足以解决几何形状,成分和质量的影响,但不应在喷砂或粗糙的表面上进行零调整。在那些表面上,涂层测厚仪将测量到粗糙度的峰谷之间的一个点,称为“磁平面”。由于大多数标准和规范表明仅报告表面轮廓峰上的涂层厚度,因此需要进行调整。
确保涂层测厚仪将在表面轮廓的“峰顶”上测量涂层的厚度,公认的程序是将放置在未涂层基材上的垫片的厚度调整为已知厚度。垫片放置在表面轮廓或其他图案的峰上,并代替最终将要应用的涂膜。II型电子量规通常具有内置的“ 1点调整”功能,以简化过程。
由于I型机械拉拔式量规通常使用大磁铁而不是小探针接触表面,因此它们受表面粗糙度的影响较小。用户可以通过获取未涂覆喷砂基材上的贱金属读数(BMR)并从将来的涂层厚度读数中减去该值来简单地执行零位调整。
参考文献
1 ASTM D7091 "Standard Practice for Nondestructive Measurement of Dry Film Thickness of Nonmagnetic Coatings and Nonmagnetic, Nonconductive Coatings on Nonferrous Metals" (ASTM International, 100 Barr Harbor Drive, West Conshohocken, PA 19428), www. astm.org
2 ISO 2808, Paints and varnishes – Determination of film thickness. Available from the American National Standards Institute (ANSI), 25 W. 43rd St., 4th Floor, New York, NY 10036, http://www.ansi.org
3 SSPC PA2, Procedure for Determining Compliance with Dry Coating Thickness Requirements. Available from the Society for Protective Coatings (SSPC), 40 24th Street, Sixth Floor, Pittsburgh, PA 15222-4656, http://www.sspc.org
4 Taking Care of Your Coating Thickness Gauge, David Beamish, PCE-European Protective Coatings and JPCL Equipment Maintenance, April 2005
about the author
David BEAMISH (1955-2019), former president of DeFelsko Corporation, a New York-based manufacturer of hand-held coating testing instruments with worldwide sales. He holds a degree in Civil Engineering and has over 25 years of experience in the design, manufacture and marketing of these test instruments for a variety of industrial equipment including industrial painting, quality inspection and manufacturing. He has conducted training seminars and is an active member of various organizations including NACE, SSPC, ASTM and ISO.


