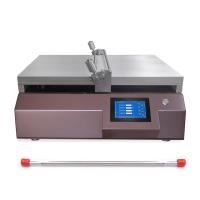
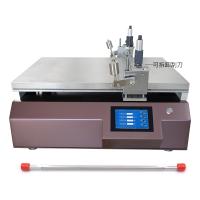
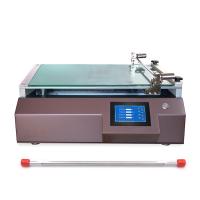
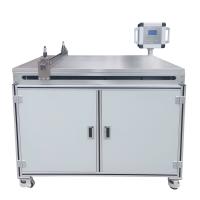
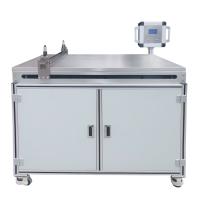
Before introducing the TQC laboratory small coating machine in detail, let's take a look at the structural design of the laboratory coating machine. As shown below
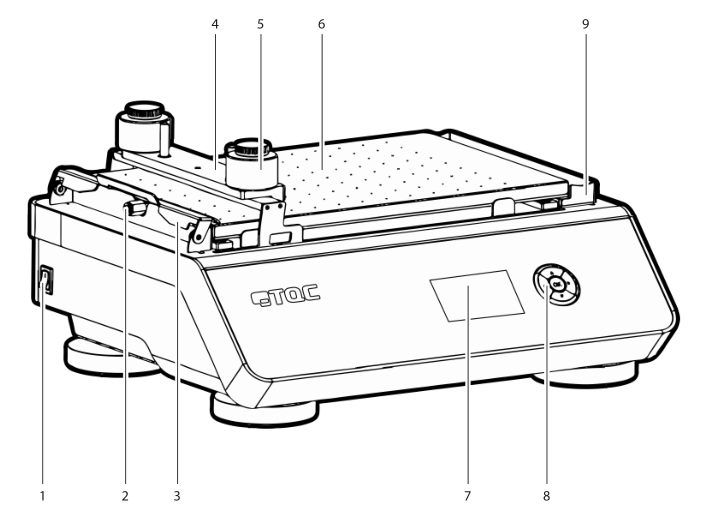
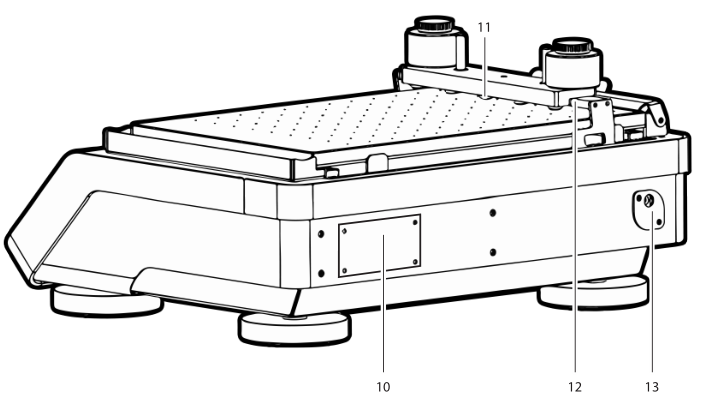
1. Switch; 2. Vacuum tube accessories; 3. Test substrate clamp; 4. Applicator weight; 5. Optional 250g weight; 6. AB3655 vacuum table or AB3650 glass bed; 7. Display
8. 5-key navigation switch; 9. Drip tray or paper holder; 10. Machine ID label; 11. 5 non-slip rubber shells; 12. Red push rod; 13. Power interface
The following is a detailed introduction to the specific operation steps of the automatic coating machine:
Instrument preparation
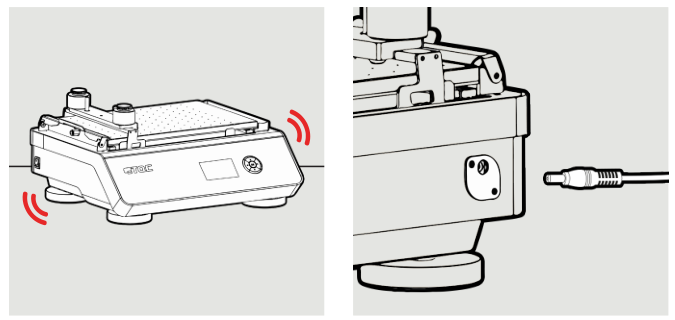
1) The instrument needs to be mounted on a sturdy table or work area. 2) Connect the power cord.
Steps
1. Navigation
With the menu on the display and the 5-key navigation switch, the TQC Automatic Film Applicator Compact is very easy to operate. Use the 5-button navigation switch to highlight the selected function in the menu and press the OK button to confirm.
The 5-button navigation switch is equipped with the unique Triple i function (Intelligent Lighting Interface). Triple i enhances the intuitive operation of the TQC Automatic Film Applicator Compact by illuminating only those keys that are used in conjunction with the position in the operating menu.
2. Start the laboratory coater
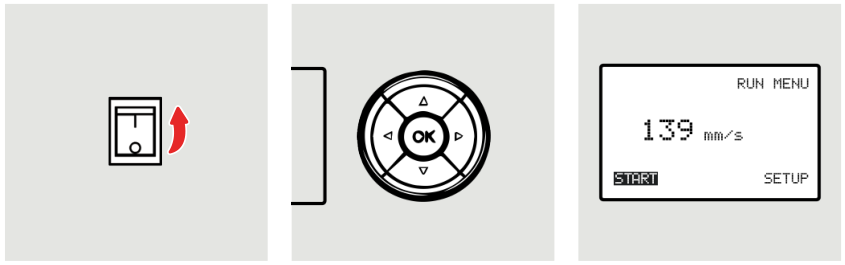
1) Use the switch button on the left side of the machine to turn on the machine. 2) Press "OK" to start the machine. (The machine will perform an internal calibration). 3) The display shows the currently set test duration.
3. Set the test time
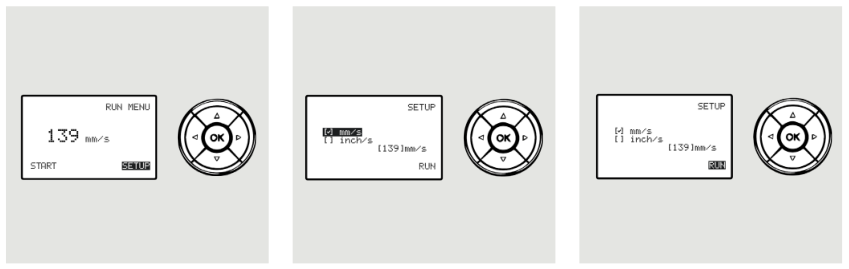
1) To change the sign of the speed or actual speed, use the arrow keys to navigate to "SETUP" and press "OK".
2) If it is desired to change the representation of speed from mm/s to inches/s or vice versa, navigate the cursor to the desired option and press OK.
3)如果需要更改速度,请将光标导航到正确的数字,然后使用向上和向下键更改数字。将光标移至“ RUN”(运行)选项并激活“ RUN”(运行)选项。 您将使用“开始”选项返回到“运行菜单”屏幕。
4、准备放样-玻璃床模型(AB3650)
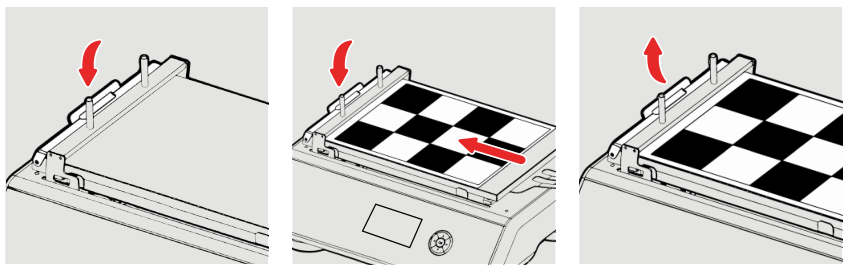
1)向下按夹以打开。
2)按住夹具的位置时,将测试卡纸或其他样品放在玻璃床上,然后将其在夹具下移至最左侧。
3)松开夹紧机构。

4)按照第7.6节所述放置应用程序工具。
5)放置一张纸以收集多余的油漆,或确保滴水盘就位且未满。 另请参见第7.7和7.8段。
6)在湿膜制备器工具的前面涂适量的油漆。
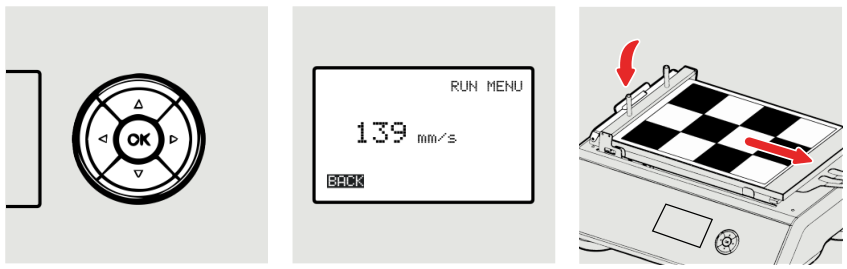
7)确保导线和应用程序工具可以自由移动,然后按“确定”按钮启动应用程序。
8)刮涂完成后,删除应用程序工具并通过激活“ BACK”(返回)选项返回导线。
9)松开夹子,卸下测试卡。
5、准备放样-真空床模型(AB3655)
1)确保真空床已连接到正确且有效的真空源。
2)将测试卡纸放置在真空床上,并确保其完全平整并覆盖所有孔。
*请注意,如果图表太小而无法覆盖所有孔,则需要使用胶带或胶带(使用易于移除的胶带)将剩余的敞口关闭。
3)按照第7.6节所述放置涂布器工具。
4)放置一张纸以收集多余的油漆,或确保滴水盘就位且未满。 另请参见第7.7和7.8段。
5)在制备器工具的前面涂适量的油漆。

6)确保导线和制备器工具可以自由移动,然后按“确定”按钮启动应用程序。
7)刮涂完成后,拿掉湿膜制备器,并通过激活“ BACK”(返回)选项返回导线。
8)关闭真空并移除测试卡纸。
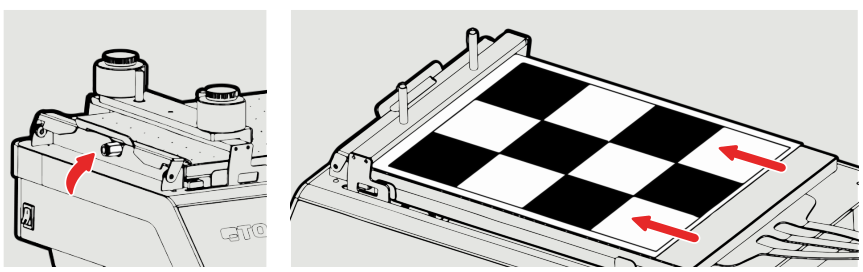
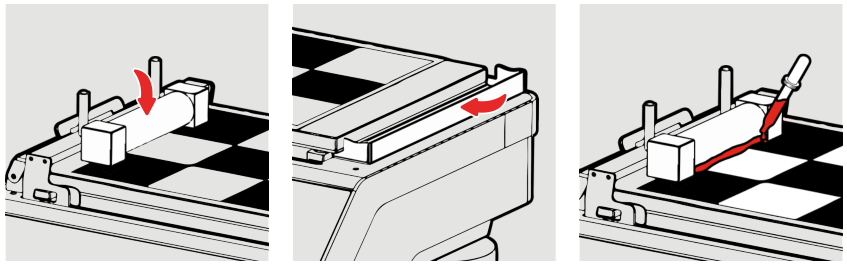
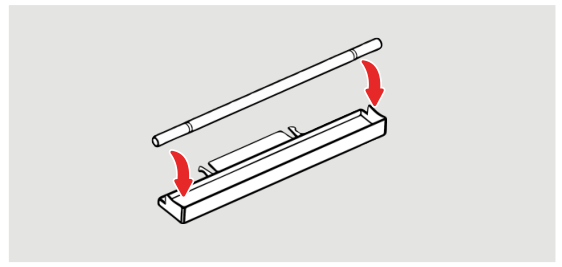
6、如何安装线棒涂布器
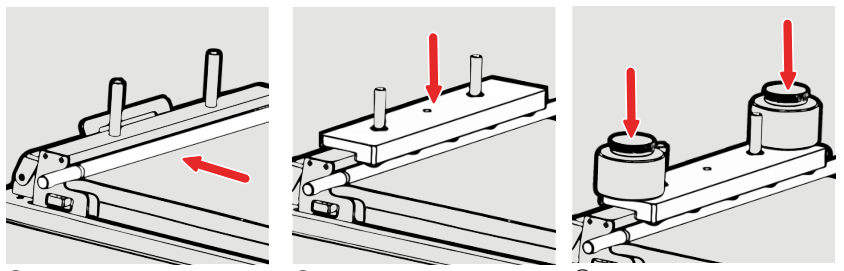
1)在红色推杆的前面放置合适的鸟式涂布器,金属线棒,方形涂布器,储液器或四重或其他涂布棒。
2)为了防止线棒旋转以及在其他施加器需要额外的重量时,将重物设置在推杆的销钉上,以使重量棒的橡胶脚搁在施加工具或线棒上。
3)如果需要,可以在标准砝码上安装其他选件砝码。
7、用纸收集多余的油漆
TQC建议使用此方法代替滴盘。 这种方法不需要任何清洁,只需处理受污染的纸张即可。
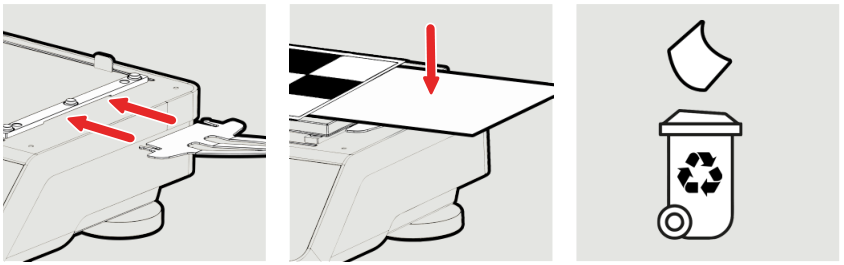
1) Slide the paper holder under the clamp holder to mount it on the right side of the unit
2) When backfilling, place a thin piece of paper under the trailing edge of the test card so excess paint will end up on the paper.
3) Simply discard the contaminated paper into the appropriate waste bin and use a new paper for the next pickup.
8. Clean the drip tray
Please note that the drip tray can only hold 30ml of paint. It is important to empty and clean it regularly.
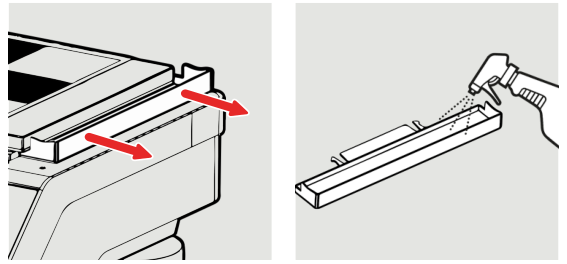
1) To remove the pan, simply pull it horizontally away from the vacuum table with two hands.
2) The pan is entirely made of stainless steel, so it can be cleaned with water, or when a more aggressive medium is required.
The drip pan is designed in such a way that the rod applicator stops above the drip pan and any remaining paint will leak into the drip pan.