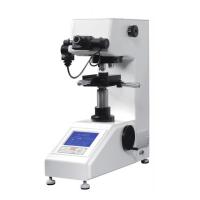
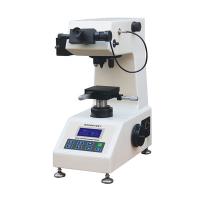
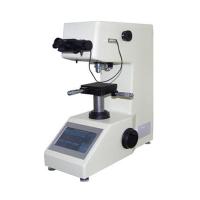
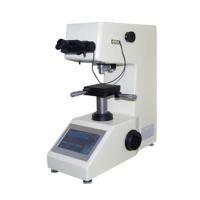
The microHardness Tester is an indispensable testing machine for studying metal structure, product quality management and issuing product certification materials. For small parts of precision machinery, the metal structure, surface hardening layer, electroplating layer, etc. can be measured on limited tiny parts, and there is basically no damage to the measured part, which has extremely high measurement reliability.
Features of this measurement analysis software
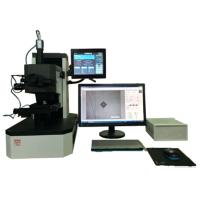
It can be used for continuous test of continuous reading of indentation after continuous loading, and successive experiments of each loading and each reading of indentation can be carried out. It adopts convenient observation ccd camera, video cable or digital camera with USB interface, which can directly observe and measure the indentation on the monitor, and the measurement accuracy is high with the mouse. For setting test conditions and displaying results, etc., it can be operated and displayed clearly and quickly. Through the measurement software, the computer can be used for easy operation, realize single-point measurement, random measurement of multiple points, statistical measurement data, arbitrarily set the distance between two or more measurement points for seepage depth measurement, and can be along X or Y directions Measure and count the measurement data, and automatically calculate the depth of the hardened layer according to the judgment value (such as 550) input by the user. Statistical calculation, conversion, display curve, judgment whether it is qualified, etc., can save and print the graph of the measured part length.
Multi-functional usb control, self-configured usb camera can be used, supports more than 90% of usb cameras on the market, including chat cameras, no need for capture card, notebook can also be used, saving costs (there is also a capture card version, the price is different, Faster response, more stable, stronger) Carburized layer depth analysis, detailed report 10, 20, 40, 3 kinds of magnification can be switched freely, and can be calibrated separately without affecting each other, changing the force value without recalibration, 14 kinds of E140 Standard ruler conversion, automatic measurement, magnifying glass function, easier measurement, force value can be set freely, no magnification limit, magnification software calibration, theoretically can measure all Vickers including small loads
Function: Calibration can be completed with one hardness block, eliminating the need for high-priced magnification scales, which is more convenient, easier, and more accurate.
Operation Manual
1. Software system
1. Host system: 32 or 64 bit system host, Windows2000, Windows xp, Windows7
Software platform, full Chinese operation interface, support color printer output.
2. 1024×768 resolution display 32-bit color display
2. Operating Instructions
(1) System interface introduction
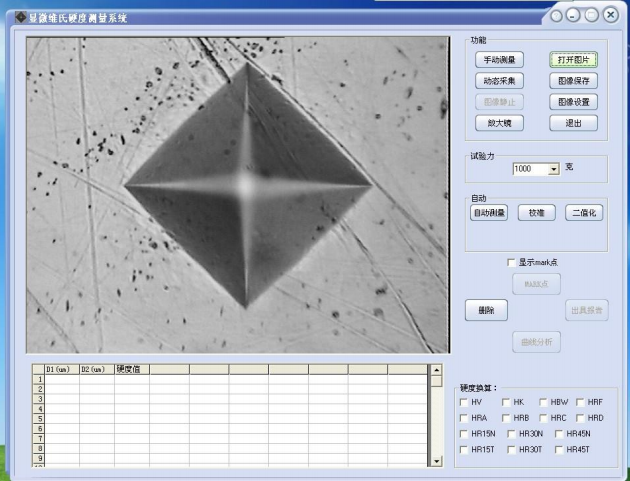
The interface is mainly composed of 7 parts, the left part is the graphic display work area and the measurement data display area. This section shows the captured indentations, which are used for spotting when collecting manually/automatically. In addition to these two areas, the right part is:
A: Ribbon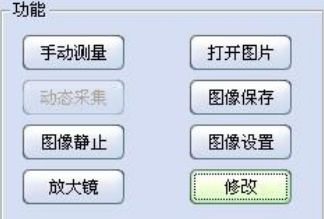
1. Manual measurement (recommended): This button is used to switch whether to measure the indentation diagonal.
2. Open the picture: the original saved picture can be read out for observation or re-measurement and analysis.
3. Image saving: The graphics currently being displayed in the display area can be saved (the format of the image can be selected when saving the image) for future observation and analysis.
4. Dynamic acquisition: It can be switched from a static state to an active state.
5. Image Freeze: This button freezes the active image for measurement.
6. Magnifying glass: After opening, a digital magnifying window will appear for more accurate measurement.
7. Image Settings: You can adjust the resolution, contrast, brightness and other data of the image displayed in the display area.
8. Modify: Press this key to modify the position of the four engraved lines being measured. The modification method is: the four keys of wsad represent the four engraved lines up, down, left, and right respectively, and the two keys '-' and '=' represent the moving direction. If you want to move the right line, press the 'd' key first, then press '-' and '=' to move to the correct tangent position.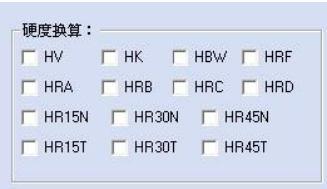
B: Hardness conversion functional area
Select the desired hardness scale and tick the front box, and the corresponding hardness value will be automatically converted in the data display area.
1. HRC: and the current hardness automatic conversion.
2. HRA: and the current hardness automatic conversion.
3. HR15N: and the current hardness is automatically converted.
4. HR45N: and the current hardness is automatically converted.
5. HR45N: and the current hardness is automatically converted.
6. HR15T: automatic conversion with the current hardness.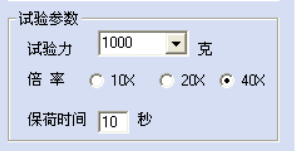
7. HR30T: automatic conversion with the current hardness.
8. HR45T: automatic conversion with the current hardness.
9. HBW: and the current hardness automatic conversion.
10. Wait
C: Test parameters
1. Test force: the current test force value used by the Hardness Tester.
2. Magnification: The current Hardness Tester uses the objective lens magnification.
3. Dwelling time: Hardness Tester.
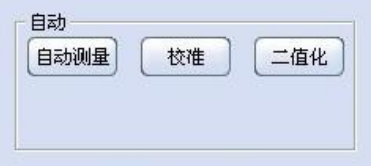
D: Automatic measurement and adjustment (not recommended)
1. Automatic measurement: press this button to frame the indentation system to automatically measure the indentation diagonal (it must have good image support, so it is not recommended to use)
2. Calibration: Press this button to calibrate the hardness value of the system
3. Binarization: adjust the image after entering, which is convenient for automatic measurement
E: Analysis and output area
1. Mark point: It is mainly used to test the depth of the hardened layer (detailed in the hardened layer test method).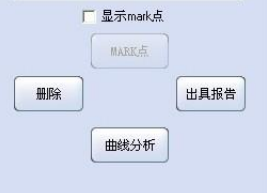
2. Delete: Each press deletes the last piece of data in the data display column.
3. Curve analysis: it is mainly used to test the depth of hardened layer (detailed in the hardened layer test method).
4. Issuing reports: After entering, the hardness data and hardened layer analysis data can be printed out and data reports can be exported.
(2) Calibration operation process (very important)
1. Insert the dongle after the hardness measurement software and camera driver are installed.
2. Double-click the desktop icon  to open the software and enter the initial interface of the software. Set the status area according to the test force, objective lens, and dwell time used on the Hardness Tester so that the display parameters in the status area are consistent with the settings on the Hardness Tester.
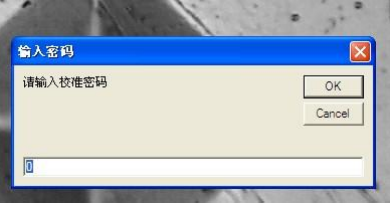
3. Test an indentation on the Hardness Tester, make it displayed in the image display area and adjust the focus to the clearest. At this time, press the calibration key and the system prompts to enter the password (the password is 11111) and press OK
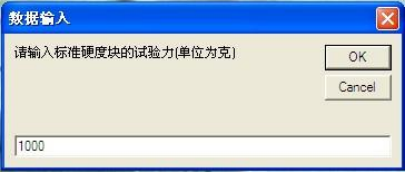
Enter the hardness value of the measured standard block and press OK

Enter the test force used and press OK
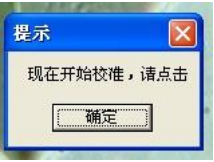
Then the system prompts to start the calibration
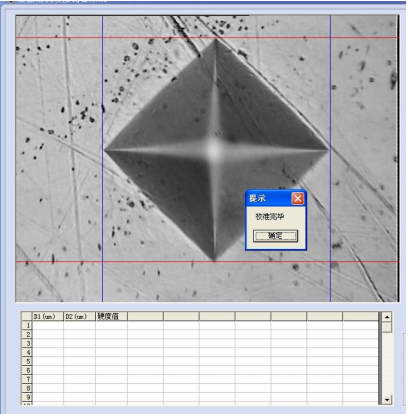
Use the mouse to move the engraved line to test the four top corners of the indentation, as shown in the figure, the calibration is completed, and it needs to be re-calibrated when changing the force value test.
4. At this time, the sample can be replaced to make an indentation. Press the image still button to make the image still and then press the manual measurement button. After positioning the four vertices with the mouse, the hardness value will be displayed. After confirming, the hardness value and the length of the diagonal line will be displayed in the data. The area is displayed, and the measurement is completed. After testing several points on the sample, if you want to output a report, you can press Issue Report.
(3) Issuing a report
If you don’t need pictures when you enter the interface, you can press the OK button and then press print or export to EXCEL if you don’t need pictures, and then press print to preview a report that cannot be modified. If you press import to EXCEL (recommended), you can edit the test report format arbitrarily .
( 4) Precautions
1. It is recommended to use a regulated power supply when using the Hardness Tester and hardness testing system.
2. Do not easily change the technical indicators of the computer system setting parameters before leaving the factory.
3. As the Hardness Tester is a precision instrument, try to arrange a special person for it, and please keep the password and dongle in a safe place.
4. The software may be continuously upgraded and improved, and minor changes may be made in the functions or operation interface, and the company will not notify you in advance.