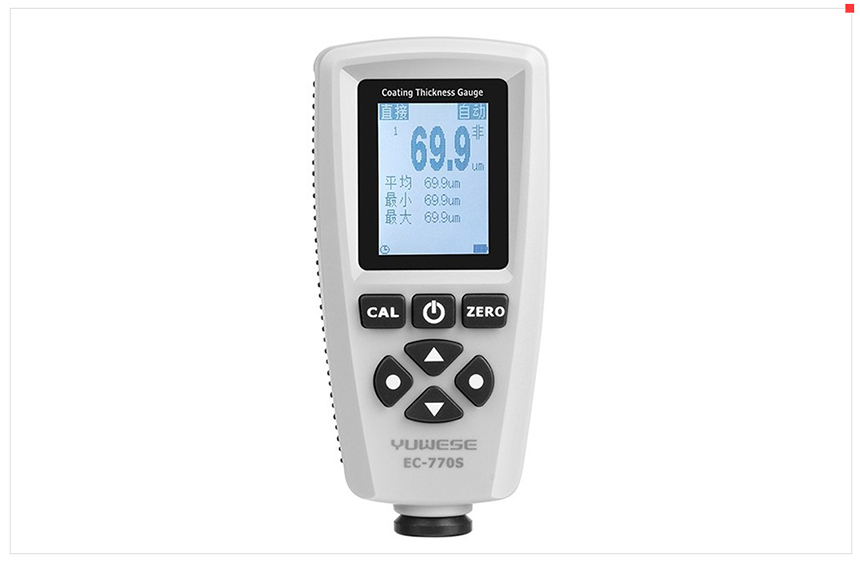
National standard analysis methods include: GB/T 1764-79 "Determination of Paint Film Thickness"; GB/T 13452.2-92 "Paints and Varnishes - Determination of Coating Film Thickness". The practical analysis methods in the factory are: lever micrometer method and magnetic Thickness Gauge method. Dry film thickness can also be tested using a microscope, penetration Thickness Gauge, etc. The method and instrument used to measure the dry film thickness vary with the type of substrate and the properties of the paint film. Generally, the following methods can be used, as shown in the table below.
| Test Methods | application | Remark |
| Test Method for Relating Dry Film Quality to Dry Film Thickness | Applied to paint films that are too soft to be measured by instrumental methods | The measurement is not precise, but the average film thickness can be verified, and the test film remains undamaged |
| micrometer method | Test panel or painted surface is virtually flat | The paint film needs to be hard enough to withstand the indentation of the chuck when in close contact with the micrometer |
| Magnetic Thickness Gauge Method | Suitable for magnetic metal substrates | Converts magnetic field variation with distance from magnetic metal substrate to coating thickness |
| Eddy current Thickness Gauge method | It is suitable for non-magnetic metal substrates such as aluminum and copper. Due to the eddy current induced by the metal pigment, it will affect the test results of the paint film containing the metal pigment | Since the induced eddy current changes with the distance between the probe and the substrate, this change is used to determine the paint film thickness |
The selection of the test site will affect the test results. When using a magnetic Thickness Gauge, the instrument is sensitive to sudden changes in the surface of the test sample. Therefore, if the measurement is performed too close to the edge or inner corner of the test surface, the test result will be inaccurate. of. This phenomenon is called edge effect, and the influence range of edge effect depends on the test method and instrument, generally 3~13mm from the unevenness. Even if a micrometer is used to test the paint film thickness on the surface of the test panel, due to various reasons, there is a certain difference between the paint film thickness at the edge of the test panel and the paint film thickness at the central part, and it cannot be tested near the edge. The selection of the test site is related to the size and shape of the test surface and the requirements for coating quality. For example, the selection of the test site on the 150mm×100mm test plate is shown in the figure below.

Selection unit for dry film thickness measurement on 150mm×100mm test plate: mm
Commonly used dry film thickness test methods are as follows.
(1) Micrometer method
Measured with a lever micrometer, the accuracy is 2μm, and the paint film needs to be hard enough to withstand the indentation of the chuck when the micrometer is in close contact. This method is only suitable for sheet test surfaces or similar flat surfaces.
First professionally check the "0" position of the micrometer, wipe the two measuring surfaces with a silk cloth, and rotate the micrometer cylinder so that the two measurement surfaces touch each other lightly. When the pointer coincides with the "0" line on the dial, stop rotating the micrometer cylinder. The "0" line on the time differential tube should also coincide with the axial scribe line on the fixed sleeve, and the edge of the differential line is exactly tangent to the left edge of the "0" line of the fixed sleeve, so that the "0" position is correct. If the "0" position is inaccurate, it must be adjusted so that the pointer coincides with the "0" line on the dial, fix the movable measuring rod with a stopper, loosen the back cover, and then adjust the "0" line on the micrometer cylinder to coincide with the fixed sleeve. The axial engraved line on the top coincides, the edge of the micrometer tube is exactly tangent to the left edge of the "0" line on the fixed sleeve, then tighten the back cover, loosen the stopper, and check whether the pointer on the dial is on "0", if not, Repeat the above steps to re-zero.
After determining the test position of the measuring surface, firstly put the unpainted bottom plate between the micro-movement measuring rod and the movable measuring rod, slowly rotate the differential rod so that the pointer is between the two tolerance zone pointers, and then adjust a certain value on the differential rod. A line coincides with the axial engraved line on the fixed sleeve. In order to eliminate the measurement error, it can be measured several times at the original place. When reading, add the numbers read on the fixed sleeve, differential scale and dial to get Measure the thickness value, then paint the paint sample, dry according to the specified time, and then measure at the same position according to this method, the difference between the two is the paint film thickness.
If it is to measure the paint film thickness of the painted surface, lightly draw a circle with a diameter of about 10mn on the pre-determined test site to mark the mark, and add an obvious number next to it, and measure according to the above method , write down the paint film thickness of each part, then remove the paint film of each test part with an appropriate solvent or paint remover, and then measure the thickness of the substrate, the difference between the two is the paint film thickness. Take at least 5 positions from the edge not less than 1cm above, middle and below for measurement.
After the measurement, calculate the arithmetic mean value of the paint film thickness at each test site, and the result is the average thickness value of the paint film.

(2) Magnetic Thickness Gauge method
Accurate to 1 μm, it is a non-destructive measurement method of dry film thickness on metal substrates and can be used for magnetic metal substrates. The magnetic method is to measure the coating thickness by the linear change value of the magnetic flux or mutual inductance current of the probe to the magnetic substrate. This method is only applicable to the measurement of non-magnetic coatings on the surface of magnetic substrates. According to the measurement principle, the test instrument is divided into two types: permanent magnet Thickness Gauge and electromagnetic Thickness Gauge. Take at least 5 positions at least 1cm away from the edge of the sample plate for measurement, and take the average value.
electromagnet
This type of instrument requires a power supply and is equipped with a device to supply the electromagnetic head to stabilize the current. The magnetic head should be placed on an unpainted metal surface similar to the metal substrate under the test paint film to take the reading. Then repeat the operation and take the reading on the painted surface. After the scale on the instrument is calibrated, the thickness of the paint film can be known by the difference between the two readings.
permanent magnet
The instrument has single-pole or multi-pole permanent magnets placed on the painted surface in a spherical contact state. Place the contact on an unpainted substrate similar in nature to the test plate, and adjust the reading of the dial to zero. The calibration of the instrument is usually carried out with the non-magnetic gasket of known thickness provided by the instrument, which is placed on the reference substrate and adjusted by the control knob to achieve the thickness of the standard film. After calibration, place the instrument on the painted surface and note the reading on the dial, to avoid any magnetism on the substrate, rotate the instrument 180° and take a second reading on the same part of the film, if the second The reading is different from the first time, take the average. Take several readings in the same manner to obtain a representative result over the full range of the painted object.

Magnetic force detachment instrument
These instruments measure paint film thickness with the force required to overcome the magnetic attraction between a permanent magnet and a magnetic substrate. The attractive force varies with the thickness of the non-magnetic paint film between the magnet and the substrate and is measured as the force exerted by the tension of a spring coil attached to a permanent magnet. Various forms of instruments are available, including simple pencil-type spring balances and others in which tension is applied by rotating a calibrated circular dial until the magnet separates from the painted surface.
Note: The magnetic part of the instrument should not be placed less than 25mm away from any side of the test piece or in a place where the magnetic field strength of the instrument will be uneven. Such instruments should be calibrated frequently against standard pads and reference surfaces to confirm that the calibration is still valid.
In addition, the gasket can be placed on the test surface for calibration, so as to check whether the corresponding reading increase obtained by the instrument under the known thickness of the gasket is within the accuracy limit stated by the instrument.
When the sample is mechanically handled and processed, it is easily magnetized, which will affect the accuracy of the readings obtained. For this reason, the control sample, used as a reference surface, should be as similar as possible to the sample in terms of composition and treatment prior to measurement.
(3) Eddy current Thickness Gauge method
The operating principle of this type of instrument is: the apparent impedance of the probe coil changes due to the eddy current induced by the alternating magnetic flux of the coil in the non-magnetic metal surface of the test object. This in turn changes the width of the alternating current flowing through the probe coil, a change that can be measured with a sensitive meter connected to the probe. The magnitude of the induced eddy current varies with the distance of the probe coil from the base metal, i.e. the thickness of the dry paint film the coil is placed in contact with.
Since metallic pigments induce eddy currents, the eddy current Thickness Gauge will have a certain influence on the test results when testing the thickness of some paint films containing metallic pigments such as aluminum powder and zinc powder .

According to different power sources, eddy current Thickness Gauges can be divided into two types, one needs to be powered by alternating current, and the other is semiconductor type, which is powered by its own battery. The latter type is small and light, easy to carry. Both types require careful zeroing on a control surface similar in nature to the object under test, followed by calibration with the characteristic plastic foil shims supplied with the instrument, as for the semiconductor type, calibration is usually not required after the main body has been zeroed . Place the instrument probe on the part to be tested, and read the thickness value after the indicator is stable.
Recently, some digital display paint film thickness Testers with more intuitive readings, smaller size and lighter size have come out one after another, but the measurement steps are the same as those of the pointer type Thickness Gauges, which usually need to go through several stages of zero adjustment, calibration and then test readings .


