Glass Adhesion Test
Adhesion requirements for UV digital printing on glass are set by ASTM International. ASTM defines and standardizes special bonding requirements for various substrates. It is important to note that not every product requires all bonding requirements, however, familiarity is key.
1. Tape Adhesion Test
The first method of adhesion testing on glass is gentle. To perform this test, simply stick a piece of pressure-sensitive tape to the trim and apply firm pressure with your thumb. Then, peel off the tape at a 180-degree angle. If ink is present, the test has failed and the adhesion is insufficient. If there is no ink on the tape, the object passes the test.

2. Scratch adhesion test
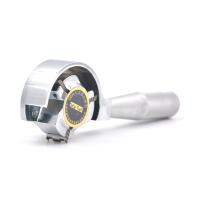
Scratch testing utilizes a pen-like tool called a durometer. This tool is specifically designed to measure the scratch hardness of substrates.
First, loosen the screws on the collar and move the scale to 8 Newtons of force.
The Hardness Tester should be perpendicular to the object to be tested. It needs to be dragged down from the outside of the image through the ink. The test passes if there are no ink drops or lines but no jagged edges.
3. Cross-hatched adhesion test
To complete the crosshatch test, use a razor blade to make an X cut in the substrate. Then, use pressure sensitive tape like you did the tape test, and peel it off at a 180-degree angle. If any ink comes off, the object failed the adhesion test on glass.
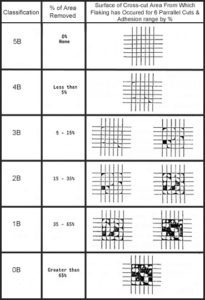
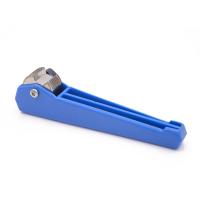
4. Cross-cut B adhesion test
This test requires a multi-tooth bond cutter. Drag the blade 0.75 to 1 inch across the decorative surface of the glass. Repeat the process with the second cut intersecting the first at as close to a 90-degree angle as possible to create a lattice pattern. Evaluate the results according to the ASTM standard classification table below. A score of 5 is adequate, indicating that all squares remain intact.