The measurement of softness refers to the measurement of the bending resistance of the sample itself and the friction between the sample and the gap by pressing the sample into a gap of a certain depth by a plate-like probe that moves up and down under a certain test gap width. Vector sum, the value represents the softness of the paper.
This method is suitable for all kinds of wrinkled toilet paper and its derivative products and other papers with soft performance requirements, but not for folded and embossed napkins, facial tissues and paper with high stiffness.
1 definition
Softness refers to the vector of the bending resistance of the sample itself and the friction between the sample and the gap when a sample of a certain width and length is pressed into the slit to a certain depth with a plate-shaped probe under the conditions specified in the standard. and (the unit of force is expressed in mN). The smaller the value, the softer the sample.
2 instruments
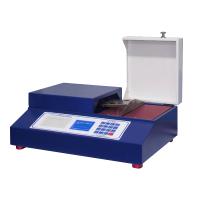
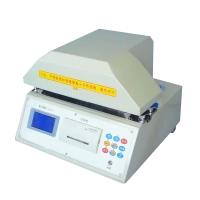
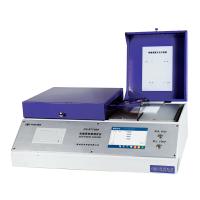
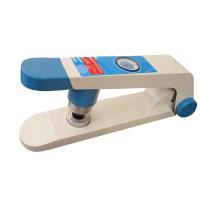
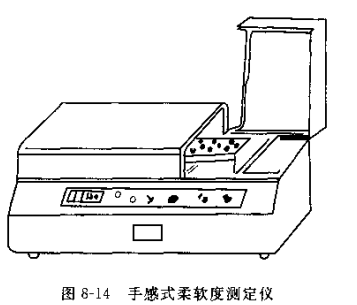
The instrument uses a hand-feeling softness Tester as shown in Figure 8-14.
The instrument should be installed on a level and stable platform, and vibration cannot be caused by external conditions. The basic parameters of the instrument should meet the following requirements.
3 Instrument parameters and inspection
3.1 Slit width
(1) Slit width range The test slit width of the instrument should be divided into four levels: 5.0 mm, 6.35 mm, 10.0 mm, and 20.0 mm, and the width error should not exceed ±0.05 mm.
(2) Slit width and width error and parallelism inspection on both sides Use a vernier caliper (gradation of 0.02 mm) to measure the width of both ends and the middle of the slit. The average value of the measured values at the three positions is the actual The difference between the nominal width of the seam should be less than ±0.05 mm, and the difference between the maximum value and the minimum value among the three measured values is the parallelism error value.
3.2 Dimensions of plate probe
The length is 225 mm; the thickness is 2 mm; the radius of the knife edge is l mn.
3.3 The average travel speed and total stroke of the probe
(1) The average travel speed and total travel range of the probe, the average travel speed (1.2 ± 0.24) mm/s; the total travel (12 ± 0.5) nm.
(2) Check the total stroke and average travel speed of the measuring head
① First, open the probe to the highest position of the stroke, measure the height h1 from the upper end surface to the table with a height gauge, then lower the probe to the lowest position of the stroke, and measure the height h2 between the upper end surface and the table, then the total stroke (mm) is :
H=h1-h2
② Use a stopwatch to measure the time required for the probe to travel from the highest position to the lowest position, accurate to 0.01s, expressed in t, then the average travel speed (mm/s) is:
V=H/t
3.4 Press into the slit depth
①The pressing depth should be 8mm.
②Press into the slit depth inspection. Use a vernier caliper to measure the height B of the plate probe itself, and the pressing depth is:
K=H-(h1-B)
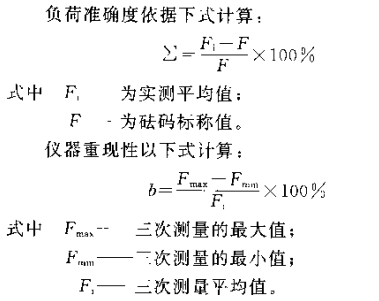
3.5 Instrument Accuracy
①The maximum measuring range of the instrument is 1000 mN: the load accuracy is less than ±3%; the reproducibility is less than ± 3%.
②Instrument accuracy check. Adjust the zero point of the instrument, and install the special pulley frame according to Figure 8-15, hang the 40 g silicon code, and then install 10 g, 20 g, 40 g, 60 g, 80 g weights in turn, or in the plate shape Add brick codes directly on the probe, repeat three times, and get three sets of measured values.
3.6 Probe alignment
① After the probe enters the slit, the probe should be symmetrical with respect to both sides of the slit, and the symmetry should be less than 0.05 mm
② Probe alignment check. Place the special gauge in the slit of the test bench, move the probe from top to bottom , and the plate-shaped probe can easily fall into the middle of the gauge groove, which is qualified. See Figure 8-16 for special gauges .
3.7 Seam parallelism The parallelism should not exceed 0.05 mm.
4 Sample collection, preparation and processing
①According to the standard method to take the sample and process the sample. and tested under standard conditions.
② Cut the sample into 100mm×100mm square test pieces according to the number of layers required by the product standard, and mark the vertical and horizontal directions respectively. The dimension deviation in each direction is ±0.5 mm.
③Turn on the power according to the instrument manual, and after preheating to the specified time, adjust the zero point of the instrument and adjust the slit width according to the requirements of the product catalogue.
④ Place the sample on the instrument test bench and make it symmetrical to the slit as much as possible. Multi-layer samples should be stacked up and down. Turn the instrument peak value! Tracking switch to the peak value position, press the start button, and the plate-shaped measuring head of the instrument starts to move. After it has gone the whole way, read the measurement value from the display, and then proceed to the next sample test. Measure 10 data respectively in the vertical and horizontal directions, but the samples shall not be measured repeatedly.
5 Calculation of test results
The average softness is expressed in mN, calculated according to the following formula, accurate to one decimal place,