1. Operation pipeline
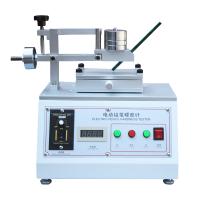
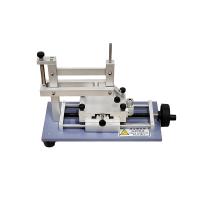
1. Place the machine level on the testing machine platform
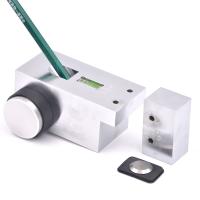
2. Choose a pencil for testing, sharpen the pencil with a razor blade so that the center of the pencil protrudes about 3~5mm, then insert the pencil into the 45° socket, make the pencil touch the plane, and carefully lock it, then adjust the button upwards, With the tip of the pencil off the flat surface, remove the level spacer
3. Place the test piece on the platform and fix it (be careful not to hit the pencil), choose an appropriate weight, and place it vertically .
Turn on the power, and the platform will move left and right at this time. After the test stops, use an eraser to wipe the surface pencil clean, and then judge whether there is any scratch on the surface
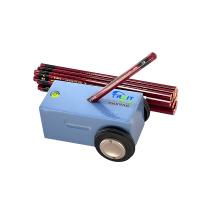
4. Determining the pipeline: It is recommended that the test piece be made at least three positions, and the average value is taken to determine the hardness series. From soft to hard, the order is: 6B, 5B, 4B, 3B, 2B, B, HB, F, H, 2H, 3H, 4H, 5H, 6H, a total of 14 types
Example: No scratches on the surface with an H pencil
No scratches on the surface with 2H pencil
There are scratches on the surface of the 3H pencil
The hardness of the test piece coating is: 2H
2. Maintenance matters
1. The instrument needs to be placed on a stable ground before use.
2. It is not allowed to move the machine during use;
3. Select the corresponding power supply voltage, not too high, to avoid burning out the device;
4. When the instrument is abnormal, please contact our company for timely processing;
5. The machine needs to have a good ventilation environment when it is working.
6. For each component of the button mechanism, due to the large operating load, please add lubricating oil to the mechanical part in time;
7. After each test, clean up the machine and keep the machine clean;
8. The control box part must be wiped with a dry cloth, not a wet cloth.
3. Troubleshooting
1. If there is no display when the power is turned on, it means that the power is not connected or the power indicator is damaged. If the power indicator is damaged, just replace the indicator. If there is no power output from the power output terminal, please check the power cord or the power socket.
2. If the power is turned on, the power indicator light indicates, and the machine does not work after pressing the start button, please check whether the relay is disconnected or disconnected. If it is disconnected or disconnected, please connect it in time. If the relay is not disconnected or disconnected , indicating that the relay is damaged, it should be replaced in time.
3. When the test reaches the number of times set by the counter, the motor still does not stop working, indicating that
(1) The counter is damaged;
(2) The counter is not cleared after setting the number of times.
4. If the power indicator light is on but the counter has no display, it means that the counter is damaged, and the counter needs to be replaced.