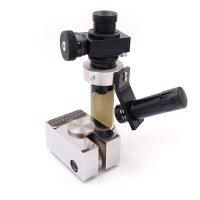
The Rockwell test method defined in ASTM E-18 is a commonly used hardness test method. Rockwell testing is generally easier to perform and more accurate than other types of hardness testing methods. The Rockwell test method is applicable to all metals unless the structure or surface condition of the metal being tested would cause too great a change; and those where the indentation is too large for the application; or the size or shape of the sample limits the test.
The Rockwell method measures the depth of permanent deformation of the indentation produced by the force/load on the indenter. First, an initial loading force (often referred to as preload) is applied to the sample using a diamond indenter. This load represents a zero or reference position that penetrates the surface to reduce the effect of surface finish.
After the preload is complete, an additional load called the main load is added to achieve the desired total test load. This force is maintained for a predetermined time (holding time) in consideration of elastic recovery. The main load is then released to measure the indentation depth deviation from the preloaded position and the indentation depth deviation between the preloaded and main loaded positions. This distance is converted to a hardness value.

The Brinell test method is defined by the ASTM E10 standard. Most of the time it is used to measure materials with rough surfaces or structures such as castings and forgings. Brinell testing typically uses a very heavy test load (3000 kgf) and a 10 mm wide indenter to balance out most of the surface and subsurface inconsistencies of the indentation.
The Brinell method loads a tungsten carbide ball of fixed diameter (D) with a predetermined test load (F), maintains a certain preload time, and then unloads it. The indentation is then taken at least two diameter measurements - usually perpendicular to each other - and averaged (d). The measured mean diameter is then converted to a Brinell hardness value using a conversion table. The force range is between 500 and 3000 kgf.
Generally, a Brinell Hardness Tester is used to produce an indentation, and then a special Brinell microscope or optical system is used to measure the diameter of the indentation. The measurements are then converted to Brinell values using the Brinell formula or a formula-based conversion table.
Ball indenters are available in diameters ranging from 10 mm to 1 mm. In general, lower loads and spherical diameters are easier to compare with other instrument results, such as Rockwell devices with a small load range.

维氏试验法,维氏试验法又称显微硬度试验法,主要用于小零件、薄片或硬化层深度的工作。Vickers 方法基于光学测量系统。显微硬度测试程序 ASTM E-384的要求,将金刚石压头按规定的低载荷范围加载,形成压痕,测量并转换成硬度值。
只要仔细准备测试样品,此测试对于各种材料测试都很有用。
带有方形底座的倒锥形金刚石用于维氏刻度测试。虽然“宏观”尺寸负载可以高达 30 公斤以上,但传统负载在几克到一公斤或几公斤的范围内都很轻。这种显微硬度方法用于测试金属、陶瓷、复合材料——几乎任何类型的材料。
由于 Vickers 测试的压痕非常小,因此适用于不同类型的应用:检查金属箔或测量零件等非常薄的材料、小零件或小区域的表面、测量单个微观结构或测量硬化层的深度. 该测量通过在部分轮廓上制作一系列压痕来描述硬度变化的轮廓。
努氏试验法,也称为显微硬度试验法,主要用于小零件、薄板或硬化层的深加工。Vickers 方法基于光学测量系统。显微硬度测试程序 According to ASTM E-384 在指定的低负载范围内加载压痕并测量并转换为硬度值。
只要 Knoop 测试样品经过精心准备,该测试就可用于各种材料测试。倒锥形金刚石压头在努氏标尺上进行测试。该压头不同于上述维氏试验中使用的倒锥型压头。努氏压头的形状相对延长或呈矩形。
当压痕非常靠近或非常靠近样品边缘时,通常使用努氏法。努氏压痕的宽度为测量提供了更高的分辨率,压痕更浅。因此,它可以用于非常薄的材料。
在努氏试验中,使用倒锥形金刚石压头在规定的保持时间内施加预定的试验载荷。
努氏试验中使用的倒锥形压头比维氏试验中的压头细。保留时间后卸载。与平均压痕纵向和横向长度的维氏测试不同,努氏法仅测量压痕的横向长度。然后According to换算表换算成努氏硬度值。
Because the indentation of the Knoop test is very small, it is suitable for a variety of applications including inspecting very thin materials such as metal foils or measuring the surface of parts, small parts or small areas, measuring individual microstructures or measuring the depth of hardened hard layers. This measurement shows changes in hardness by making a series of indentations in a section of the part.
Hard layer depth is the thickness of the hard layer on the sample. Case hardening increases the wear resistance and fatigue strength of the component under dynamic and/or thermal stress. Hardened steel components are often used in applications requiring high wear resistance and strong rotation. The properties of hard layer hardening are mainly determined by surface hardness, effective hardening depth and depth distribution of residual stress. Transmission and engine components are examples of hardening.
Hard coating depth testing is typically performed by creating a series of hardness indentations from the edge of the sample towards the center. The hardness evolution is then plotted and the distance from the surface to the hardness limit (HL) is calculated.


