


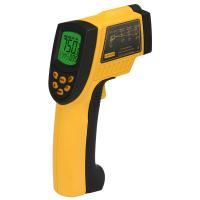
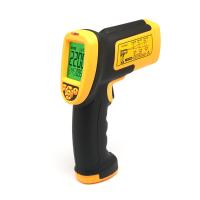
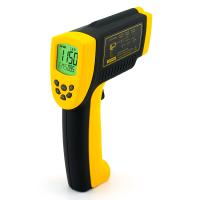
SMART SENSOR AR882 + Infrared Thermometer Optical inspection Thermometer -18~ 1650 ℃
Temperature range -18~ 1650 ℃, resolution 0.1 ℃, repeability +/- 1 ℃| +/- 1%, object distance ratio 50:1, emissivity 0.1~ 1.0, response time 500ms, Response wavelength 8~ 14μm
 SMART SENSOR
 AR882+

-
SMART SENSOR AR852B + Industrial Infrared Thermometer Range: -50 ℃~ 700 ℃
$ 110.00 -
SMART SENSOR smart sensor AS892 Infrared Thermometer temperature range 200 ℃~ 2200 ℃
$ 301.00 -
SMART SENSOR AR350 + Mini Infrared Thermometer Temperature Range -50 ℃~ 480 ℃
$ 101.00 -
SMART SENSOR AS842A Infrared Thermometer Optical inspection thermometer -50 ℃~ 600 ℃
$ 92.00 -
SMART SENSOR AR872D + Infrared Thermometer Optical inspection Thermometer -50~1150 ℃
$ 159.00


1. Introduction
This machine is compact, anti-interference and easy to use - just aim and press the button, and the current surface temperature of the measured object can be read within one second. For high temperature, poisonous or difficult to reach objects, Measurements can be performed safely with this unit
2. Principle
The infrared thermometer measures the surface temperature of the object, and its optical sensor radiates, reflects and transmits energy, and then the energy is collected and focused by the probe. Then other circuits convert the information into readings and display them on the machine. The machine is equipped with a laser The lamp is more effectively aimed at the measured object and improves the measurement accuracy.
3. Use diagrams
1. Display symbols
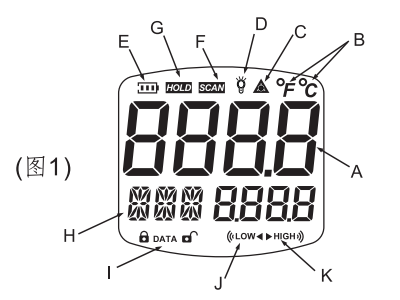
A temperature measurement reading
B temperature unit symbol
C laser point open symbol
D backlight on symbol
E battery indicator symbol
F read data symbol
G data hold symbol
H Mode/Emissivity Display
I data storage and reading symbols
J low temperature warning symbol
K high temperature warning symbol
2. Hot spot/cold spot positioning: press and hold the switch button, and at the same time scan the laser point of the thermometer by moving up and down for positioning (as shown in Figure 2).

3. The name and function of each part
(1) Measurement switch: The VERXX version and the highest for about one second when the power is turned on, and then the measured temperature value will be displayed . "SCAN" and EMS (preset emissivity 0.95) will be displayed at the same time . " and temperature display, automatically maintain data, automatically shut down after 30 seconds without operation.
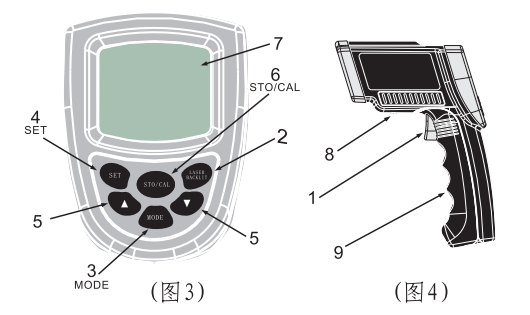
(2) Laser spot and backlight switch (when the backlight is turned on, the backlight will be turned off with a delay of 7 seconds when the button is pressed). LCD prompts laser point and backlight switch status
(3) One (6) function keys: Press the MODE key, the bottom of the LCD will flash MAX-MIN-DIF -AVG-HAL-LAL-STO-EMS, press the SET key to confirm the selected mode function.
a.MAX: Measure the maximum value of the current data
b.MIN: Measure the minimum value of the current data
c.DIF: Based on the measured value after pressing the SET key, the difference between the measured value and the reference value
d.AVG: take the average value of the measured value
e.HAL: High temperature alarm--when HAL is selected, press the ▲/▼ key to set the alarm temperature point, press the SET key to confirm; when the measured temperature exceeds the set point, the HI symbol will be displayed and "BI, B1.. "Voice.
f.LAL: Low temperature alarm--When LAL is selected, press ▲/▼ key to set low temperature alarm point, press SET key to confirm; when the measured temperature is lower than the set point, the LOW symbol will be displayed and "BI, BI.. " Sound.
g. STO: storage function--when STO is selected, press SET key to confirm the display lock and DATA and 1 --- symbols, then measure the temperature , press STO/CAL key to store in memory 1, and immediately go to 2- -- A total of 12 measured temperatures can be stored. In the STO state, you can press the MODE key to return to the normal state to read out the storage temperature. In the general measurement state, press the STO/CAL key to display in sequence and have an unlock symbol. If you need to clear all records, press and hold the STO/CAL key for 3 seconds in the general measurement state .
h.EMS: The emissivity can be set between , press the SET key to confirm the setting.
(7) Display (see Figure 1 for details)
(8) Battery door button
(9) Battery door: To replace the battery, please press the battery door button and open the battery door outward.
(10) Temperature conversion between Celsius and Fahrenheit: When it is necessary to convert the unit of the measured temperature, please open the battery door and pull the switch in the battery compartment.
SMART SENSOR AR882+ Infrared ThermoMeterSpecifications
| LIST | VALUE |
|---|---|
| Temperature Measurement Range | -18~1650℃ |
| Accuracy | -18~ 32 ℃ +/- 3, -20-100 ℃ +/- 3,500 ℃ +/- 4 |
| Resolution | 0.1℃ |
| Repeatability | ±1℃|±1% |
| object distance ratio | 50:1 |
| emissivity | 0.1~1.0 |
| Response time | 500ms |
| Response wavelength | 8~14μm |
| Operating temperature | 0~40℃ |
| Relative Humidity | 10-90% RH non-condensing |
| Storage temperature | -20~60℃ |
| Power | 2 * 1.5V AAA battery |
| Dimensions | 220*134*60mm |
| Weight | 480g |
| Temperature unit | ℃/℉ |
| data locking function | Yes. |
| Laser positioning function | Yes. |
| backlight function | Yes. |
| Automatic shutdown | Yes. |
| Battery life | 12h |
SMART SENSOR AR882+ Infrared ThermoMeter Packing list
Thermometer X1, original battery X2, factory certificate X1, warranty card X1, manual X1, portable toolbox x1.
[Note] Because the manufacturer's packaging may be updated or upgraded, the detailed packaging list shall be subject to the latest standard configuration of the manufacturer.