Reader's Guide
This manual is compiled based on manufacturer's data. Due to equipment batch changes, the content may not fully match every physical unit. Please refer to the actual operation and on-device labels.
Copyright belongs to the manufacturer. For internal reference of purchasers only. If safety parameters in the manual differ from the physical unit, please suspend operation and consult our engineer for confirmation.
Disclaimer: This manual is for reference only. In case of any discrepancy, the physical unit shall prevail. Our company assumes no liability for any consequences arising from operations based on this manual.
TBJ/ZY series laboratory coater instruction manual
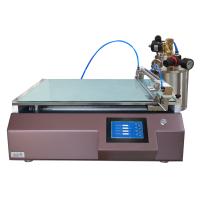
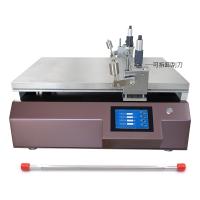
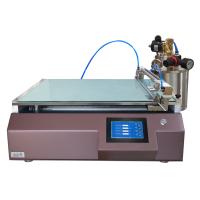
Laboratory automatic coating machine

Preface
Thank you for choosing our products. Our company not only provides excellent products but also guarantees reliable after-sales service. To ensure the personal safety of users and the integrity of the instrument, please read this operation manual thoroughly before using this instrument and pay close attention to its precautions.
This operation manual provides a detailed introduction to the design principles, structure, operating standards, calibration, and maintenance of this instrument. Any "test regulations" or standards mentioned in this manual are for reference only. If your company has objections, please review the relevant standards or data yourself.
Special statement:
● This operation manual cannot be used as a basis for any requests to the Company.
● The right to interpret this operation manual belongs to our company.
Table of Contents
Overview
Technical specifications
Equipment Principles and Features
Equipment installation
Equipment commissioning and operation
Equipment maintenance
Included spare parts list
1. Overview
The laboratory coating machine is a new laboratory instrument developed in recent years. It is a successful innovation combining electrical control and mechanical organics. In the coating production field, it can significantly save raw materials and improve production process technology; The key is to greatly improve the reproducibility of coating based on experiments.
In the past, most coating experiments used manual application, resulting in uneven coating and poor overall results. To address these issues, laboratory coating machines were born, and their arrival can be seen as the icing on the cake for the thriving coating industry. The purpose of the laboratory coating machine is to facilitate precise coating by technicians on different substrates, reducing and eliminating errors caused by human factors such as varying coating speed and pressure. It is mainly used in the production experiments of metal foil, adhesive, paper, and film, and can also be applied in other related coating and coating industries.
2. Technical Parameters
| Scraper material | 304 stainless steel |
| Machine dimensions (L*W*H) | 622*470*520mm (for reference only, actual product shall prevail) |
| Coating speed | 2~180mm/s |
| Coating area | 300mm wide, 400mm long |
| Wire rod specifications | Accuracy: ±0.001 mm, effective coating width: 300 mm (coating thickness determined by wire rod model) |
| Heating temperature | Room temperature -180°C |
| Temperature accuracy | ±2℃ |
| Vacuum dimensions | 290*420mm / 20*20mm |
| Vacuum port dimensions | 1mm |
| Scraper specifications | Accuracy± 0.003mm |
| The main unit uses a power supply | 220V/50Hz |
| Main unit power | 60W 1500W (heating) |
3. Equipment Principles and Features
This product is meticulously designed according to the requirements of small-scale coating tests, striving for reliable operation and simple operation. Its basic coating principle is as follows: The coating system mainly consists of a speed-regulating motor, lead screw, sliding shaft, handle, squeegee, meter, and other mechanisms. Adjust coating thickness via a micro adjuster, set the coating speed with a speed knob for uniform application.
4. Equipment installation
It is best to open the machine at the installation site. Before opening, check the packaging box for any damage; After unpacking, first check whether the equipment is in good condition, and count according to the packing list. If any damage or shortages are found, analyze the situation and immediately report it in writing to our company.
The installation location of the machine should be in a location free from vibration sources;
The machine should be installed on a flat and solid foundation, and check for smoothness with a level;
Before powering on, turn off the main power switch of the unit and check whether the power connection is correct. Only after confirming everything is correct can you turn on the power;
Place the bottom corners of the machine securely on a solid tabletop; never leave the corners hanging loose;
Turn on the power and turn on the switch.
5. Equipment commissioning and operation
Vacuum pump operation:
Open the vacuum pump lid and pour in an appropriate amount of water.
Install the vacuum tube, connect one tee and one end to the equipment.
Turn on the vacuum pump switch.
Boot control screen and enter the [Welcome Interface]
Click any click on the [Start screen] to enter the [Operation Interface].

6. Set the corresponding parameters for testing
Heating operation: (Standard model without heating unit, no temperature setting required)
Temperature settings : Tap the screen [Set Temperature] to enter your desired temperature, click [OK] to complete the setup.
Heating : Tap the screen [Heating], the [Measured Temperature] reading will start ticking, and the instrument will start heating. When the temperature reaches the set temperature, the instrument will automatically stop heating. When the temperature drops below the set temperature, it will start heating again.
Stop heating :During heating, you can press the [Heating] button again at any time; the [Measured Temperature] reading stops jumping and heating stops. After the test is complete, click [Heating] to stop heating.
!! Note: Do not touch the working surface during heating; be careful to prevent burns. During heating, residual heat causes the temperature to rise above the set temperature. The equipment will automatically stop heating and cool down. After 5 minutes at the set temperature, once the temperature stabilizes, the test begins.
Scraper coating test method:
Plug in the power and turn on the switch; On startup, the company welcome screen will appear. Click anywhere on the screen to enter the experiment interface.
Lift the scraper, set the speed and distance, and adjust the coating head to the right;


1: Raise the handle (about 90 degrees) to put the coated paper in, then lower the handle (no need to press tightly) so the knife falls under its own weight. Note: The operating handle should be raised or lowered parallel on both sides simultaneously (when starting or releasing the knife, both sides should be raised and placed together to maintain balance).
Lay the substrate and turn on the vacuum pump switch; Gently smooth the substrate by hand, covering any voids that can't be covered with other materials to increase the substrate's adhesion.
Zero adjustment: Place the squeegee blade on the substrate surface, rotate the micro heads at both ends clockwise until the squeegee presses the base material and the micro head number does not change. Set the trimmer and press the zero key to set it to zero.
Set thickness: Turn the micro-adjusters at both ends counterclockwise to set the coating thickness, tighten both ends to ensure the meter reading remains unchanged.
Click the input box after "Set Speed," click the number to enter the desired test speed, and press the "OK" key to save.
Click "Set Distance" to set the desired coating length, then press "OK" to save.
Place the coated liquid in front of the squeegee, press the "Start" button on the screen, and the squeegee will complete the coating at the set speed.
After coating is complete, lift the scraper lifting handle and click "Back". Clean the scraper and prepare for the next coat.
Wire rod coating test method:
Plug in the power and turn on the switch; On startup, the company welcome screen will appear. Click anywhere on the screen to enter the experiment interface. Lift the scraper, set the speed and distance, and adjust the coating head to the right;
Place the wire rod and fix it with twist springs on both sides.

Raise the squeegee so it does not interfere with the wire rod coating.
Lay the substrate and turn on the vacuum pump switch; Gently smooth the substrate by hand and cover any voids that can't be covered with other materials.
Lower the handle so the wire rod contacts the substrate.
Click the input box after "Set Speed," click the number to enter the desired test speed, and press the "OK" key to save.
Click "Set Distance" to set the desired coating length, then press "OK" to save.
Place the coated liquid in front of the wire rod, click the "Start" button on the screen, and the wire rod will complete coating at the set speed.
After coating is complete, lift the scraper lifting handle and click "Back". Clean the wire rod and prepare for the next coat.
6. Equipment maintenance
Keep the machine clean regularly;
Do not use toxic chemicals or organic solvents to clean equipment surfaces;
Disassembly of machines must be performed by professionals, using appropriate tools or equipment;
The inverter and other electronic components used in this machine are internally installed at the factory and cannot be changed by themselves;
Pay attention to moisture protection.
7. List of Included Spare Parts
For the packing list, please refer to the "Included Spare Parts List" attached to the product packaging box. Please check the spare parts quantity according to the list. If there are any missing or damaged parts, please contact our company promptly. (Spare parts include: vacuum tubes, tees, differential head adjustment tools, etc.)
Quality assurance
1. Quality Assurance Matters
The free service period for this testing machine is one year from the date of manufacture (consumables are not included in the free service and travel expenses are not included).
2. In the following situations, even within the valid warranty period, technical or material fees may still be charged:
Damaged by natural disasters and earthly changes.
Malfunctions caused by user negligence or operational errors.
Damage caused by improper use of power supply voltage.
Failure caused by self-disassembly and repair.
Lending it to others and causing malfunctions.
Self-modification leads to malfunctions.
Self-correction may cause malfunctions.
Failure due to improper transfer or transportation.
Remote regional services.
3. Notes:
For those who originally installed and used our products, if the product is moved to a region outside the designated area, regardless of whether it is within the warranty period, all transportation and travel expenses for service personnel shall be borne by the customer.
This instrument should be avoided in the following situations:
In situations of vibration and swaying.
In places where sunlight shines directly.
Places that are hot, dusty, and humid.
The AC power supplied to the machine should be well grounded to ensure safe use.
It is strictly forbidden to use strong solvents (such as benzene or nitro oils) for cleaning.
Do not inject water or debris inside the machine to prevent damage to electronic components and electric shock.
Disassembly, installation, and commissioning of instrument displays can only be handled by units approved by the national metrology department and our company; others are not allowed to disassemble or repair them without authorization.
Note
If there are any omissions in this volume, they must be supplemented or corrected; and the design changes of the test machine due to improvements and innovations; or replacing with better components where usage instructions must be separately stated, are listed in this column
This volume is edited to assist your factory in understanding the operations and important points to note, so please keep it safe
Our company is constantly innovating and improving products. The examples, illustrations, and specifications in this volume are subject to the model models at the time of publication
The contents of this manual may be changed due to instrument upgrades without prior notice, and the company reserves the right of interpretation.
Reproduction without permission is prohibited


- 1BOZHEN NBC-960 humidity chamber controller manual
- 2CCYONGXIN ZDJ-100 Pulp Freeness/Schopper-Riegler Tester Instruction Manual
- 3CCYONGXIN GBJ-A fiber standard dissociator, instruction manual
- 4CCYONGXIN ZQX-1000 paper Air Permeability Tester Instruction Manual
- 5SMTSER NBC-120 Gravure Printing Proofer Instruction Manual
- 6SMTSER NBC-225 offset ink colorimeter instruction manual
- 7SMTSER NBC-A200 Flexographic Printing Proof instrument
- 8RONGHUA INSTRUMENT HH-S series digital display thermostatic oil bath instruction manual
- 9SHIMADZU ATX/ATY Series, Electronic Analytical Balance Instruction Manual
- 10AISRY ASR-339A Rubber alcohol Wear resistance tester instruction manual