Reader's Guide
This manual is compiled based on manufacturer's data. Due to equipment batch changes, the content may not fully match every physical unit. Please refer to the actual operation and on-device labels.
Copyright belongs to the manufacturer. For internal reference of purchasers only. If safety parameters in the manual differ from the physical unit, please suspend operation and consult our engineer for confirmation.
Disclaimer: This manual is for reference only. In case of any discrepancy, the physical unit shall prevail. Our company assumes no liability for any consequences arising from operations based on this manual.
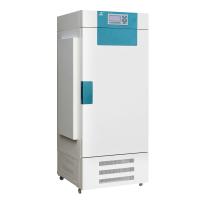
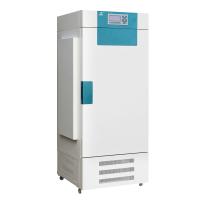
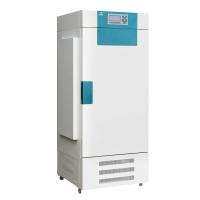
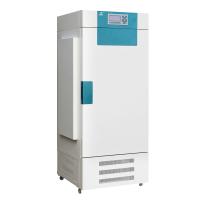
SANFA LGP series Artificial climate box instruction manual
Table of Contents
1. Scope of Application
This product is suitable for cell tissue growth and cultivation, seed germination, seedling cultivation, insect and small animal rearing, microbial and antibiotic cultivation and preservation. It is especially suitable for fields such as bioengineering, medical research, agricultural science, aquaculture, and animal husbandry, serving as a device for experimental cultivation at constant temperature and humidity.
2. Technical Indicators
| Model | LGP-160 | LGP-250 | LGP-300 | LGP-400 | LGP-500 |
| Volume | 160L | 250L | 300L | 400L | 500L |
| Refrigerants | Fluorine-free | ||||
| Ambient temperature | 5-35°C | ||||
| Temperature range | With light: 10-50°C; without light: 5-50°C | ||||
| Temperature uniformity | ±1°C | ±1°C | ±1°C | ±2°C | ±2°C |
| Temperature fluctuations | ±1°C | ±1°C | ±1°C | ±1°C | ±1°C |
| Illuminance | Puguang 0-6000LX adjustable, Strong light 0-12000LX adjustable | ||||
| Control methods | Intelligent microcomputer control (LCD display) | ||||
| Humidity control range | 50%~95%RH±7%RH | ||||
| Power supply | 220V 50HZ | ||||
| Maximum power consumption | 1500W | 2000W | 2500W | 2800W | 3500W |
| Note | |||||
3. Overview of the structure
The casing of this product is made of high-quality steel plate, with a surface powder coating; The studio uses stainless steel plates, which are durable and resistant to corrosion. The outer door is equipped with an observation window and uses double-layer insulated glass doors to facilitate monitoring of temperature tests inside the chamber.
Uses intelligent microcomputer control with touch switches for easy operation. The climate box can be set with various parameters (including time, temperature, humidity, and illuminance) to simulate natural climates. Inside the chamber, an axial fan is used to force convection, ensuring good temperature uniformity; Ultrasonic humidification is used, ensuring reliable humidification and uniform humidity. LED lighting is used, making it energy-saving, durable, and easy to maintain.
1. Plug the humidifier power into the socket on the lower right side of the cabinet. Insert one end of the humidifier hose onto the spray head and the other end at the humidifier inlet. Add water according to the humidifier instructions and set aside.
4. Panel display

5. Indicator lights and button descriptions
Temperature and parameter settings
After powering on, the system enters the main monitoring screen. Press the "Stop/Run" key to start or stop running for 5 seconds, then press the "Search/Shift" key to check the set value. Self-tuning function: In normal and balanced compressor mode, if temperature and humidity control is not ideal, please start temperature and humidity self-tuning. Press and hold the "Decrease" button to activate the temperature PID auto-tuning.
1. Run parameter editing
On the main interface, press the "Set" key to enter the menu, select "Run Parameters" using the arrow keys, then press the "Set" key to enter the editing interface. After each parameter is modified, it automatically switches to the next parameter. If a working group is set to this group, it will operate according to that group. When the current period is 0, it indicates the last segment of the program and exited editing. Day and night mode is fixed at two segments to finish. The second paragraph is set to 0, indicating that this group operates in fixed operating mode. Press and hold the "Settings" button to return to the main monitoring screen.
2. User parameters, temperature parameters, and system parameter settings
In the menu interface, select the corresponding directory and press the "Set" key to enter. System parameters require password entry. The parameters are as follows:
User parameters
| Parameter name | Function description | Range (factory value) |
| Power-On Mode (PM) | 0 - Power-on to shut down, 1 - Power-on to operate | 0~1 (0) |
| Program Pattern (PROG) | 0-set control; 1-99 segments of program control | 0~1 (0) |
| Timing Method (TM) | 0 - Start timing, 1 - Temperature stabilization timing (set value only) | 0~1 (1) |
| Timing unit (HM) | 0 minutes, 1 hour | 0~1 (0) |
| Working Group (GP) | (0-8) → (Groups 1-9) | 0~8 (0) |
| Day and Night (BH) | 0 - Normal Mode, 1 - Day-Night Mode - Day Goes First, 2 - Day and Night - Night Comes First | 0~1 (0) |
| Disinfection Time (SRT) | The time for each disinfection | 0~6000min (0) |
Temperature parameters
| Parameter name | Function description | Range (factory value) |
| Alarm Value (AL) | 0 is the upper deviation alarm; when the temperature exceeds (temperature setpoint + AL)°C, turn off the heating; 1 is the lower deviation alarm, when the temperature is less than (temperature setpoint - AL)°C | -40~100 (3.0) |
| Scale Zone (P) | Proportional adjustment: the smaller the P, the faster the response speed | 0~100.0 (6.0) |
| Integration Time (I) | The time constant of integration and I, the smaller the I, the stronger the ability to correct static differences | 0~3600 (240) |
| Differential Time (D) | The time constant of differential action, the larger the D, the stronger the ability to prevent overheating | 0~3600 (240) |
| Points Limit (AR) | Used to suppress humidity overshooting; if too low, humidity may not rise | 0~200 (100) |
| Control Cycle (T) | Control cycle output | 1~180s (6) |
| Turn on Refrigeration (CH) | When switching, the temperature measurement > (set temperature + CH) and cooling is started | 0~10.0 (0.8) |
| Turn off the refrigeration (CL) | When switching, the temperature measurement < (set temperature + CH-CL) turns off cooling | 0~10.0 (0.8) |
| Heating Off (HC) | When switching, the temperature measurement < (set temperature + CH-CL-HC) turns on heating | 0~10.0 (0.5) |
| Refrigeration Delay (CT) | Compressor delay; when set to 0, the cooling function is turned off | 0~1800s (120) |
| Zero Correction (TB) | Correction near zero degrees can correct the measurement error of the temperature sensor. TB = mercury thermometer reading - current measurement value | -99.9~+199.9 (0) |
| Full Correction (TK) | Adjust this value when there is a deviation near the set temperature, Tk = 4000× [mercury reading - current measurement value] ÷ current measurement value | -1999~+1999 (0) |
| Lower Temperature Limit (TL) | Set the lower limit of the measurement value | -40.0~100.0 (0) |
| Temperature Upper Limit (TH) | Set the upper limit of the measured value | -40.0~100.0 (60) |
Humidity parameters
| Parameter name | Function description | Range (factory value) |
| Scale Zone (P) | Proportional adjustment: the smaller the P, the faster the response speed | 0~100.0 (10) |
| Integration Time (I) | The time constant of integration and I, the smaller the I, the stronger the ability to correct static differences | 0~3600 (300) |
| Differential Time (D) | The time constant of differential action, the larger the D, the stronger the ability to prevent overheating | 0~3600 (70) |
| Points Limit (AR) | Integration limit | 0~200 (100) |
| Control Cycle (T) | Control cycle | 1~180s (3) |
| Enable Temperature (KT) | Enable temperature deviations for humidity control | 0~10.0 (1) |
| Humidification (HC) | Regarding humidification deviation | 0~10.0 (1) |
| Turn on dehumidification (CH) | When the humidity measurement ≥ the humidity setpoint + CH, and the two compressor starts ≥ Ct seconds, start dehumidification | 0~10.0 (2) |
| Turn off dehumidification (CL) | Humidity measurement value ≤ humidity setpoint + CH-CL, remove moisture | 0~1800s (1) |
| Zero Correction (HB) | Actual humidity value - the current measured value of humidity | -99.9~+99.9 (0) |
| Full Degree Correction (HK) | Adjust this value when there is a deviation near the set humidity; Hk = 4000× [standard humidity meter value - current measurement value] ÷ current measurement value | -1999~+1999 (0) |
Print and store
| Parameter name | Function description | Range (factory value) |
| Storage intervals | USB drive data storage interval | 0~9999 (0) |
| Print interval | Printer interval (if print time is zero, the printer will not print data) | 0~9999 (0) |
| Units of time | Printer printing time units (0: minutes; 1: hour) | 0~1 (0) |
| Export data | USB drive data export (0: ignore; 1: Export) | 0~1 (0) |
| Printer | Printer type | 0~9999 (0) |
| Print the curve | 0: Data; 1: Curve | 0~1 (0) |
| Set the print | 0: No printed set value; 1: Print set values | 0~1 (1) |
| Paper width | Printer paper width | 0~9999 (0) |
System parameters
Press and hold the "Set" button, set the password to 12, and press the "Set" key to enter.
| Parameter name | Function description | Range (factory value) |
| Emergency Reporting (AM) | 0 - upper deviation, 1 - lower deviation, 2 - upper and lower deviation, 3 - upper absolute value, 4 - lower absolute value | 0~4 (0) |
| Temperature Unit (CF) | 0 - Celsius, 1 - Fahrenheit | 0~1 (0) |
| Gate Enable (DR) | 0-No gates, 1-Gate closed is valid, 2-Gate disconnect is effective | 0~2 (0) |
| Water Level Enabled (WT) | 0 - No water level, 1 - Effective when water level is closed, 2 - Effective when water level is disconnected | 0~2 (0) |
| Decimal point (DP) | 0 - no decimal point, 1 - has a decimal point | 0~1 (1) |
| Cooling Temperature (CB) | When the set temperature is < CB, the compressor remains on; otherwise, the compressor switches | -20.0~60.0 (0) |
| Dehumidification Temperature (JS) | When setting humidity to < JS, keep the compressor running; otherwise, switch the compressor | 0.0~99.9 (0) |
| Temperature Filtering (ERT) | Temperature displays filter level | 0~9 (1) |
| Moisture Filtering (ERH) | Humidity displays filter level | 0~9 (4) |
| Auxiliary Relay Output Function Selection (OF) | 0: Auxiliary output when setting temperature ≥ OT; 1: Auxiliary output when setting temperature ≤ OT; 2: Auxiliary output when setting humidity ≥ OH; 3: Auxiliary output when setting humidity ≤ OH; 4: Auxiliary output automatically replenishes water, providing output when water is low | 0~4 (0) |
| Auxiliary Temperature (OT) | Auxiliary output temperature | -40.0~99.9 (60) |
| Auxiliary Humidity (OH) | Auxiliary output humidity | 0.0~99.9 (99.9) |
System Parameters: Long press the "Set" button, set password to 36, press the "Set" key to enter.
| Parameter name | Function description | Range (factory value) |
| Dual Compressor Mode (CM) | After continuous compressor operation for CM hours, defrosting output occurs. CM=0 means single compressor operation; CM=1 is fixed to ensure compressor 1 is operating; CM=2 is fixed to ensure compressor 2 is operating; Other values automatically switch to another after one compressor operates for CM hours | 0~9999h (0) |
| Defrosting interval 1 (PT1) | Time between two defrosting sessions (set temperature< 10°C) | 0~9999h (0) |
| Defrosting time 1 (T1) | Defrosting Hold Time (Set Temperature < 10°C) | 0~9999s (0) |
| Defrosting interval 2 (PT2) | Time between two defrosting sessions (10°C≤ set temperature≤25°C) | 0~9999h (0) |
| Defrosting Time 2 (T2) | Defrosting Holding Time (10°C≤ Set Temperature ≤25°C) | 0~9999s (0) |
| Defrosting interval 3 (PT3) | Time between two defrosting sessions (set temperature> 25°C) | 0~9999h (0) |
| Defrosting Time 3 (T3) | Defrosting Retention Time (Set Temperature> 25°C) | 0~9999s (0) |
| Parameter name | Function description | Scope | Factory value |
| Language choice | 0 - Chinese, 1 - English | 0~1 | 0 |
| Humidity activated | 0 - No humidity, 1 - Humidity | 0~1 | 0 |
| Light on | 0 - no light, 1 - illuminated | 0~1 | 0 |
Time setting
On the menu menu, select time settings to enter the time settings interface.
(a) Long press the "Query/Shift" button to change Beijing Time, then press "Set" to save.
(b) Press the up and down arrow keys to select a scheduled entry, move it to the designated position, then click "Set" to start editing, then click the "Search/Move" key to edit. After editing, press "Set" to exit editing mode. Long press "Settings" to return to the menu. If the appointment time is valid on year-month-day (months 1-12, dates 1-31), the week option is disabled. When the month/date is set to 0, the week of day takes effect automatically.
Example:
20-06-15 08:30 4 Startup Indicates the device will start at 8:30 on June 15, 2020
20-00-00 19:30 Off means the shutdown is every Friday at 19:30
6. Fault Handling
| Malfunction | The reason | Processing |
| The unit is not operating | Power outages; Fuse blows; Poor contact at the power socket | Use only after electricity is available; Replace the fuse; Reinstall or replug it in |
| Poor or no cooling effect | Refrigerant leaks; Capillary blockage; The axial fan does not rotate | Request professional personnel for maintenance; Request professional personnel for maintenance; Testing or replacement |
| Poor temperature performance | Cultivating items is too dense; Ambient temperature is too high or too low; Frequent door openings; Axial fan not running; The temperature control setting is not as required | Leave a certain gap; Ambient temperature: 0-30°C; Reduce the number of door openings; Replace the fan; Reset the debugging parameters |
| No heating | Damage to heating tubes or relays; Thyristor damage | replace; Replace |
| Operation is disordered or not running according to set parameters | It could be a damage to the memory chip | Professionals are replaced |
| The buttons are not working | Button damage; The socket is loose | Panel replacement; Open the lid and insert it tightly |
| During normal operation, no relay suction or discharge sound can be heard | Optocoupler damage; Relay damaged | Professional personnel replacement; Professionals are replaced |
| The humidification indicator light is on but not humidifying | Humidifier water cut; The humidifier is damaged | Add water; Replace |
| People touching the casing can experience electric shock | No grounding wire or poor grounding | Do not use it; reinstall the grounding wire |
7. Wiring diagram

Note: Lighting Level 1: Lighting 1 operates; Light Level 2: Light 2 operates; Light Level 3: Light 1 and 2 operate simultaneously.
Compressor 2 outputs 220V and currents 5A, requiring an external contactor or solid-state relay.
8. Packing list
| Serial number | Category | Name | Unit | Quantity | Note |
| 1 | Documents | User manual | portion | 1 | |
| 2 | Documents | Certificate of Conformity | portion | 1 | |
| 3 | Documents | Product warranty card | portion | 1 | |
| 4 | Spare parts | Melt core | Only | 2 | |
| 5 | Spare parts | Shelf | Block | 3 | |
| 6 | Spare parts | Humidifier | Platform | 1 | External humidification is used for use |
| 7 | Spare parts | Humidifier tube | Root | 1 | External humidification is used for use |
The items listed on this order match the actual items inside the box
Packer 2
- 1SANFA SHP-100/160/250/300/400/500 biochemistry cultivating box instruction manual
- 2SANFA SHP-E series biochemistry cultivating box instruction manual
- 3SANFA SYQX-II anaerobic incubator instruction manual
- 4NOBOTECH NPT-PH101/PH106 Waterproof Pen pH/ORP Meter Instruction Manual
- 5NOBOTECH NPT-CD501/CD506 Waterproof Pen Type Conductivity detector /TDS Instruction Manual
- 6NOBOTECH NPT-DO601 Pen Dissolved Oxygen Detector Instruction Manual
- 7NOBOTECH NPT-CLOZ801 Pen type residual chlorine/ozone detector instruction manual
- 8NOBOTECH PH-1186 Industrial Online PH/ORP Meter Instruction Manual
- 9NOBOTECH DOZ-7600 Online Water Ozone Detector Instruction Manual
- 10NOBOTECH CD-5000 Industrial Online Conductivity /TDS Instruction Manual